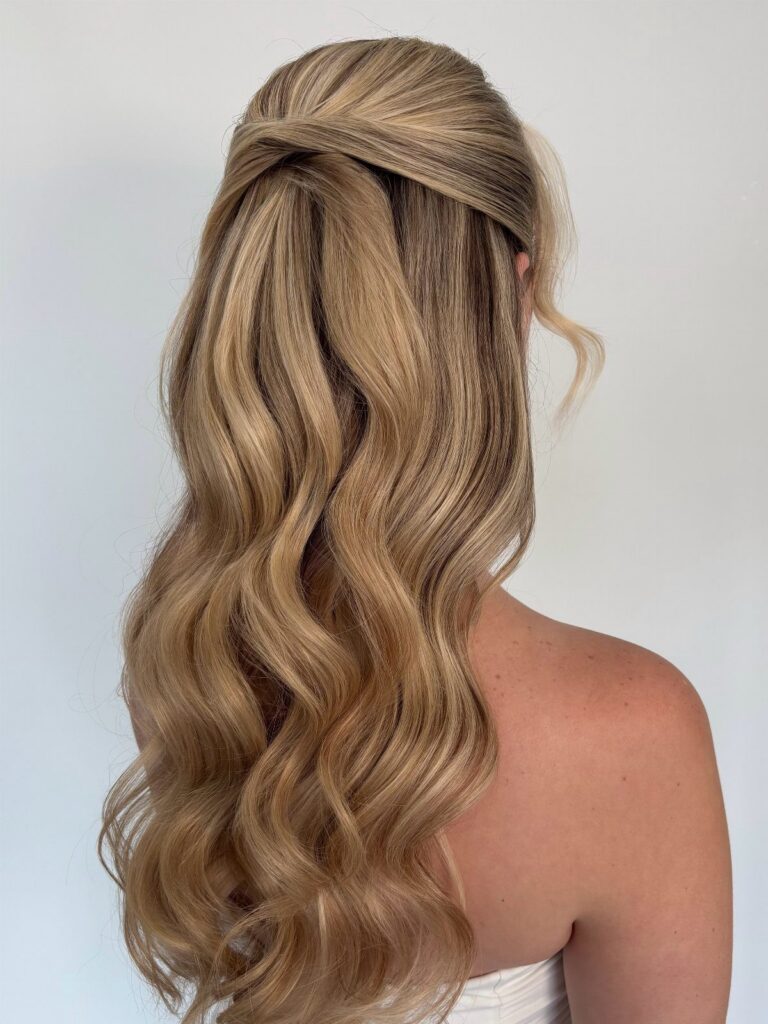
The amount of hair you pull up decides most of what follows: a small clipped section, a full crown bun or a bouffant each change how the lower hair has to be styled.
These ideas run from a 5-minute-style twist with a single pin to a sleek Hollywood wave that needs at least 1.5 hours, so your length and texture, and how much time you have, point to the right one.
Short bobs, natural curls and very long waves each get a version built for them.
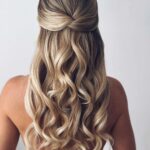
1. Soft Tousled Half Up
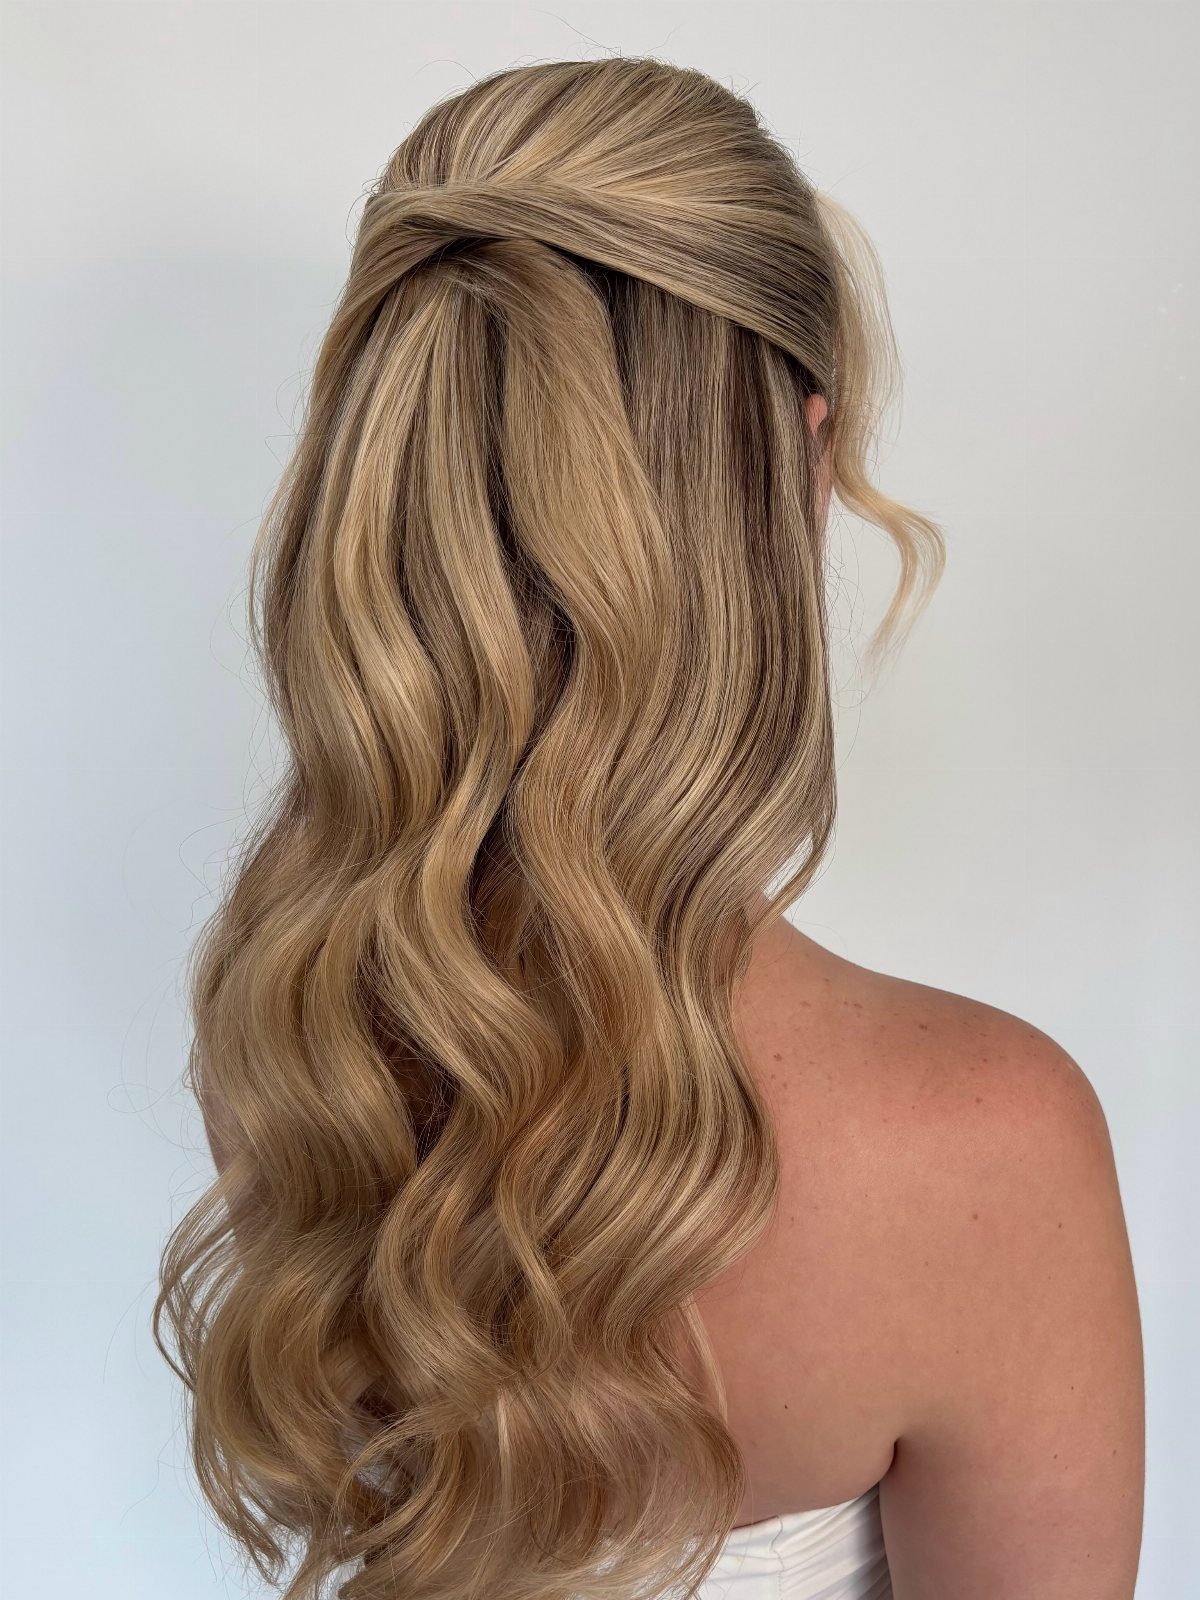
Soft waves with a top section left a little rough make up this look, and it only works if you resist smoothing. Gather the upper hair loosely, pin it without pulling tight, and let a few strands slip free.
I like it most on long, wavy hair, where the half-up section blends into the waves instead of sitting on top of them as a separate piece.
Skip it if you want a polished finish; this one is meant to look easy.
2. Wavy Undone Half-Up
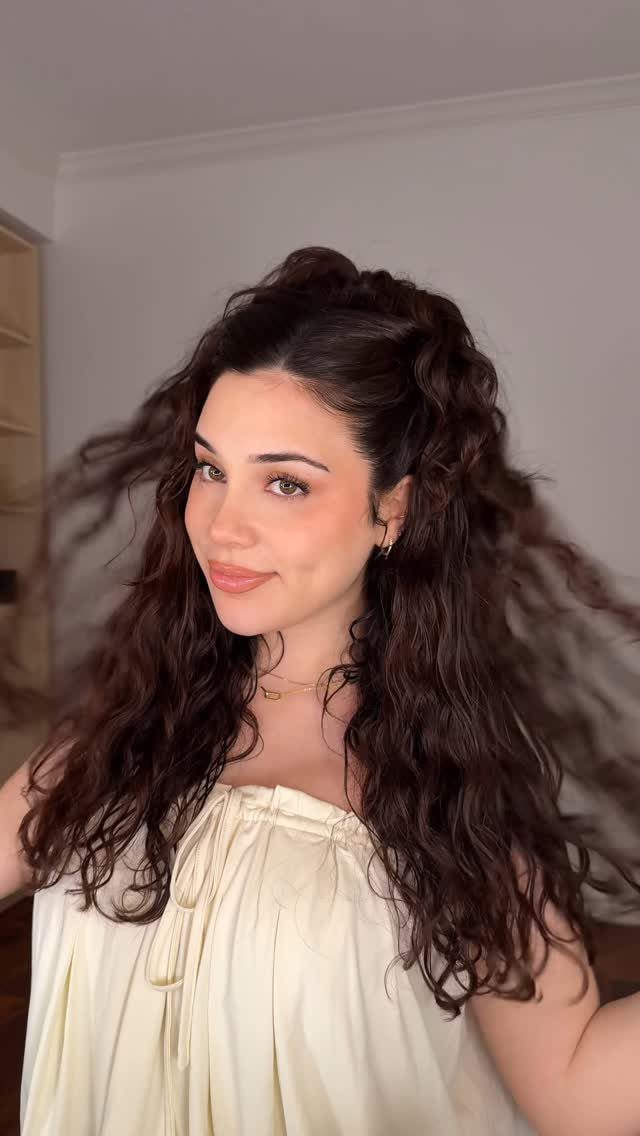
Hair off the face, but not tidy about it: that is what this one does best. Keep the lifted section loose and full at the crown, with the waves roughed up instead of combed into place.
The slightly messy, edgy finish suits anyone who wants a half-up that doesn’t read as sweet or formal. I would choose it for long, dark waves with some natural volume, since the shape depends on hair that already has body.
3. Braided Half-Updo
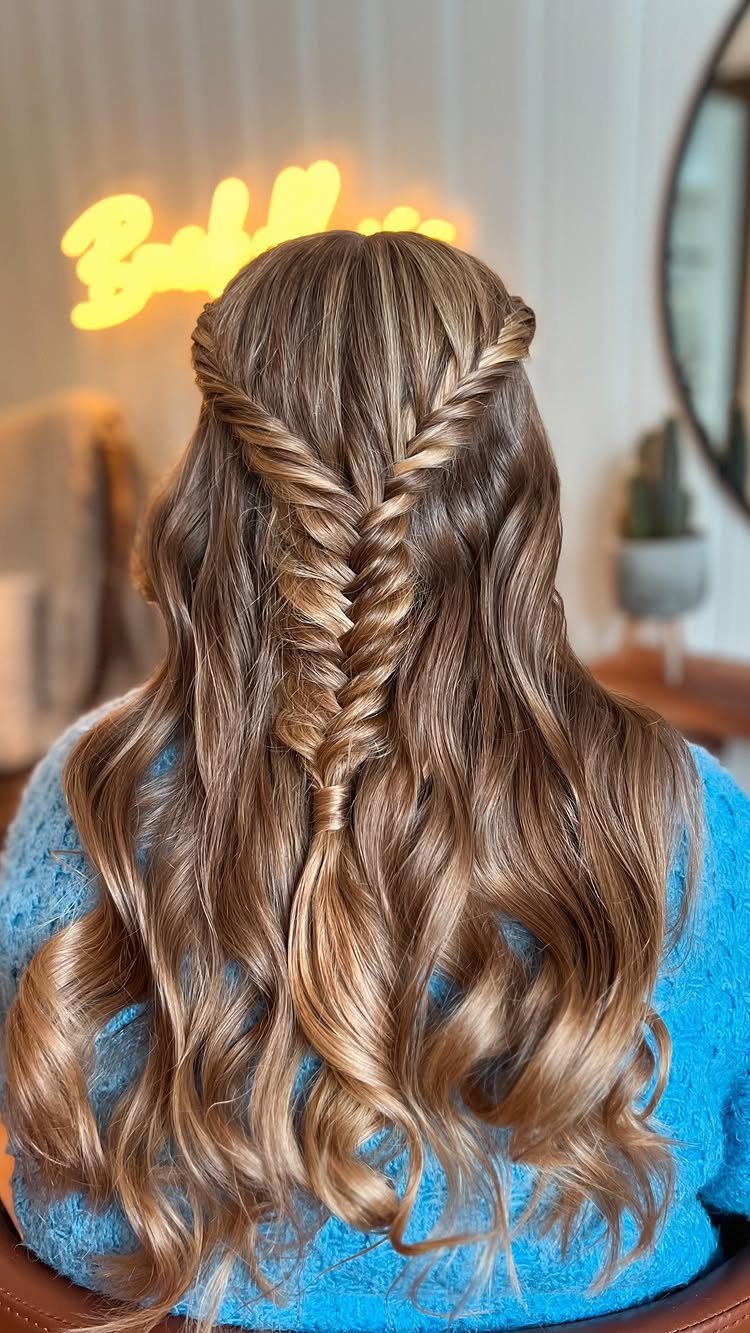
Braids laid over curls give a half-updo more detail than a plain gathered top section. The twisted pieces gather at the back, while the curls below stay loose and add texture.
Expect it to take longer than a simple half-up, since the braiding needs a steady hand and some patience. I would pick it for an evening out or a salon-style finish, and I would skip it on a rushed morning.
4. Fishtail Braid
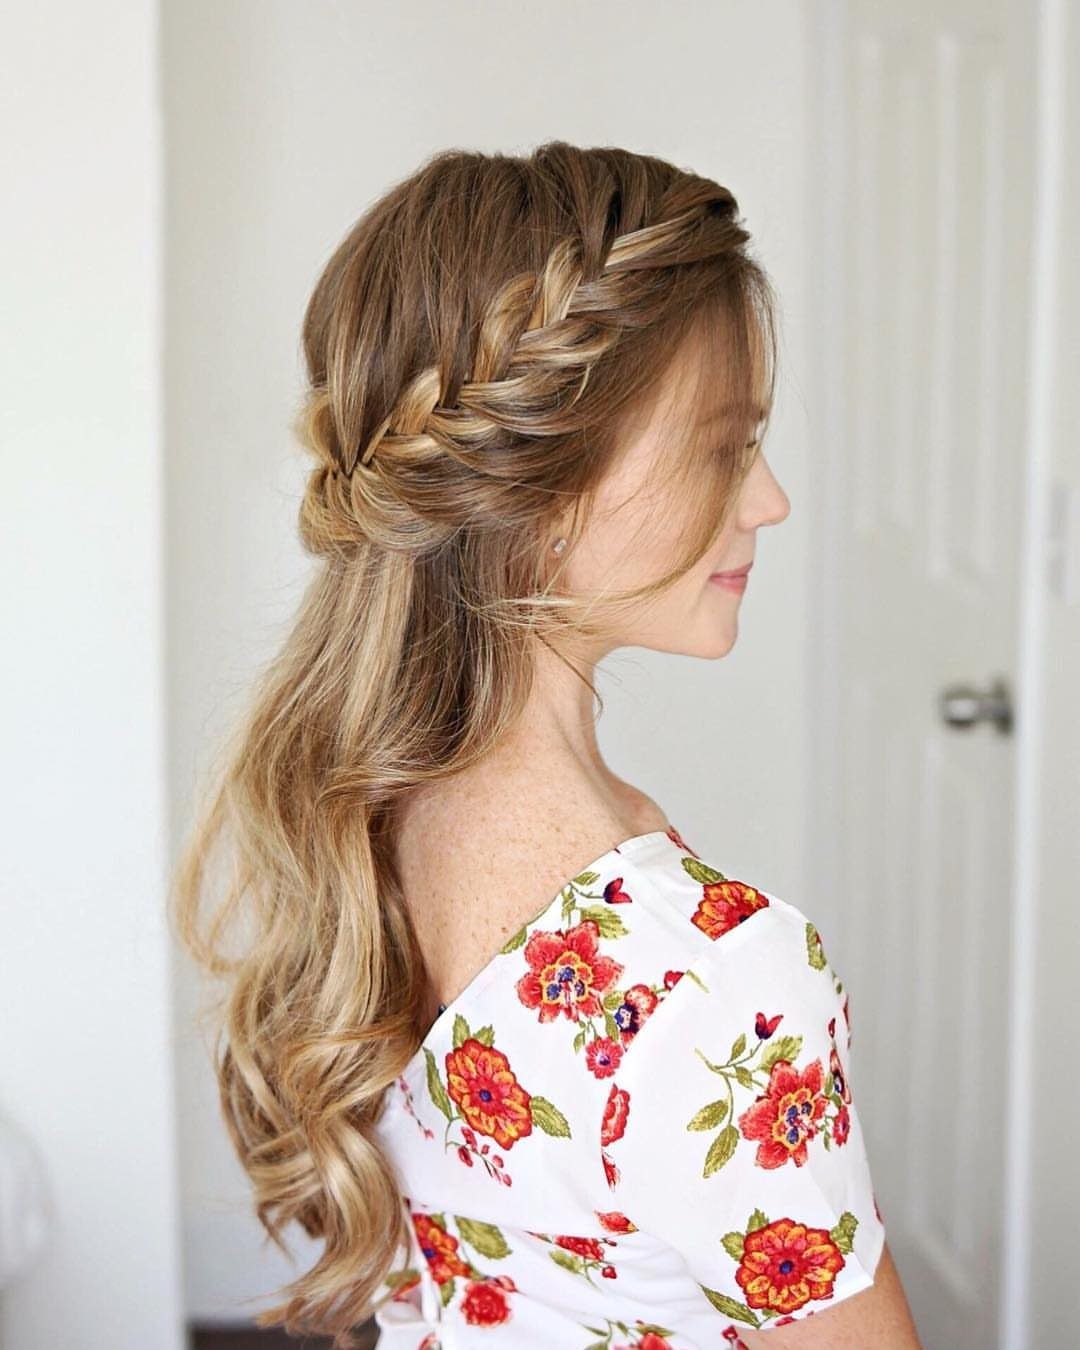
A single loose fishtail is a softer answer to the tight, sprayed-down half-up that wedding hair often calls for. Keep the weave relaxed and leave the long curls hanging below it.
I prefer it with a loose, slightly open braid, because a tight one fights with the curls and loses the easy feel. It suits formal events where you still want the hair to look like yours.
5. Half-Up Bun
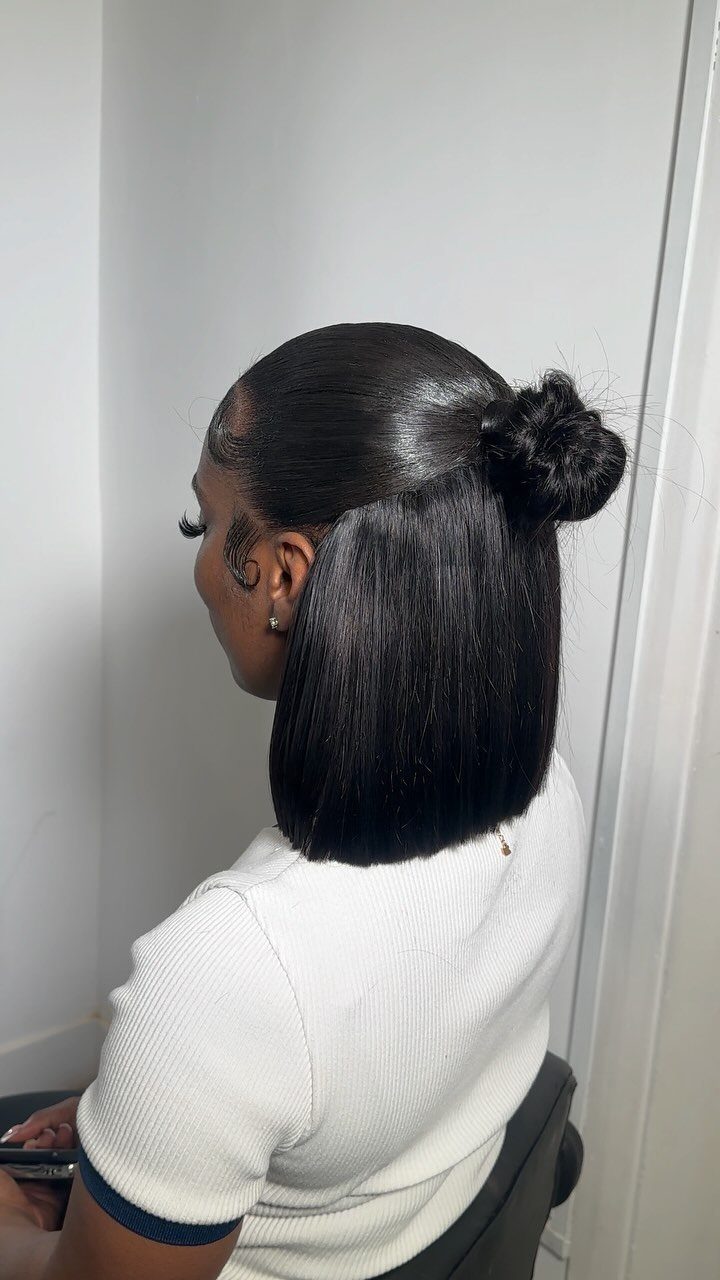
Twisting the ends of the pulled-up sections into a small bun at the back is all this style takes. Gather the upper hair, twist the lengths around themselves, and pin the bun in place.
It works especially well on straight, shoulder-length hair, where the ends are long enough to twist but the bun stays compact. The lower hair falls sleek and straight, so the bun is the only detail.
6. Natural Curl Half Up
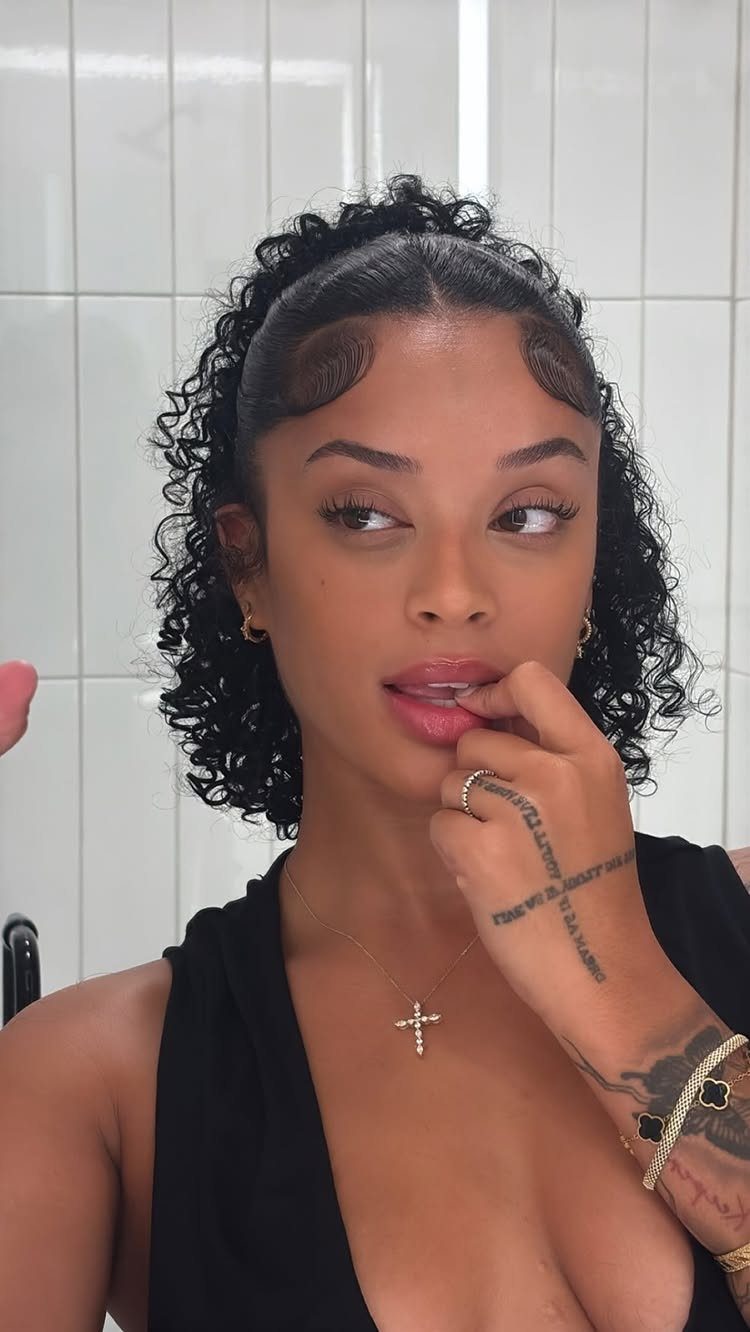
Natural curls need no reshaping here. Lift the top section away from the face, secure it, and leave the rest of the curls loose so their full texture shows.
This is my pick for curly hair when you want it off your face without flattening the pattern.
Because the curls stay loose, the look relies on your own texture, so the half-up section should be gathered gently and not pulled tight.
7. Wrapped Bouffant Ponytail
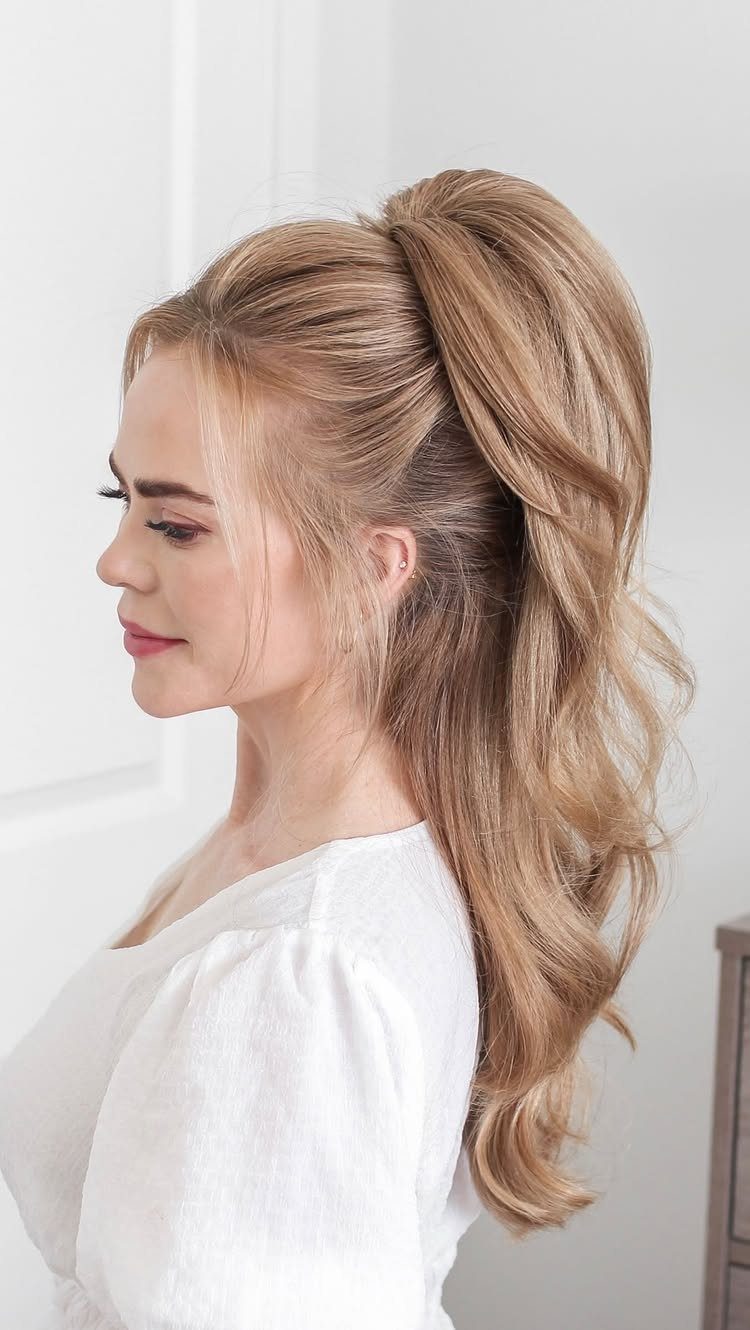
Teasing the crown before you pin or tie it is what gives this ponytail its lift.
Wrap a thin section of hair around the elastic so the tie disappears; the wrapped piece is also a cleaner finish than a visible band.
I would pick it for hair that falls flat by midday, since the volume sits right where you need it. Smooth the top layer over the teased part so the surface looks polished.
8. Self-Made Half-Up Bow
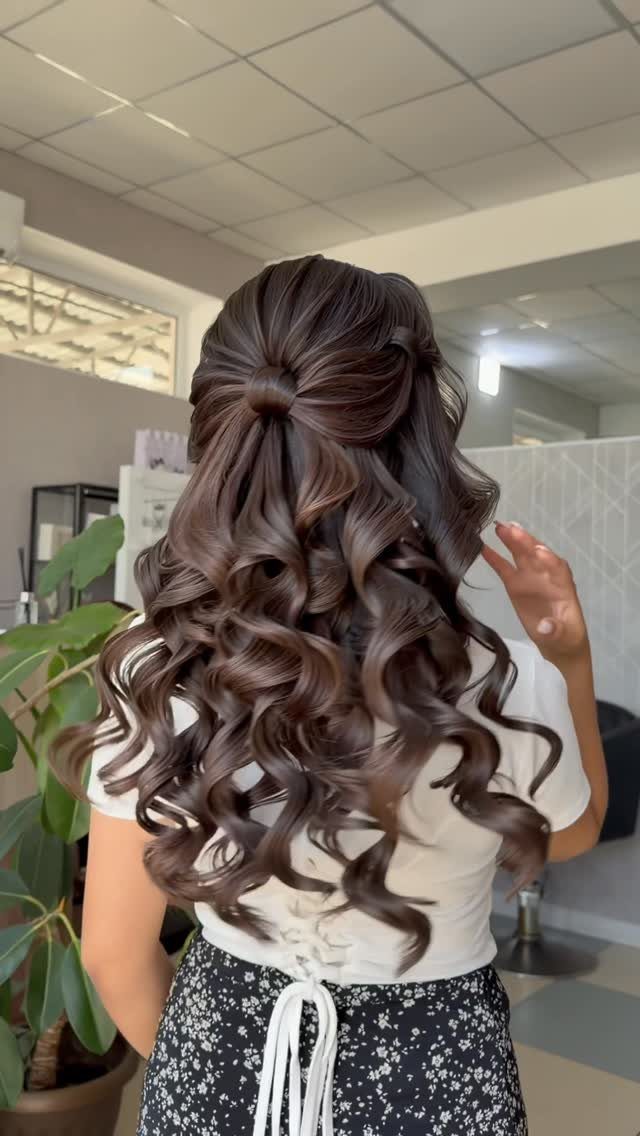
A bow made from your own hair has no accessory to buy and no fixed shape, so you can size it however you like.
Loop the gathered top section, split the loop in two, and secure the center so the curls below stay loose.
Curly hair suits it well, because the texture gives the loops some grip. I like a smaller bow worn high on the head; a large one tends to look costume-like.
9. High Pony Half Up
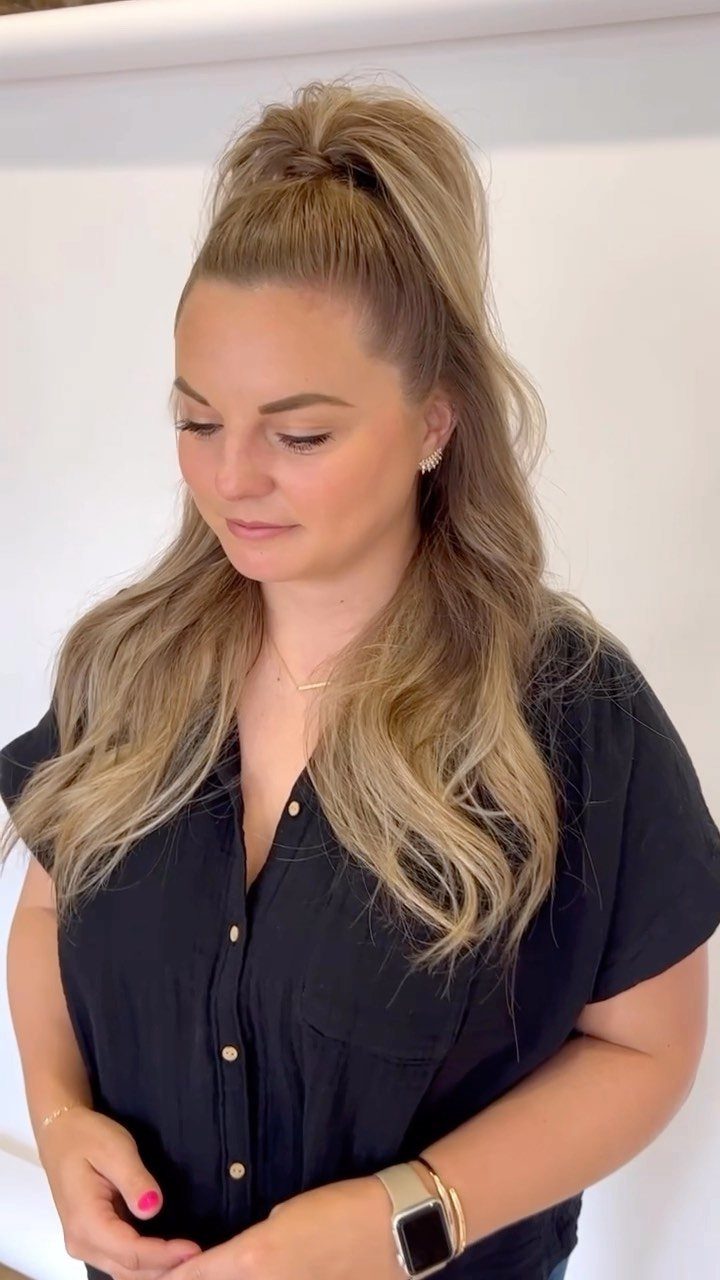
Flipping the ponytail upward at the back adds bounce that a plain half-up ponytail lacks. Set the tie high, then let the length spring up and out so the waves below stay long and loose.
This works best on hair with some body already, and I would curl the lengths first if yours sits flat. It’s a quick look to wear with a button-down or any crisp neckline.
10. Loose Half-Up, Half-Down
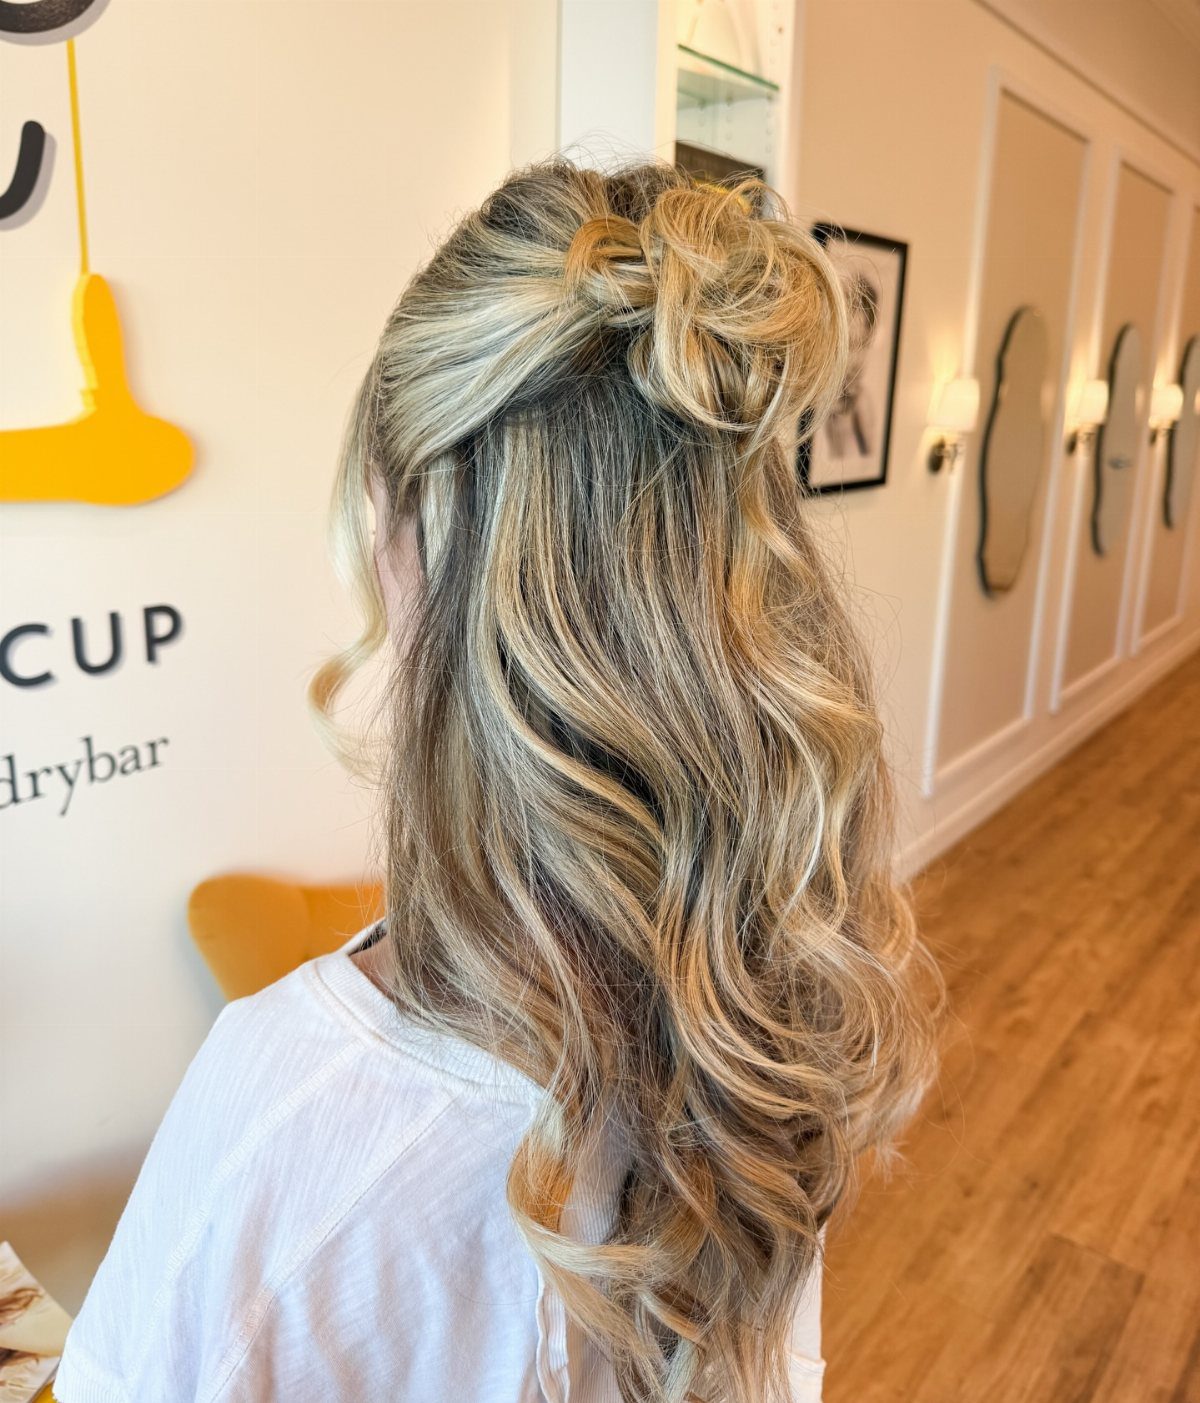
Keep this one loose: gather the top layers at the back and hold them with a light grip, so the waves slide around the clip or elastic instead of being locked into it. Pull out a few pieces on purpose.
I prefer a clip or soft elastic over bobby pins for this, since pins can make the hold look too tidy.
If you want the finish to last through a long day, expect some slipping, which is part of the look.
11. Face-Framing Half-Up
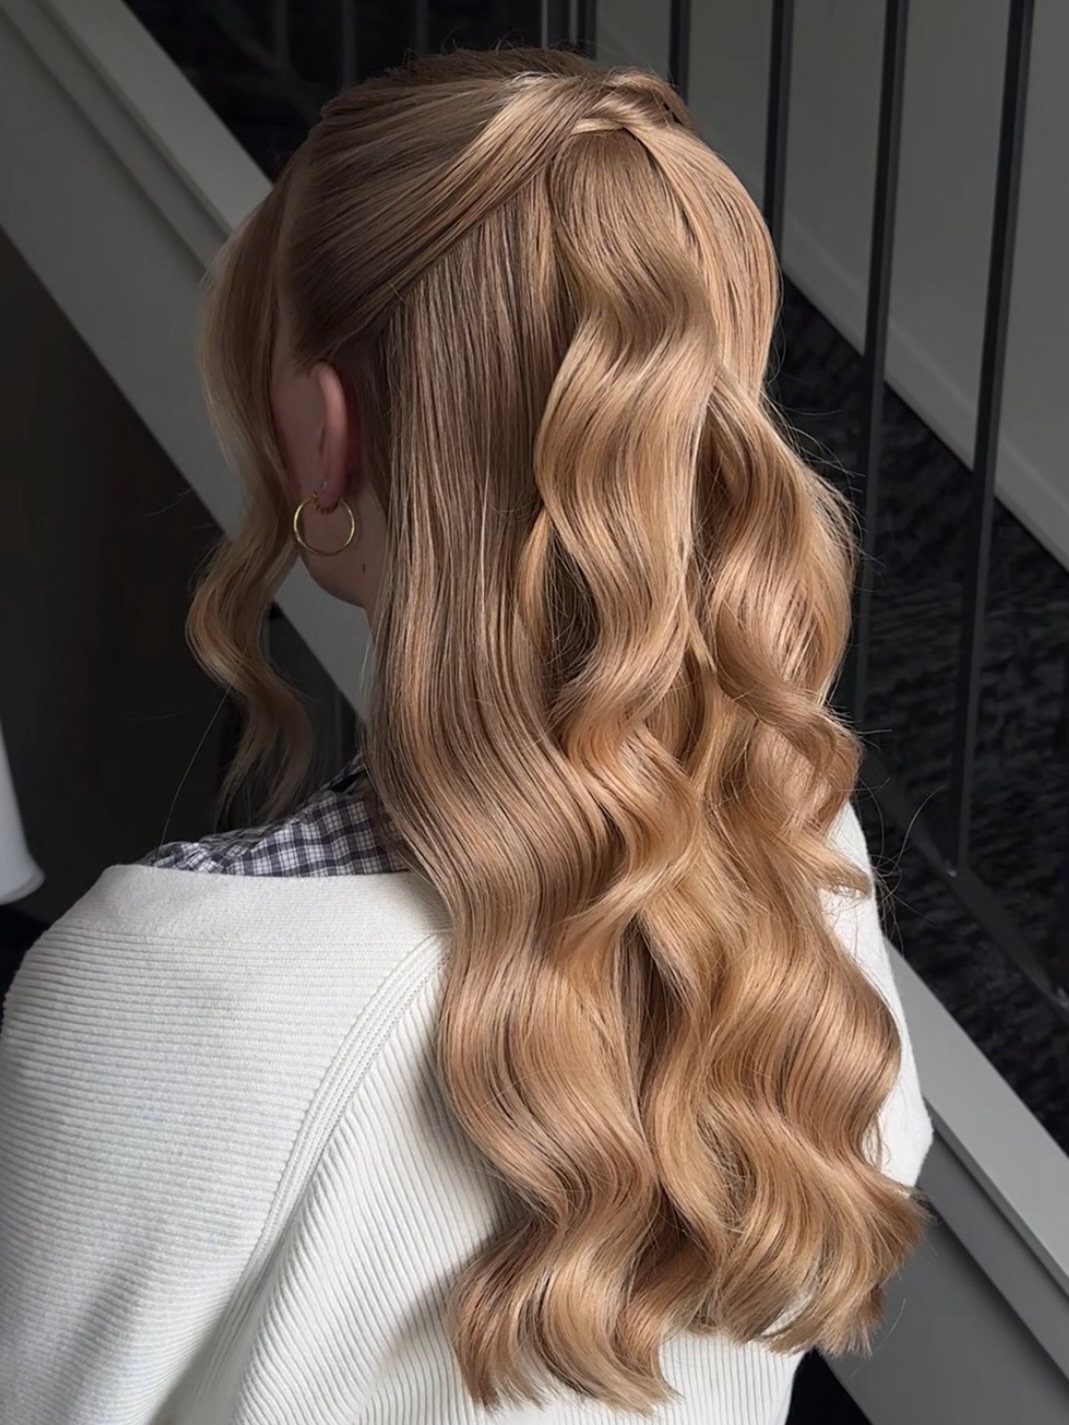
Two or three strands left out at the front do more for a half-up than any pin or clip. Pull them loose after the top section is secured, and curl or wave them to match the length of hair below.
I like this on long, wavy hair, where the front pieces blend with the rest. Keep them thin; a thick chunk reads as a mistake instead of a choice.
12. Half-Up Top Knot
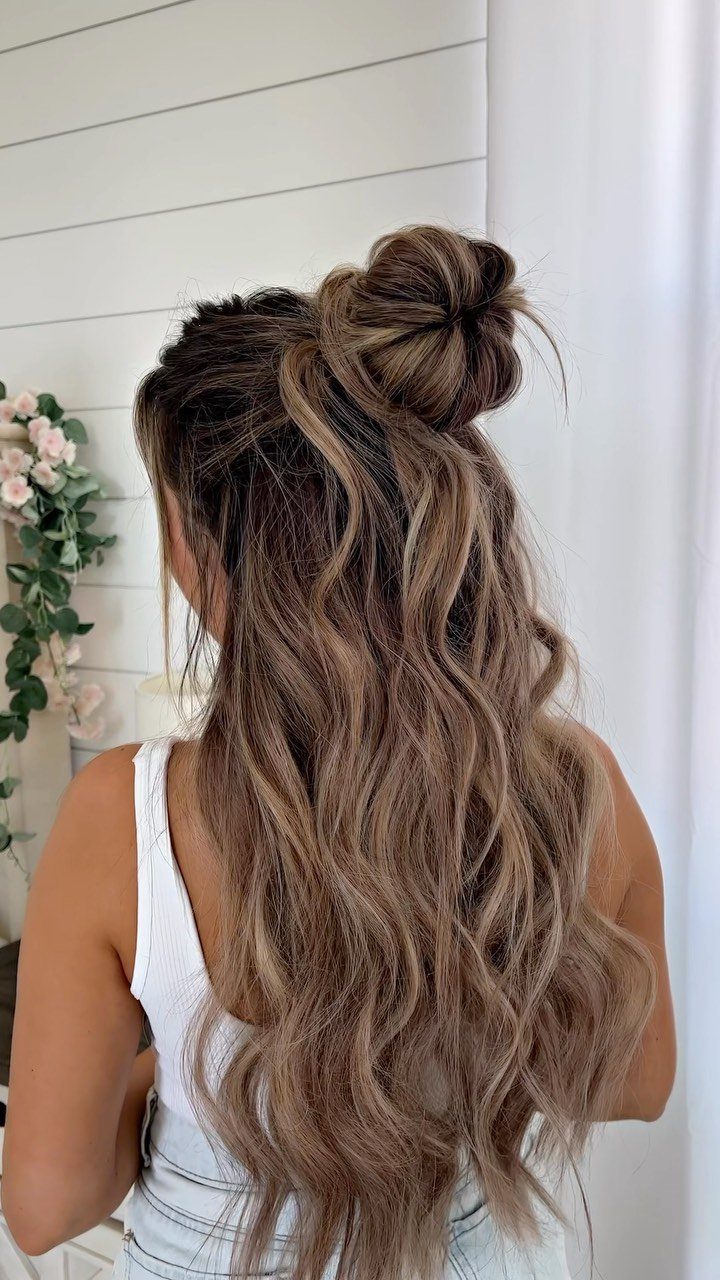
A small knot at the crown is the fastest way to get hair off your face without losing length. Twist the top section, wind it into a knot, and pin it flat to the head.
I would keep the knot compact for this half-up version; a big one pulls the look toward a full updo. Leave the lengths down and slightly wavy, which gives it a casual feel for errands or work.
13. Bouffant with Face-Framing Ringlets
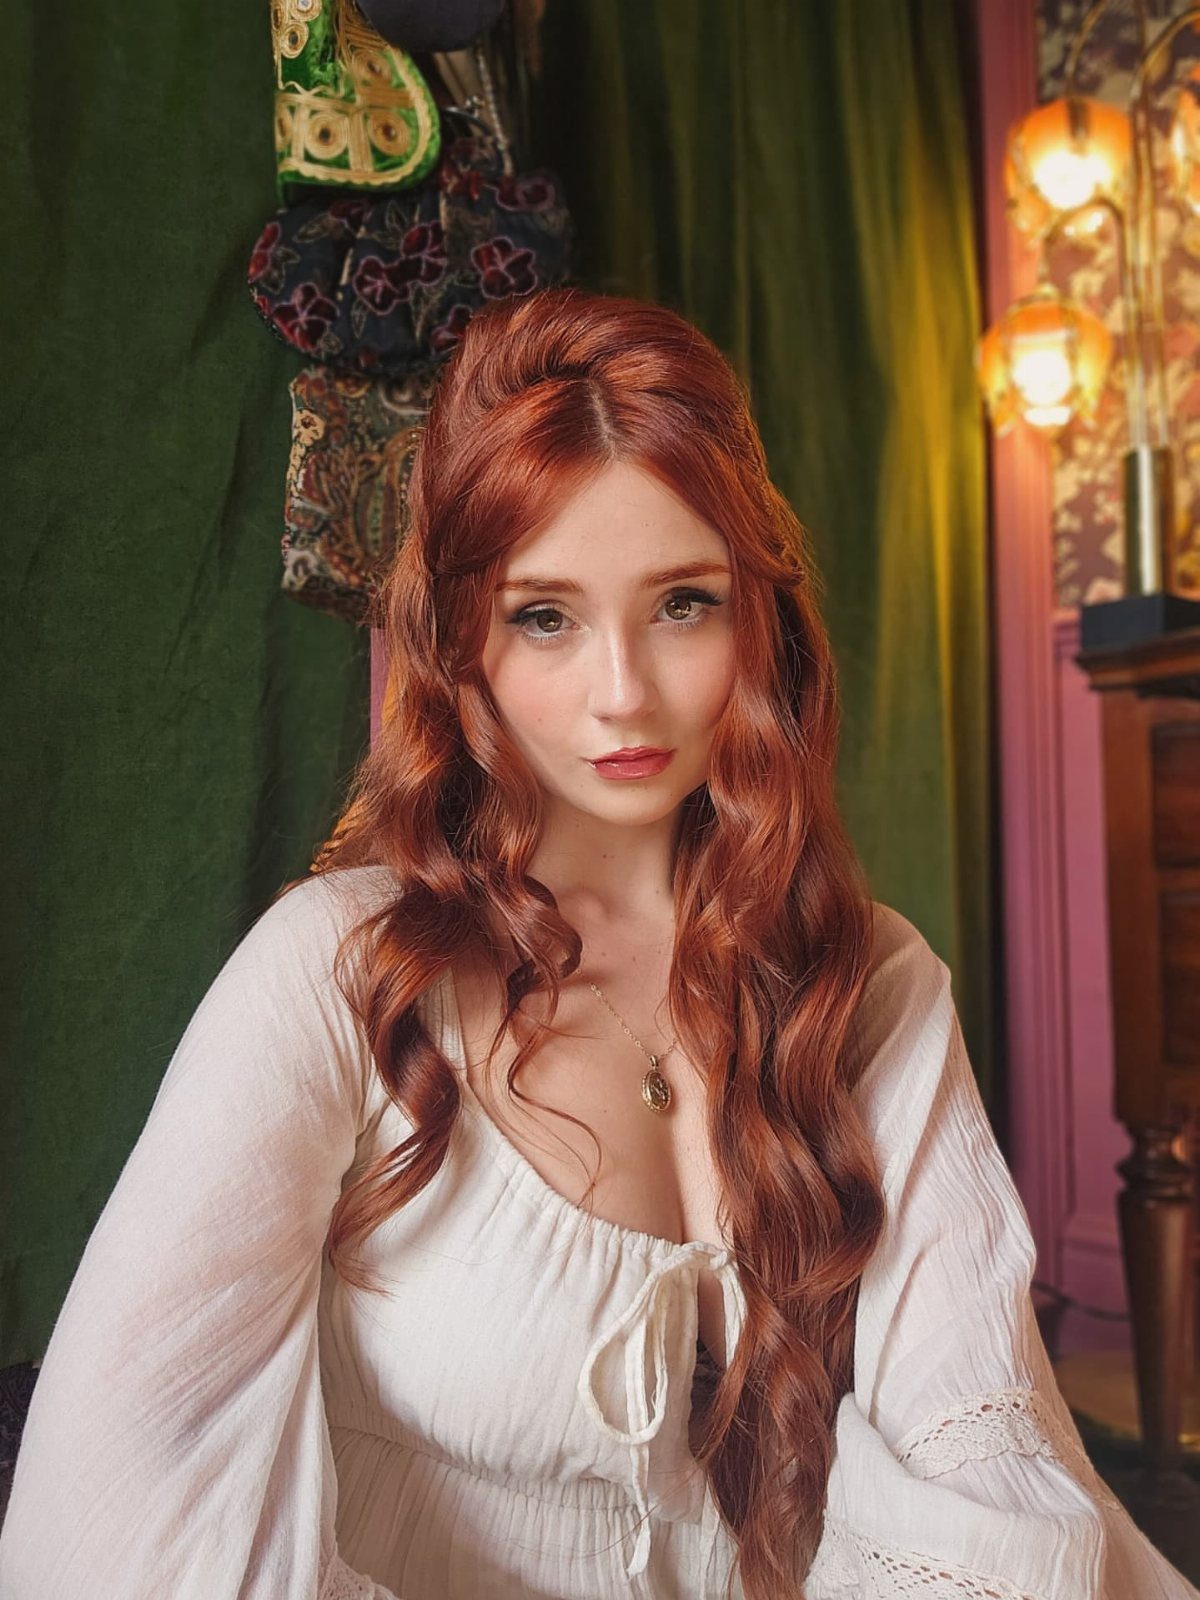
Smooth, defined curls hanging at the front and a lifted bouffant at the crown make this a half-up built around the face. The volume sits up top while the long curls run down past the shoulders.
I would curl the lengths first and brush them out only slightly, so the ringlets stay glossy instead of fluffy. Keep the lift modest; a bouffant this high can swallow a smaller face.
14. Braided Rose at the Back
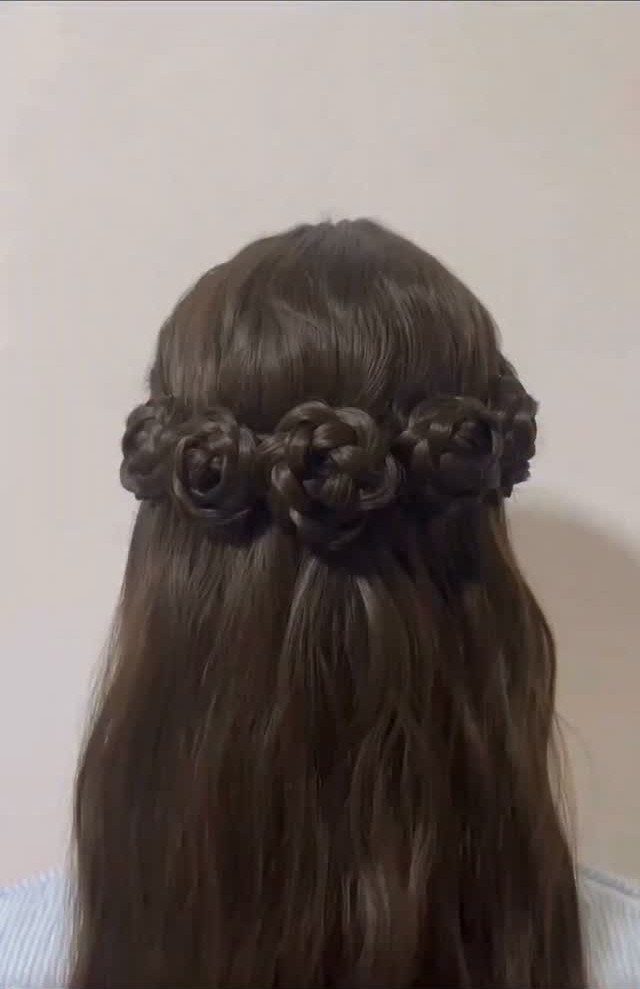
Braided roses turn the back of the head into the focal point, which is a nice change from styles that put all the detail up front.
Each rose is a braid coiled into a flat spiral and pinned against the head, and the long hair around them stays down.
3 roses arranged across the back is my favorite count, since it reads as a pattern instead of a single patch. Plan on extra time and a good supply of pins.
15. Mohawk with Beaded Accessory
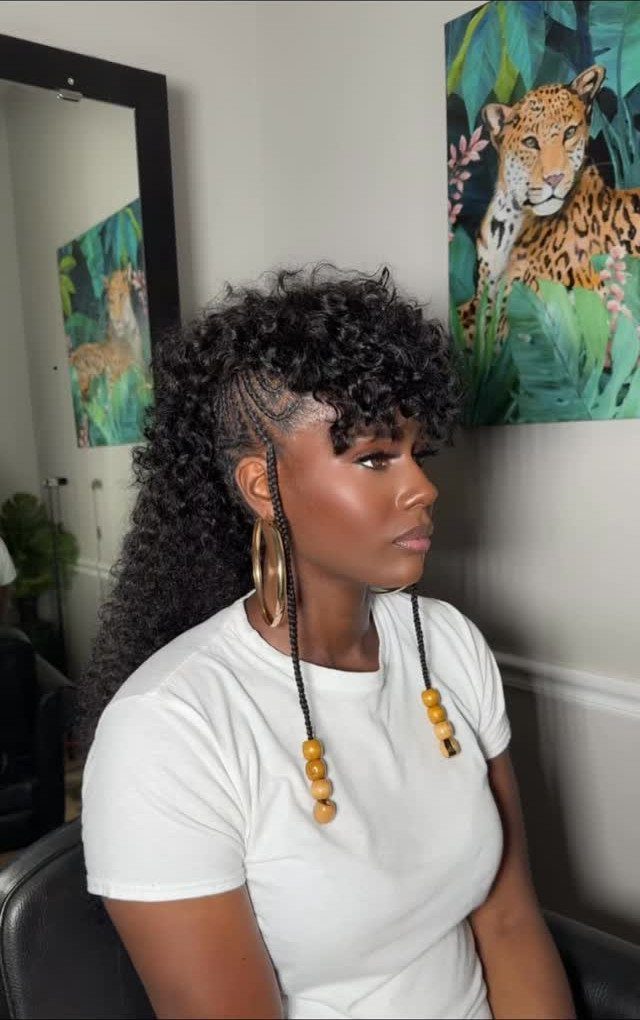
Hair worn as a curly mohawk gets its edge from the beaded braids that run as long as the curls.
Pick beads with a hole wide enough to slide onto a braid, and finish each braid with a secure tie so nothing slips off.
I would keep the rest of the outfit plain, like a white tee and gold hoops, and let the beads do the talking. Any heavy accessory is best added last, after the curls are shaped.
16. Teased Half-Up, Half-Down
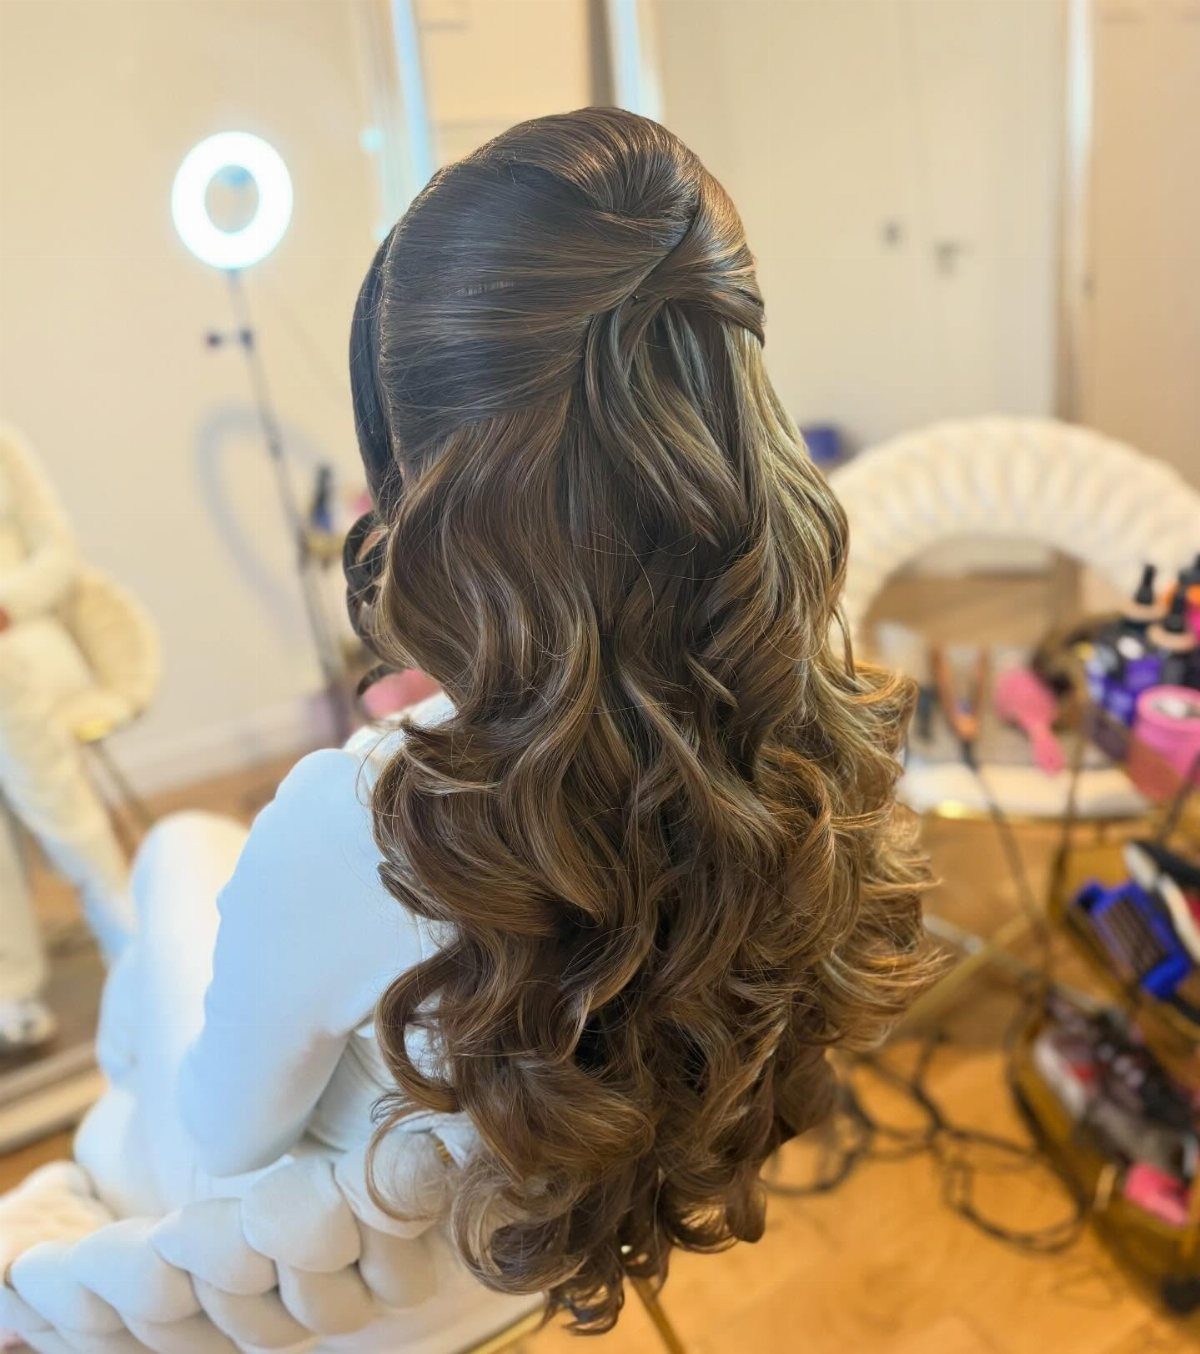
Teasing at the crown, then smoothing the top layer over it, gives a half-up its height without a visible bump. Pin the teased section back and leave the long curls to fall loose over your shoulders.
A soft-bristle brush helps keep the surface neat. I would curl the lengths before you tease, since curls hold the volume in place better than flat hair does.
17. Hollywood Wave Half Up
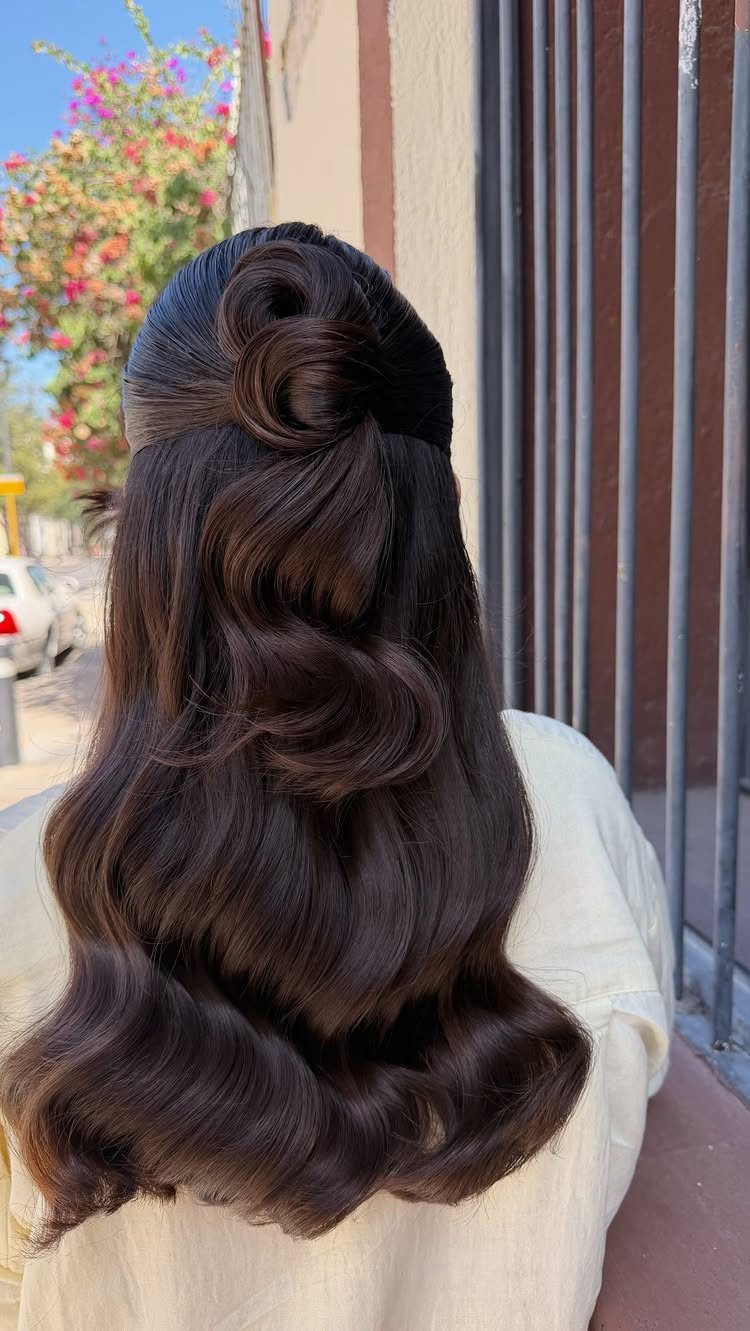
Sleek, even waves are what separate this from a casual half-up: every curl is the same size and brushed into one smooth S-shape.
The upper section is twisted into a small bun at the back, so the waves carry the whole finish.
I prefer it on long, dark hair, where the shine shows. Brush each wave out as you go, and expect it to take more time than a quick twist and pin.
18. Space Buns
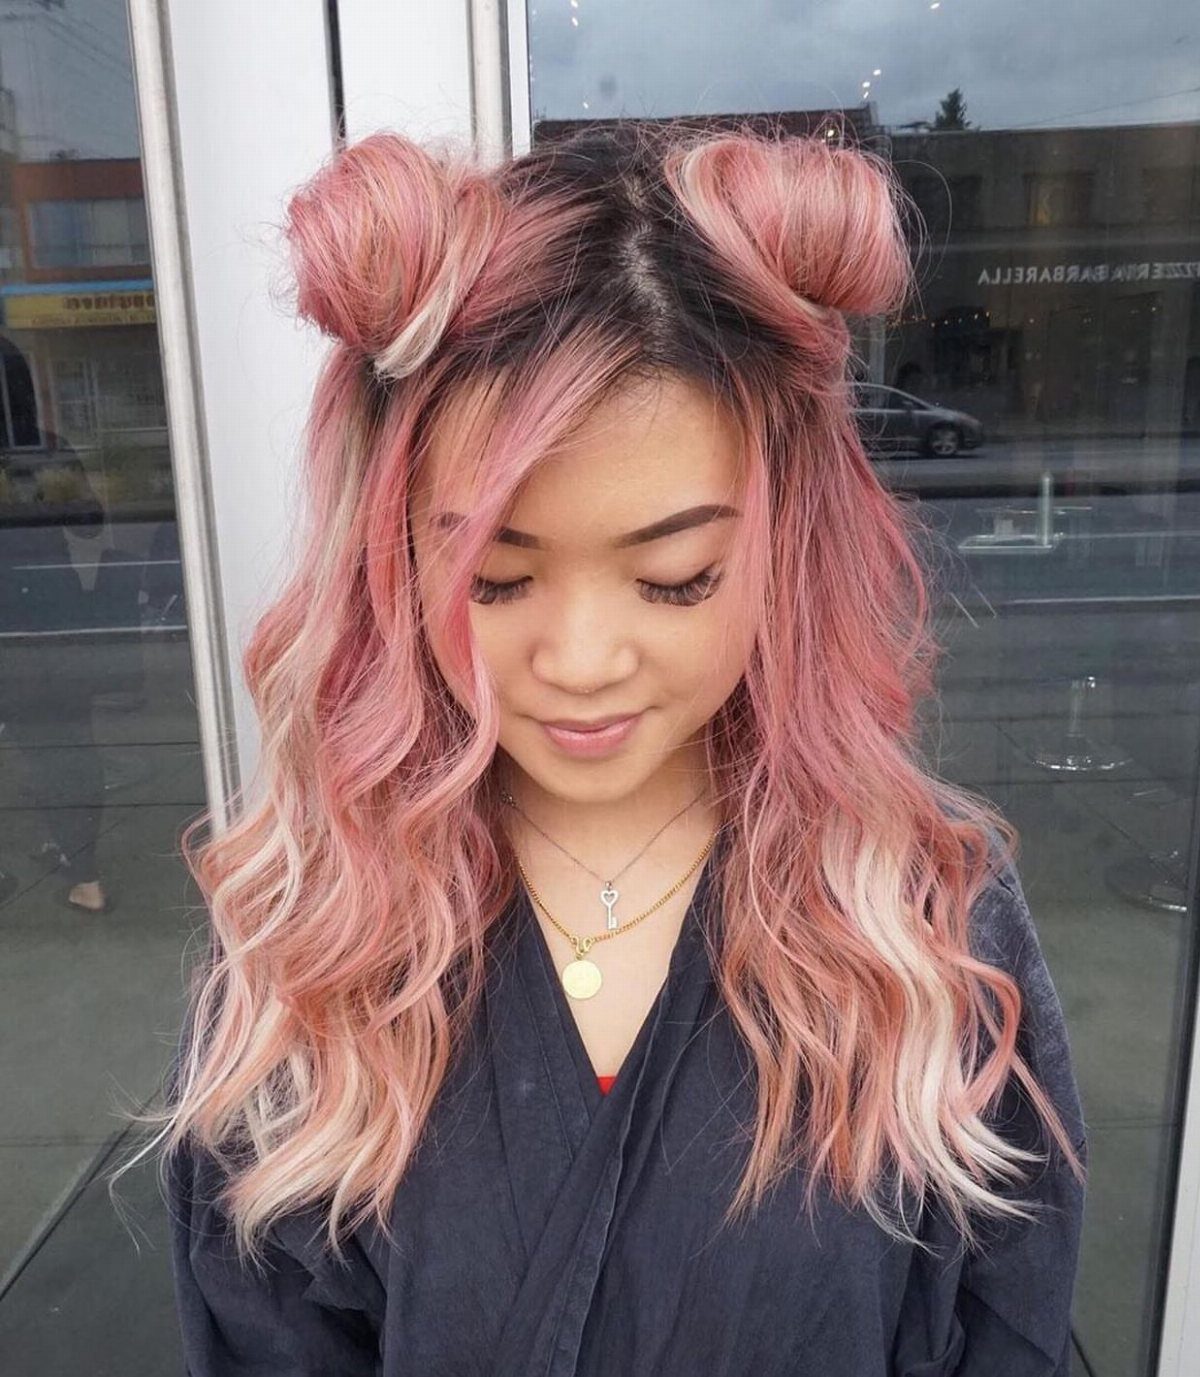
Two buns, one on each side of a center part, give a half-up its playful shape.
Part the hair down the middle, gather each upper section above the temple, and twist it into a small bun while the lengths stay down.
Keep the buns small and place them evenly; a lopsided pair is the quickest way to spoil it. I like them with loose waves below, and they look especially good on colored hair.
19. Short Half-Up
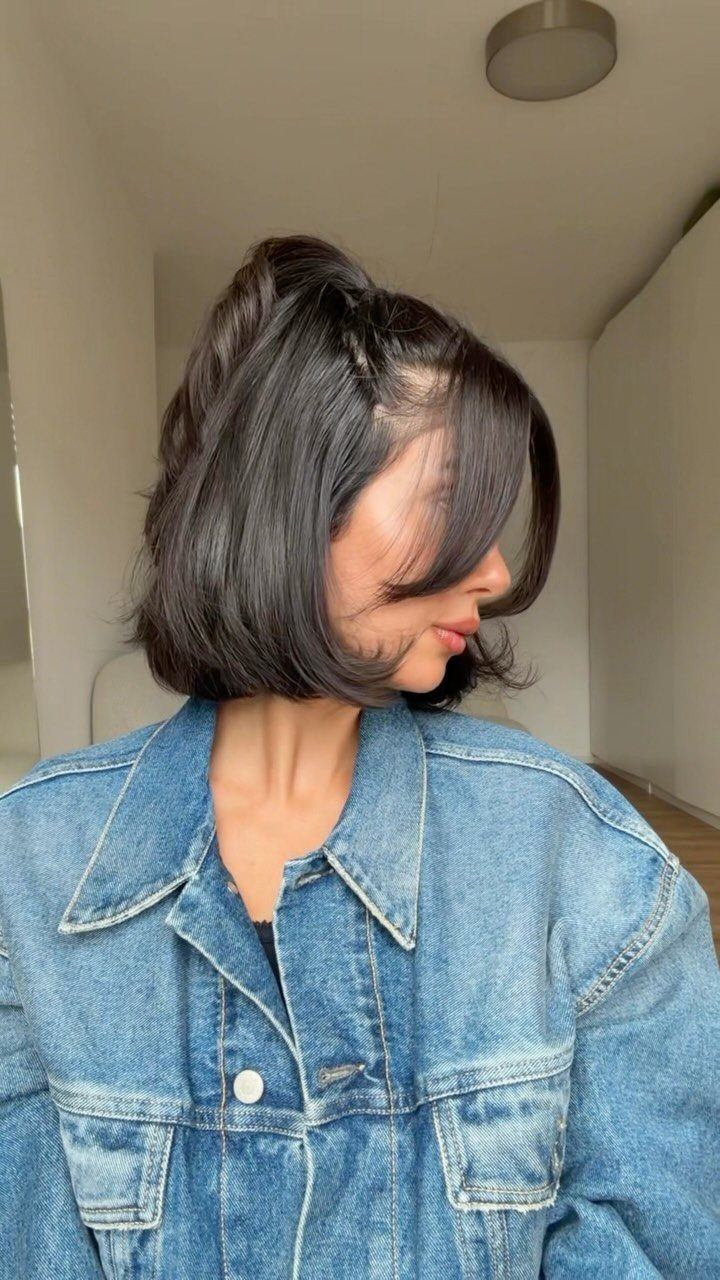
A short bob can wear a half-up and still keep most of its length down, which leaves the cut looking full instead of pulled back. Take only the top section and secure it at the crown.
I would keep the lower hair loose and let it frame the jaw. With this little length, a smaller top section looks more balanced.
20. Super Long Half-Up
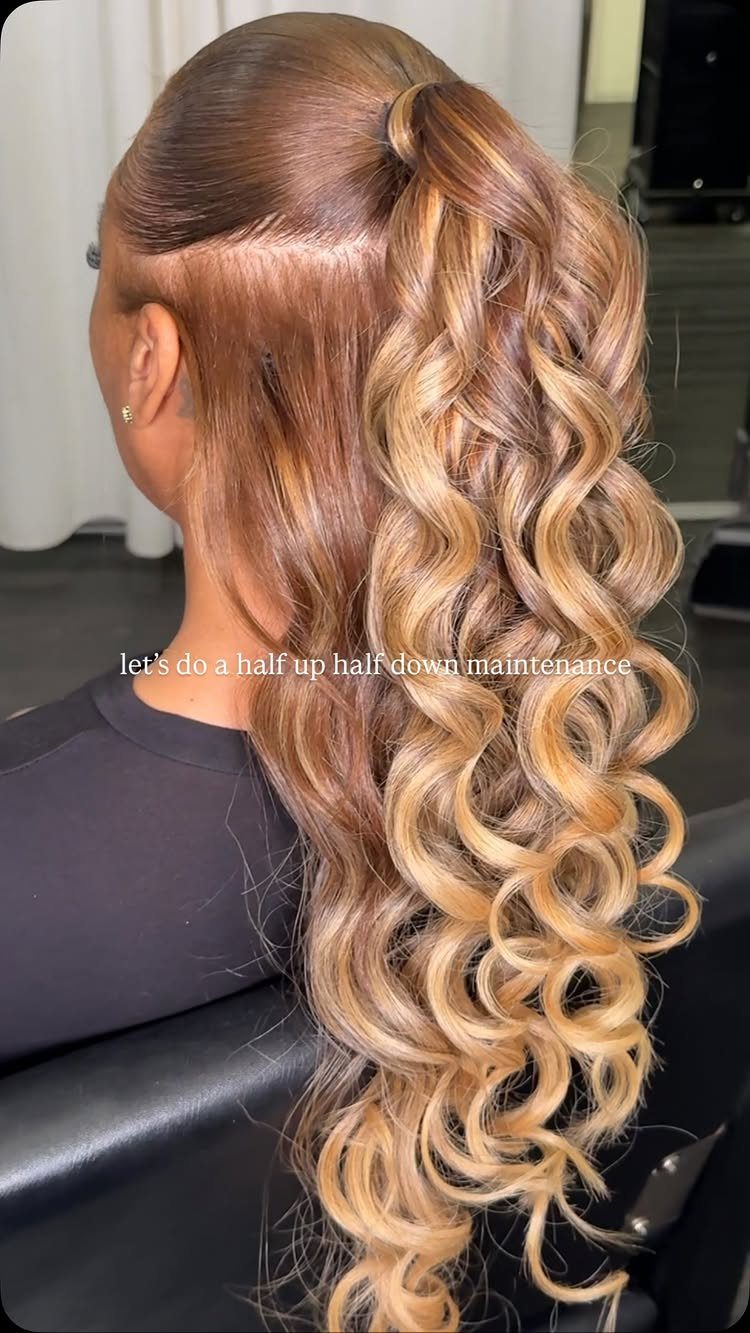
Taking a generous crown section for the half-up gives very long hair more dimension, and the curls below look longer for it. Gather more hair than you would for a basic half-up, then let the rest cascade.
I prefer curling the lengths first, since the curls need to sit evenly under the pulled-up section. Highlights show up better with this much hair in view.
21. Curtain Bang Half-Up
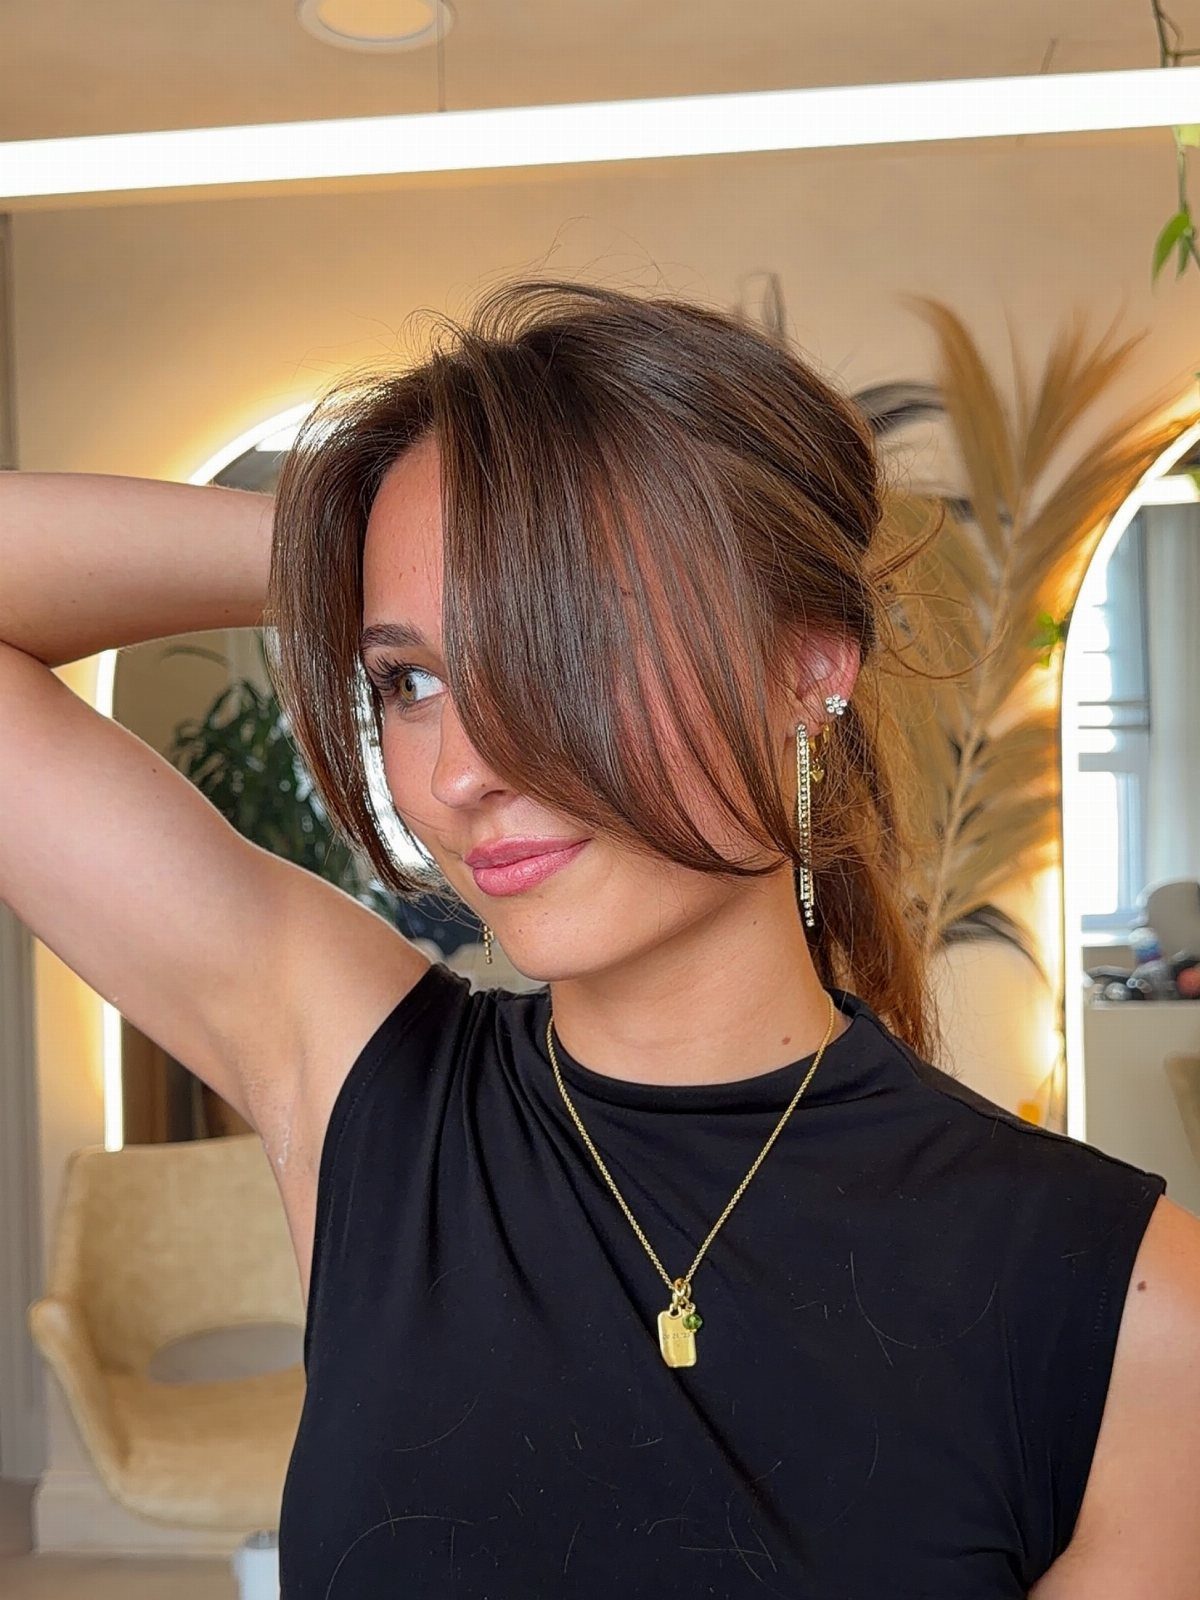
Long curtain bangs parted down the middle do the framing, so the half-up itself can stay simple. Pull the back sections up and leave the bangs loose on both sides.
I like this because the bangs can be refreshed on their own: a quick re-curl or a brush-through fixes them without redoing the whole style. Pin the top section gently so the bangs keep their soft shape.
22. Half-Up with Fringe
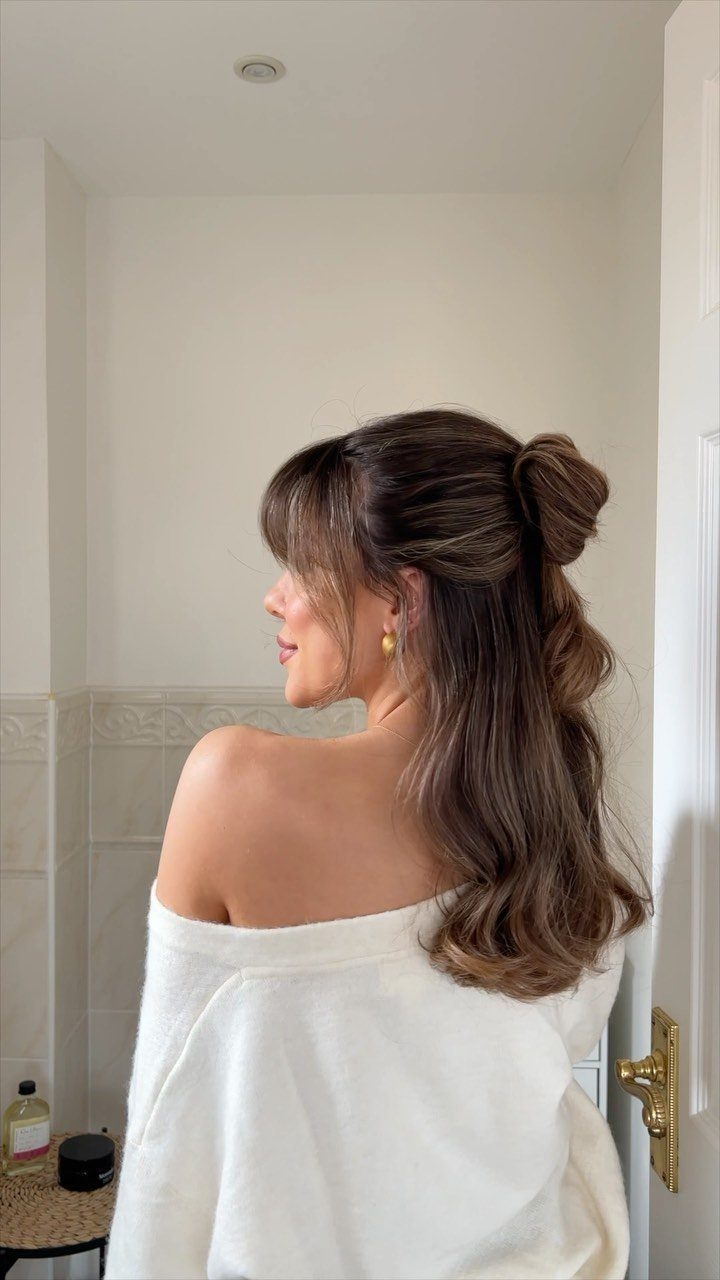
Pulling the rest of the hair back puts bangs at the center of the look, so they need to be styled with care. Leave a few face-framing layers loose beside them, and keep the lengths in loose waves.
My preference is a relaxed, slightly rounded bun on top; a tight one fights with the soft bangs. Trim upkeep on the bangs matters more here than on most half-ups.
23. Half-Up Pigtails
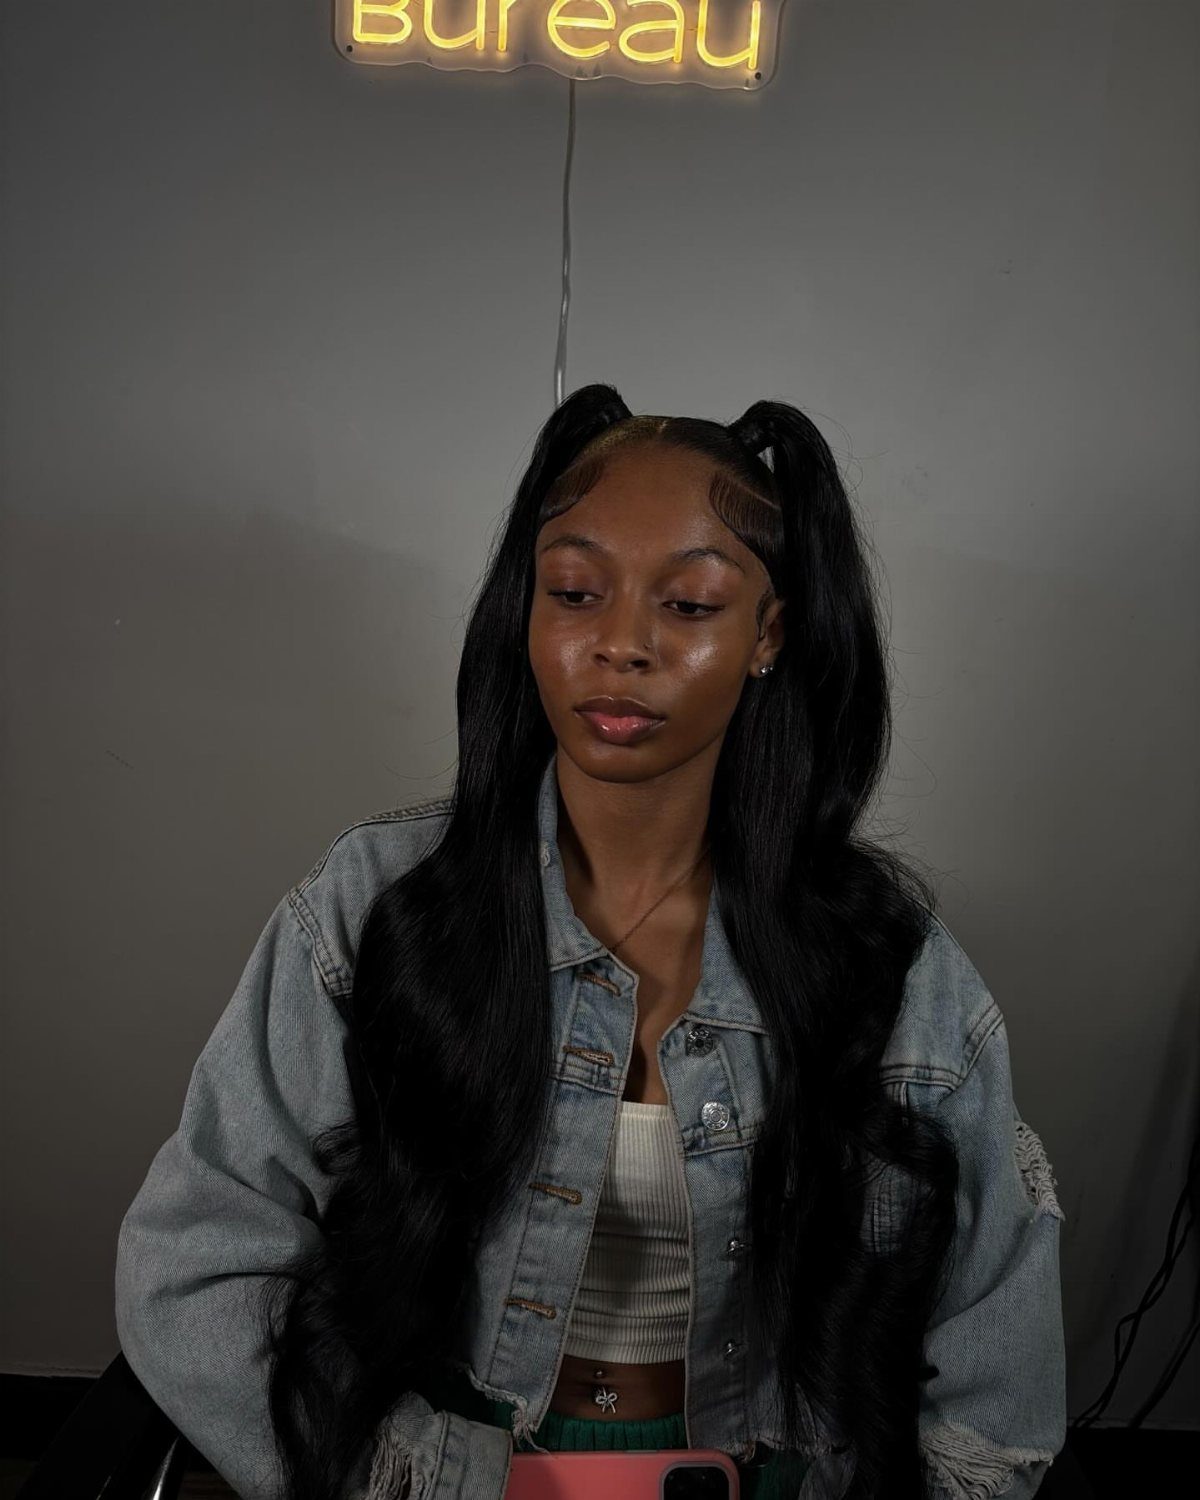
Two half-pigtails sit one on each side, and the long hair underneath stays down.
Split the hair down the middle, take a section from each side above the ear, and secure both with a loose elastic so the pigtails sit soft instead of tight.
If you want a different finish, twist each pigtail into a bun and you have space buns. I would keep the elastics hidden by wrapping a thin piece of hair around each one.
24. Mermaid Curls with Bouffant
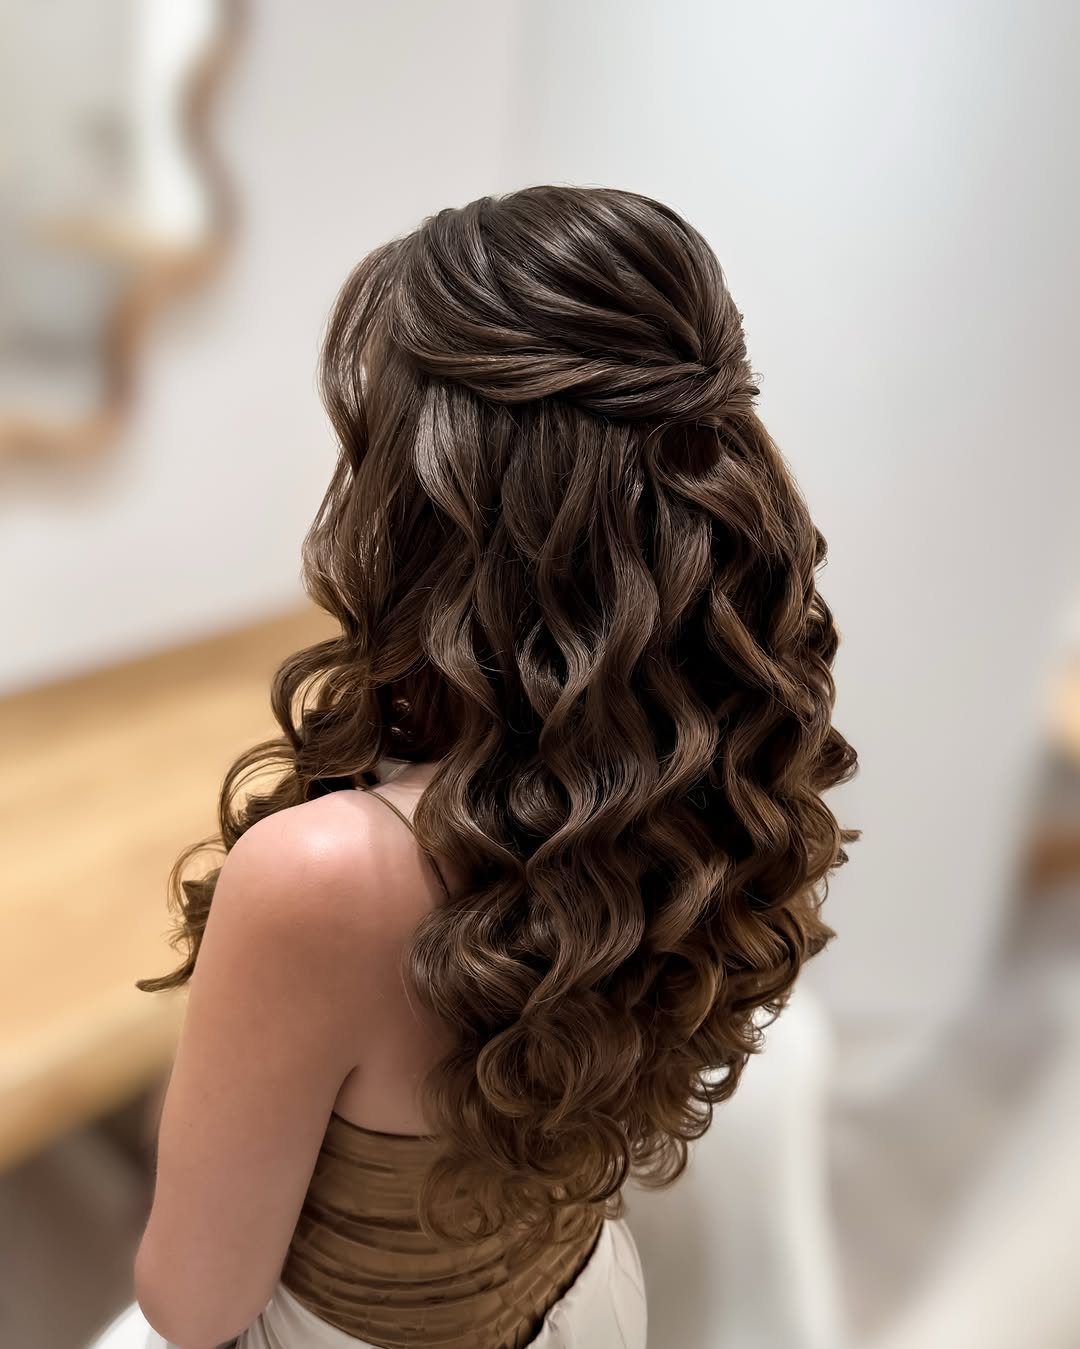
A bouffant lifts the crown, and the long curls hanging below it gain a dramatic frame. Before the curls are released, backcomb the crown, smooth it back over the teasing, and anchor it with pins.
I would use a barrel size that gives a defined, spiral curl, then brush it out only slightly so the shape stays. Dress it up with a formal neckline; the back view is half the appeal.
25. Twisted Half-Up
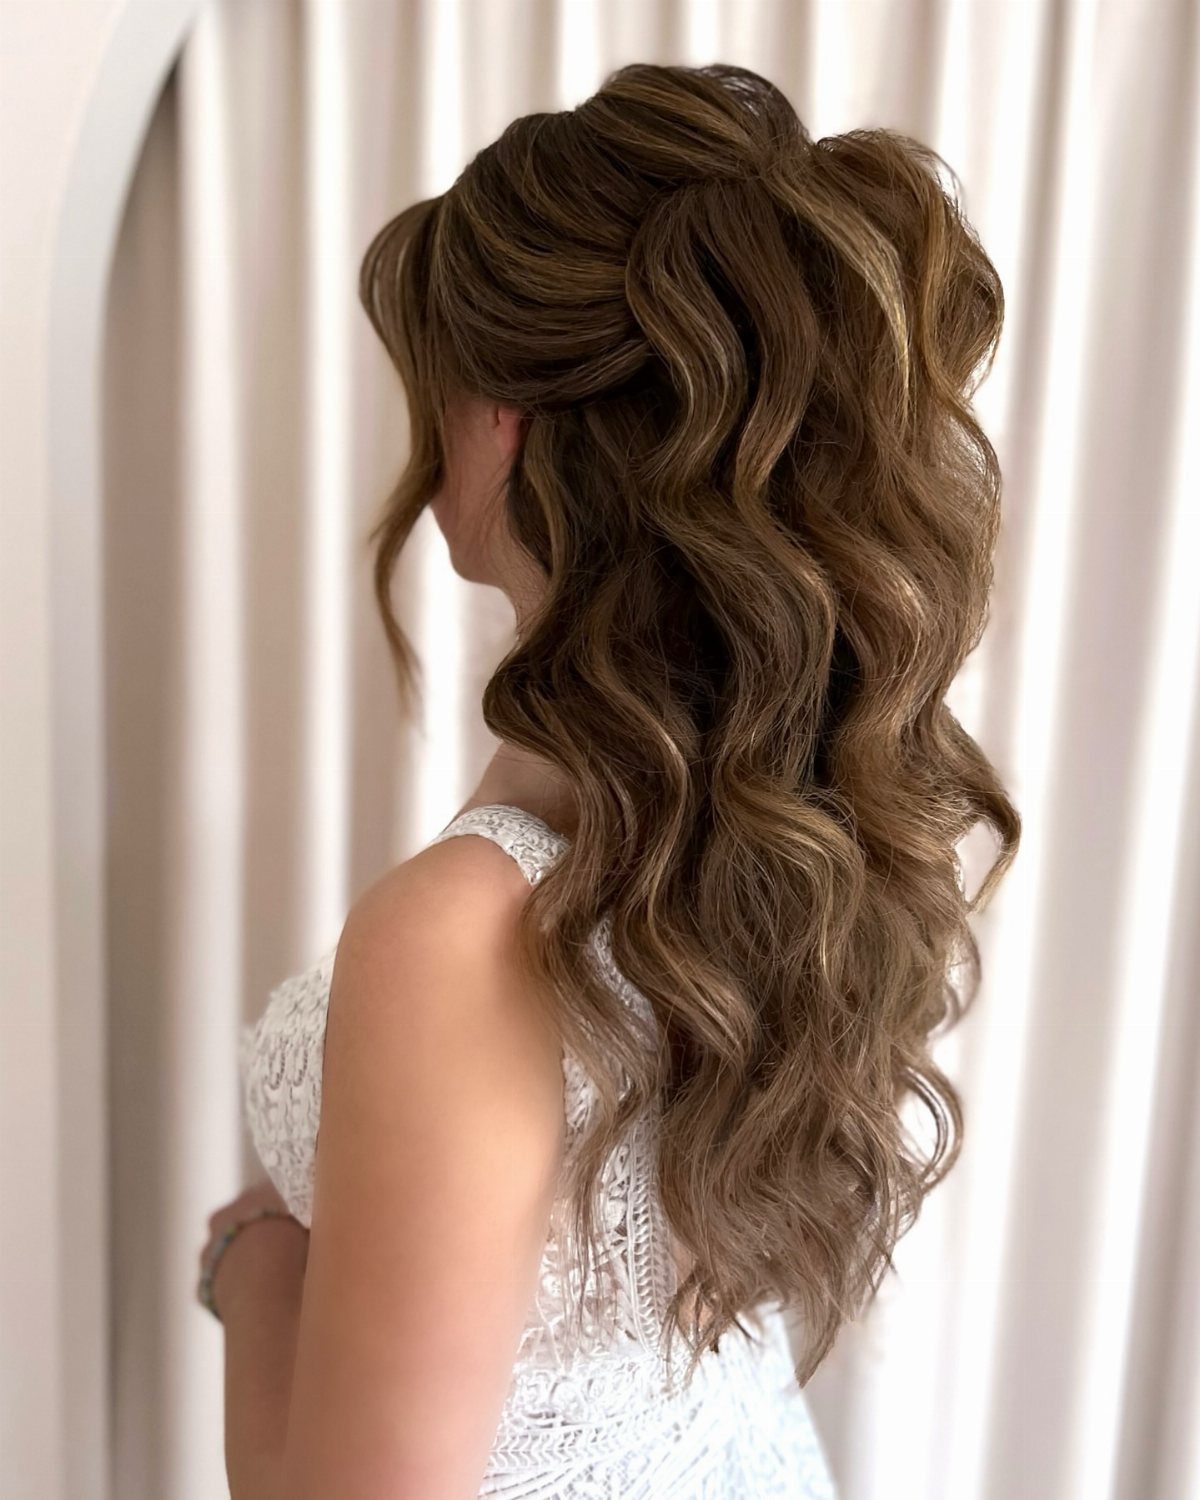
Gathering the crown into a twist and pinning it at the back gives long curls a lifted, finished shape without hiding any length. Curl the lengths first so the twisted section and the hair below match in texture.
I like it with the twist kept full and soft, since pulling it tight flattens the volume. Loosen it with your fingertips after pinning.
26. Side-Pinned Half-Up
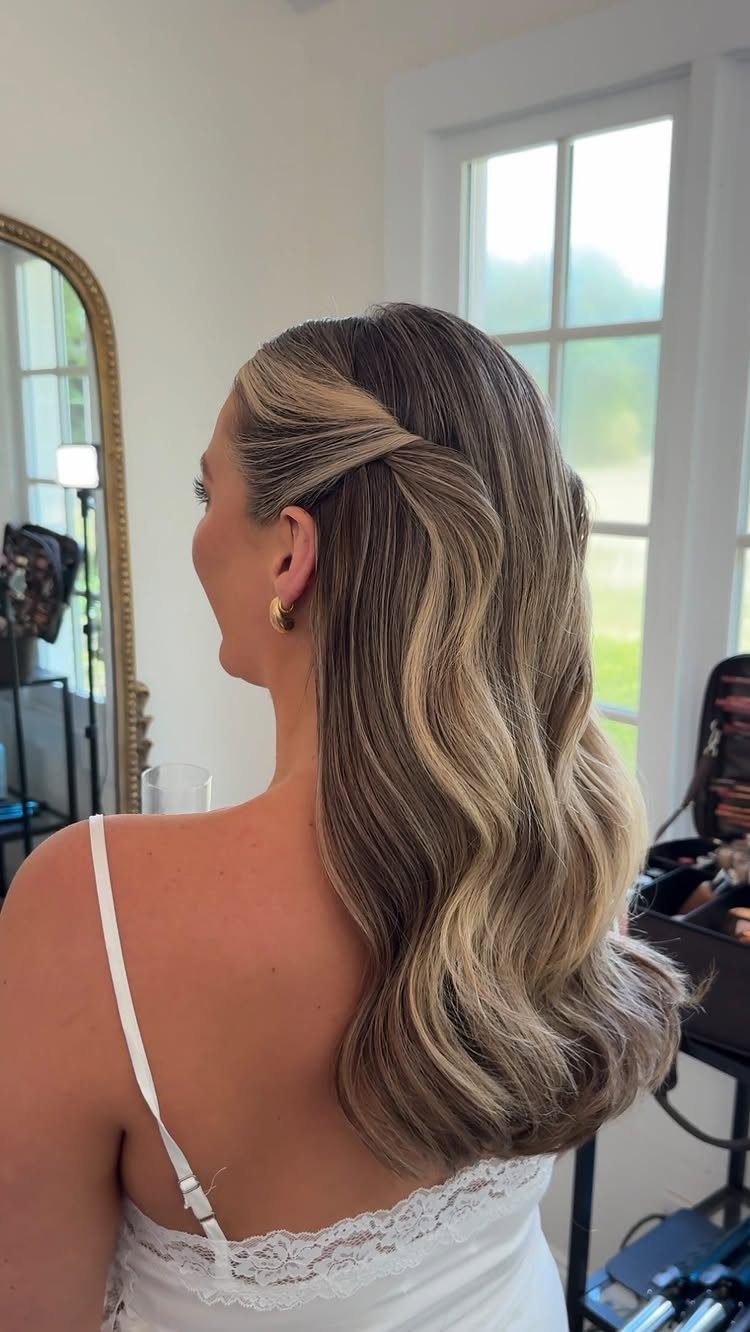
Only one side moves in this half-up: sweep that section back and pin it behind the ear, and the rest of the waves stay loose. It asymmetrically clears one cheek while leaving the other side soft.
Because the hold is a single pin or clip, I would pick a clip that grips well on fine, slippery waves. Put the pin in at a slight angle so it sits flat against the head.
27. Cornrow Half-Up
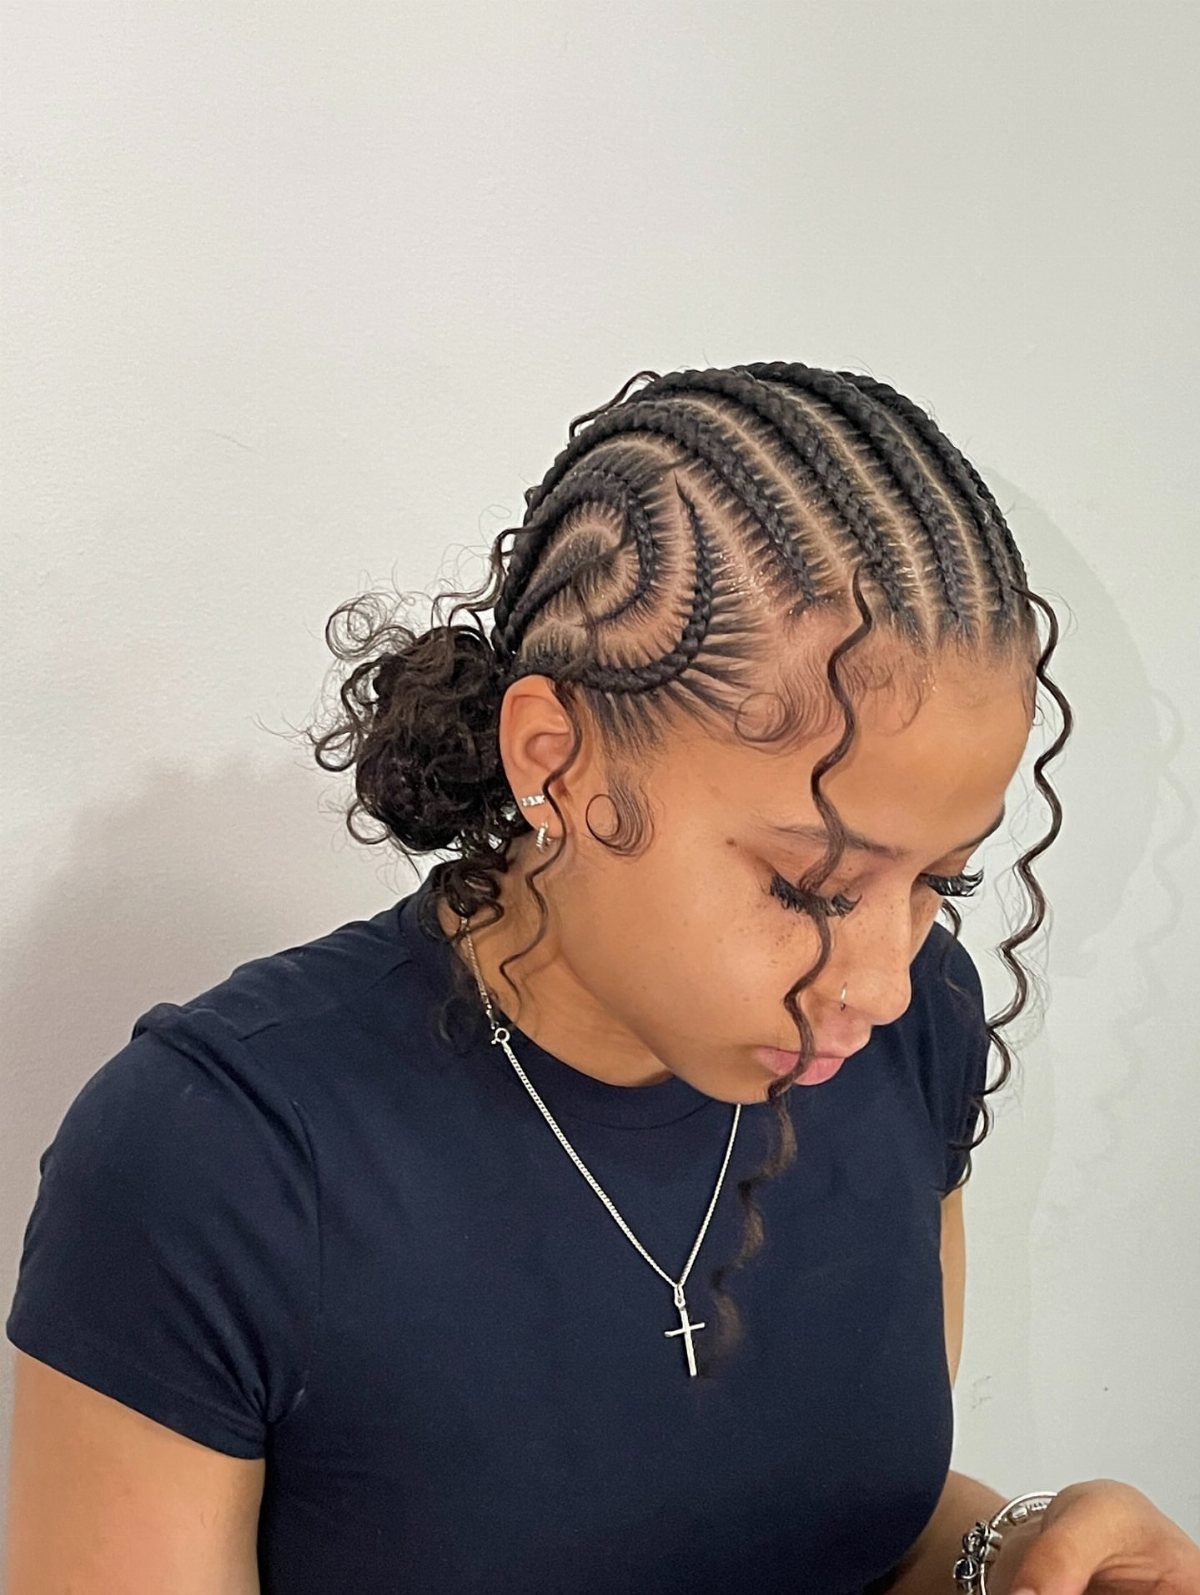
Cornrows laid across the scalp give a half-up its structure, so there is no clip or elastic to manage up top. The loose curls gather at the back, and a few tendrils left out at the front soften the edge.
Cornrows are a job for a skilled braider, and I would book that time instead of trying them alone. Leave the face-framing pieces thin so the braided lines stay the focus.
28. Ribbon and Ornament Half-Up
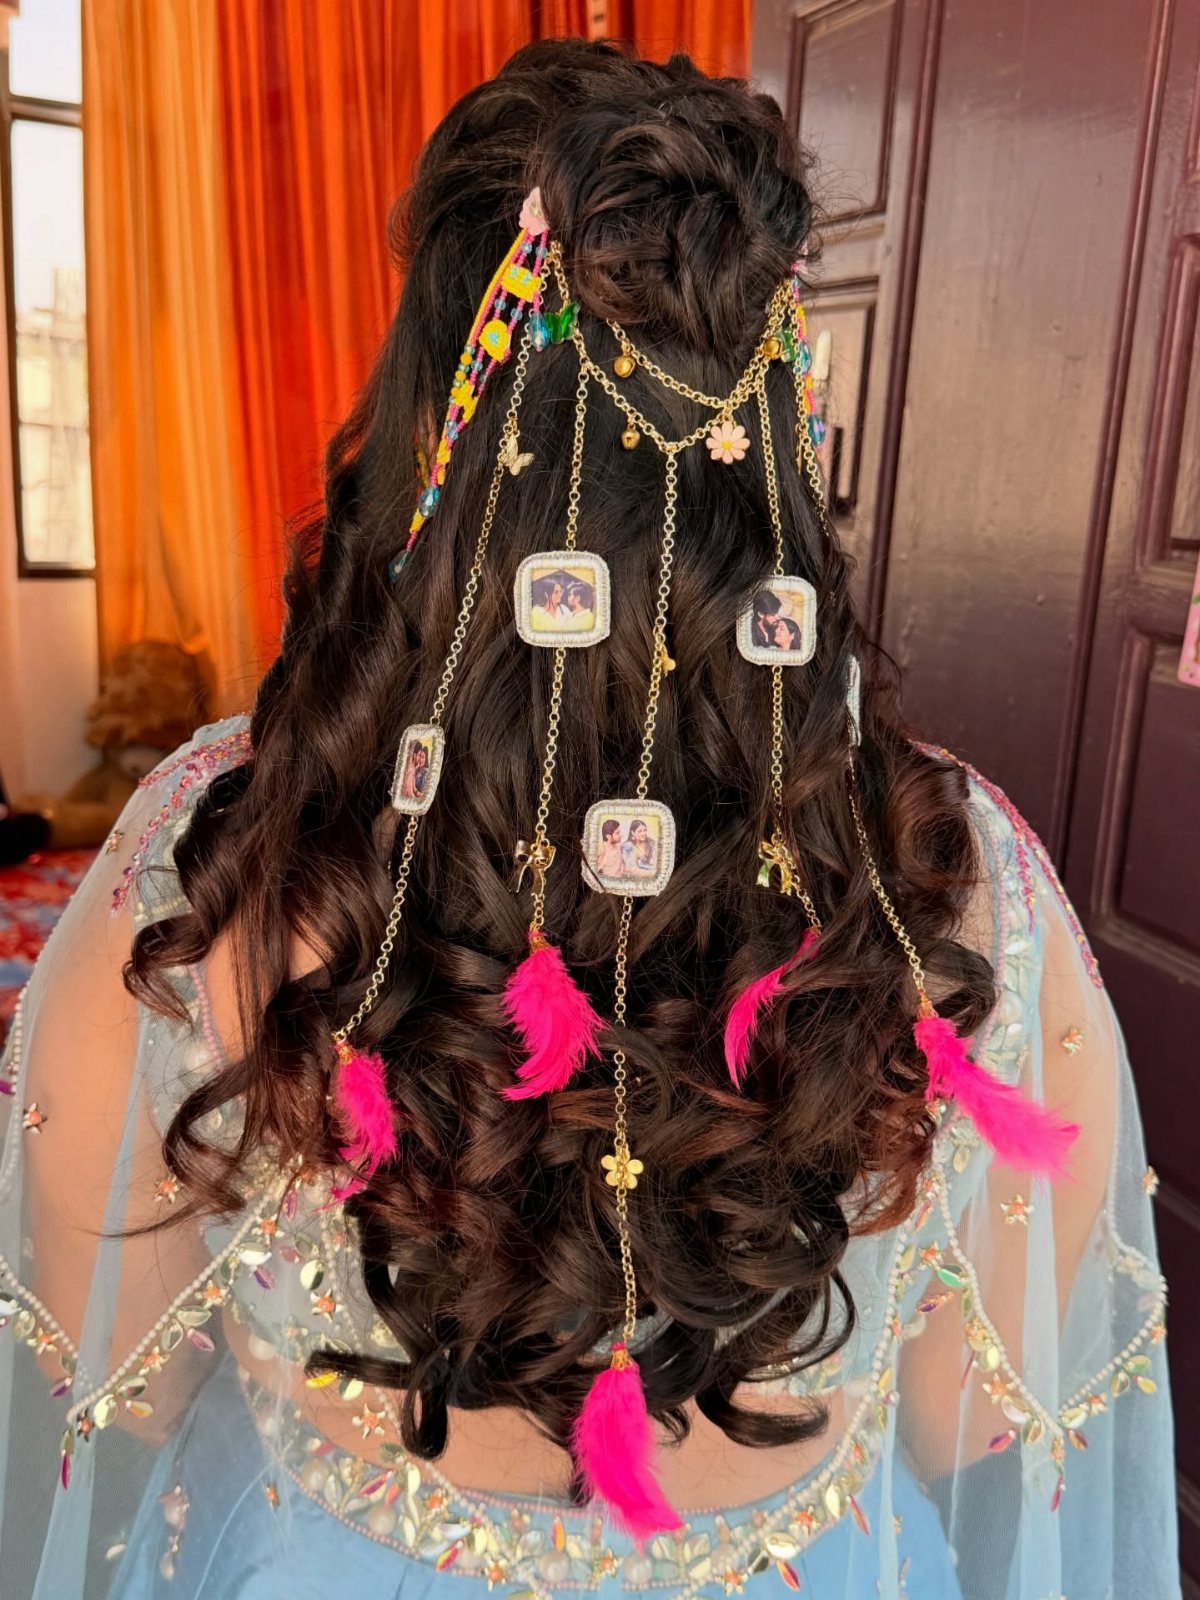
Ribbons, chains, ornaments and feathers turn a plain high half-up into a statement piece. Gather the curls up top, then attach each accessory last, once the shape is set, so nothing gets tugged out of place.
I would pick a few pieces and not all of them at once, since the more you add, the heavier the style feels. Pin anything weighty to a secure section of hair, not just to loose curls.
Choosing and Creating a Half-up Style
Decide how much hair to pull back before you pick up a brush, because the amount sets the look. A small ponytail or a clipped-back style takes a modest section, while a bun needs noticeably more hair from the crown.
A line drawn from ear to ear, with everything above it pulled into a ponytail, is where most half-up looks begin.
That’s a starting point, not a rule. The top section can just as easily become a bun, a braid, a top knot or a tied scarf.
A few passes with a brush over that top layer will flatten any bumps before you fasten anything.
A hair tie, claw clip, barrette or set of bobby pins will all hold it, so pick based on how polished or relaxed you want the finish.
The lower hair is your call: leave it natural or style it to match.
The beauty of a half-up, half-down hairstyle is that there’s no strict formula.
Styling Time and Staying Power
Looks that seem effortless are rarely quick. Expect to use several products and tools, and for a sleek Hollywood-wave finish, allow at least 1.5 hours.
If this is for a wedding, book a hair trial and judge the result honestly.
If you don’t love it there, you won’t love it on the day. A stylist can’t always match one photo exactly, so save 2–3 versions of the look to show them.
Ask how to prep your hair that morning. Ask before you shampoo: day-old hair has more grip, and some stylists would rather start with it.
Loose versions tend to droop by evening, so pack extra bobby pins and a small can of hairspray, or hand them to someone who’ll be standing near you.
Fresh flowers, a crown, braids or twists are easy ways to make the style your own.
Frequently Asked Questions
How to make half up half down hair look good?
Before you reach for a tie, settle on the size of the section going up, because that amount drives how the finished style reads.
A mini ponytail or a clip is happy with a thin slice of hair, but a bun wants a thicker handful gathered from the crown.
Once the top half is parted off in a straight line across the head, a quick brush smooths it, and an elastic, claw clip, barrette or a few bobby pins hold it in place.
Is half-up, half-down hair professional?
Yes, it can be, depending on how you style it.
At the office or a conference, plain barrettes look polished. Intricate braids and accessories fit better at formal events or on a night out.