A fabric headband takes under a minute, while cornrows with curly sections and rows of individually tied elastics need a day with room to spare, so the time your morning allows decides which of these fits.
Length narrows the choice next, since most of the braids, buns and curls here need hair past the shoulders, while the Headband and Down and Natural looks are the ones that adapt to shorter hair.
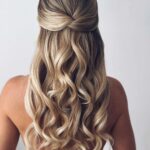
1. Half Up, Half Down
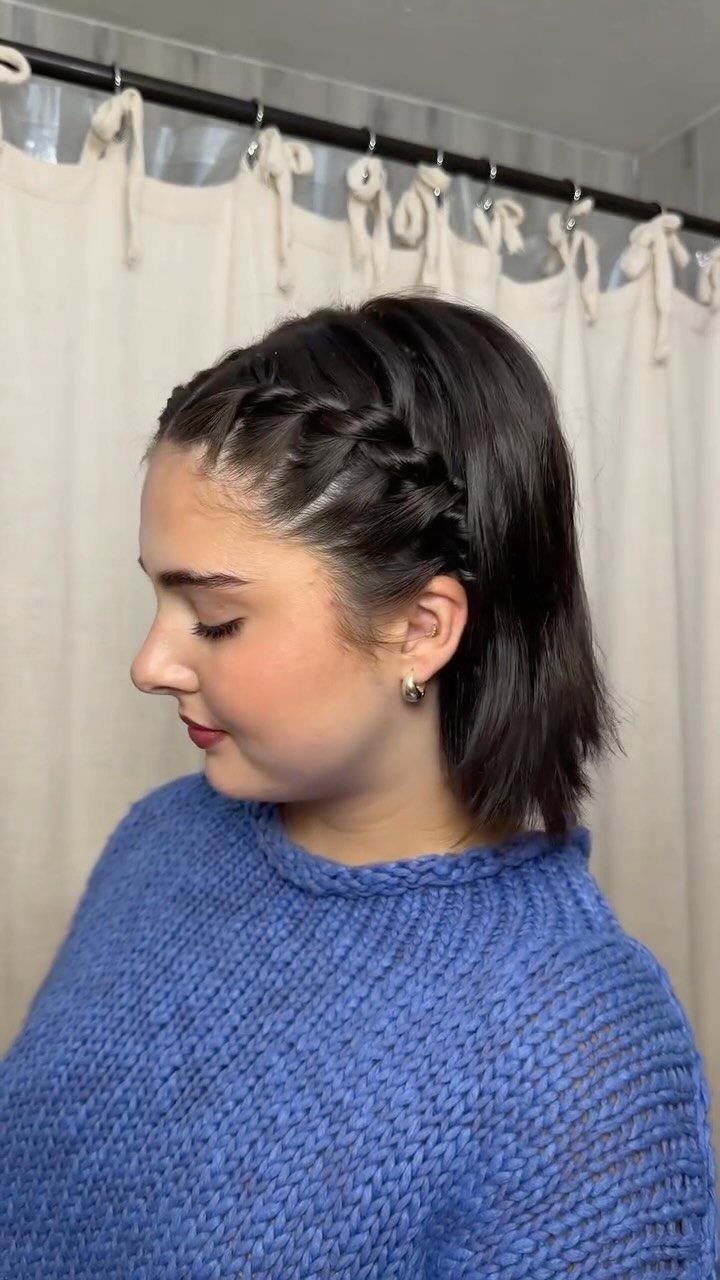
This splits the difference when you want hair off the face but still want length to show. The top section gets pulled back and secured, leaving everything below the crown down.
It holds through a full day without much fuss, and you can leave the pulled-back section smooth or add a small braid on one side for a little more detail.
Face-framing pieces can stay out if you want them softer around the jawline.
The style works on most lengths past the shoulders, and an elastic or a clip is all it takes to secure it.
2. Bubble Braids Into Buns
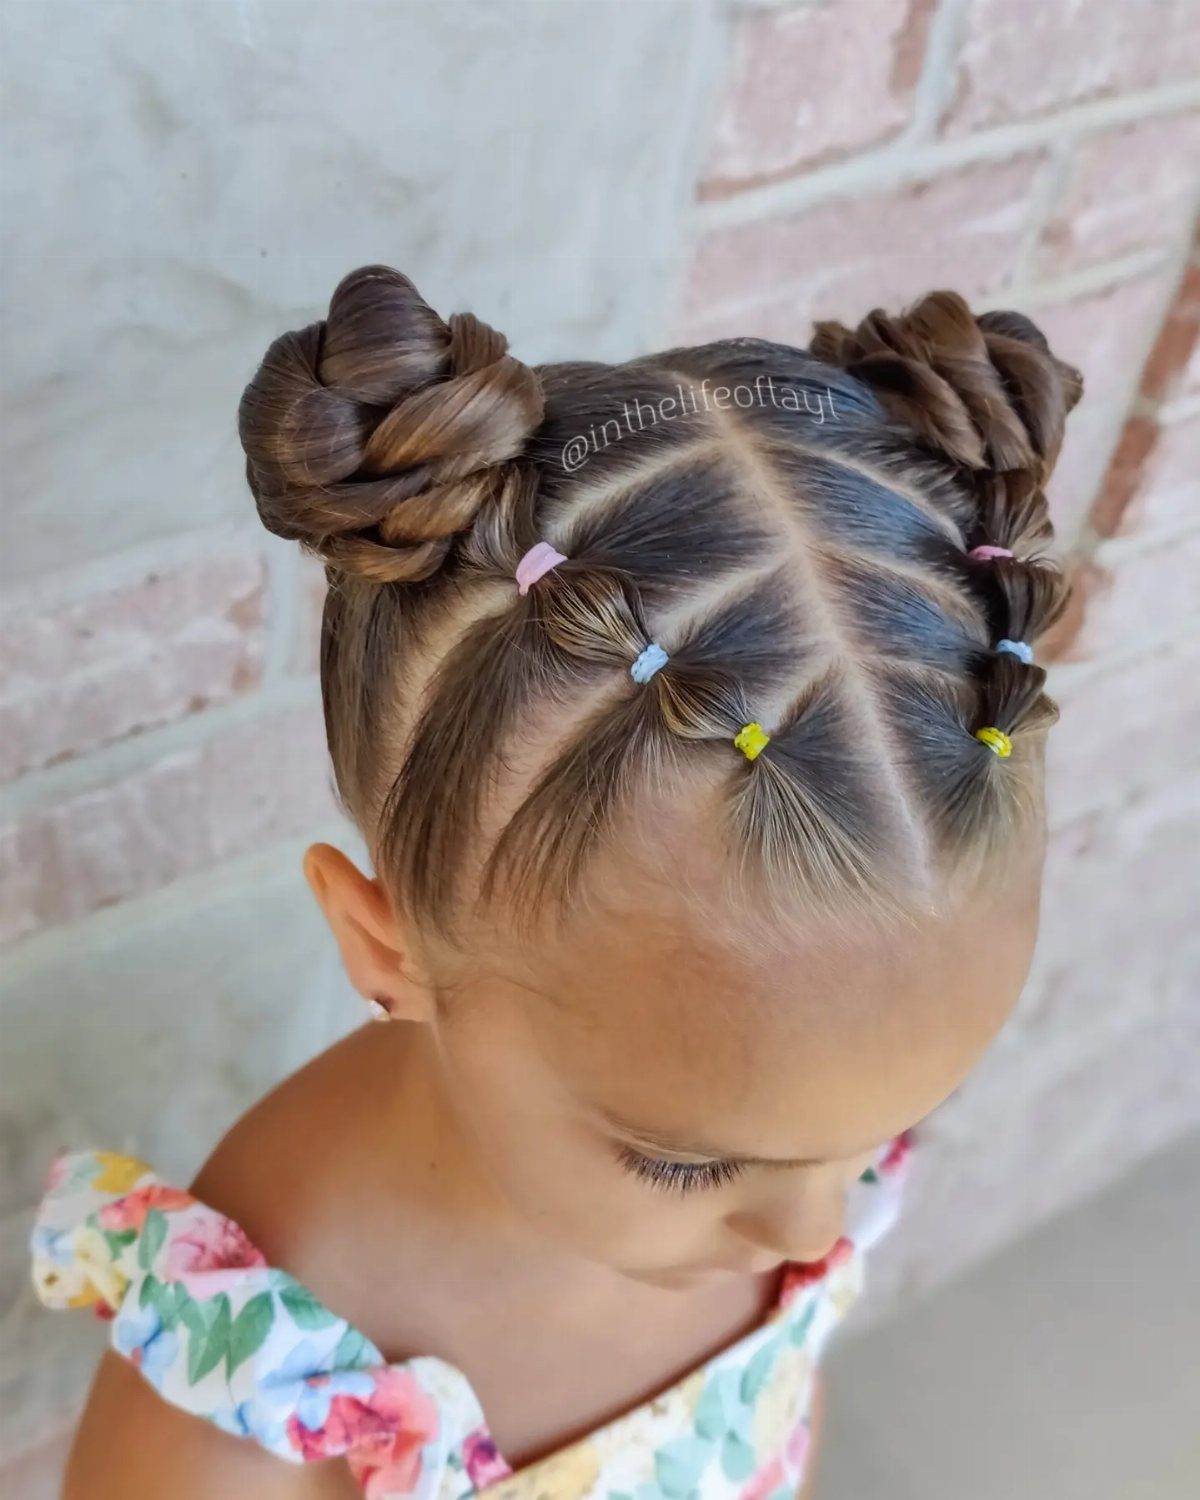
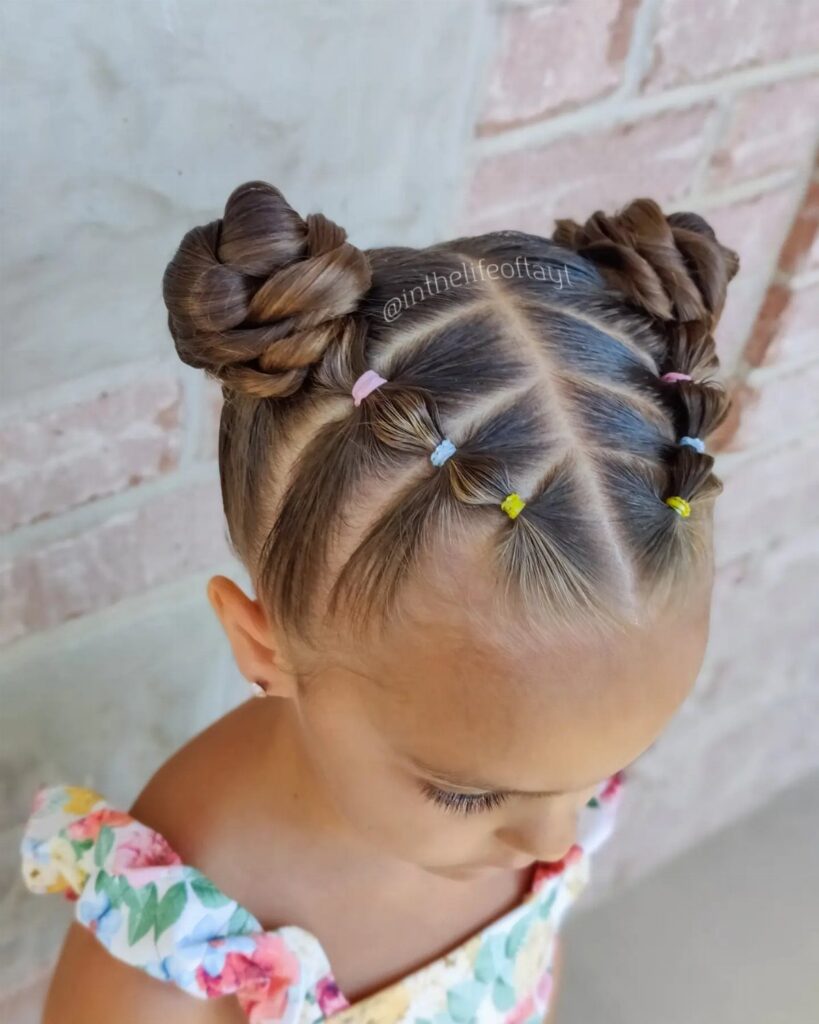
2 ponytails get sectioned with elastics down their length to form the bubble effect, then each tail wraps into a small bun at the top. The sections stay visible even after the bun is formed, so the bubbles still read.
This holds better than a standard bun because the elastics grip multiple points along the hair. Space the elastics evenly along each pony before you wrap it, and the buns sit high enough to show clearly in a photo.
This works best on hair that reaches past the shoulders.
3. Voluminous Curls
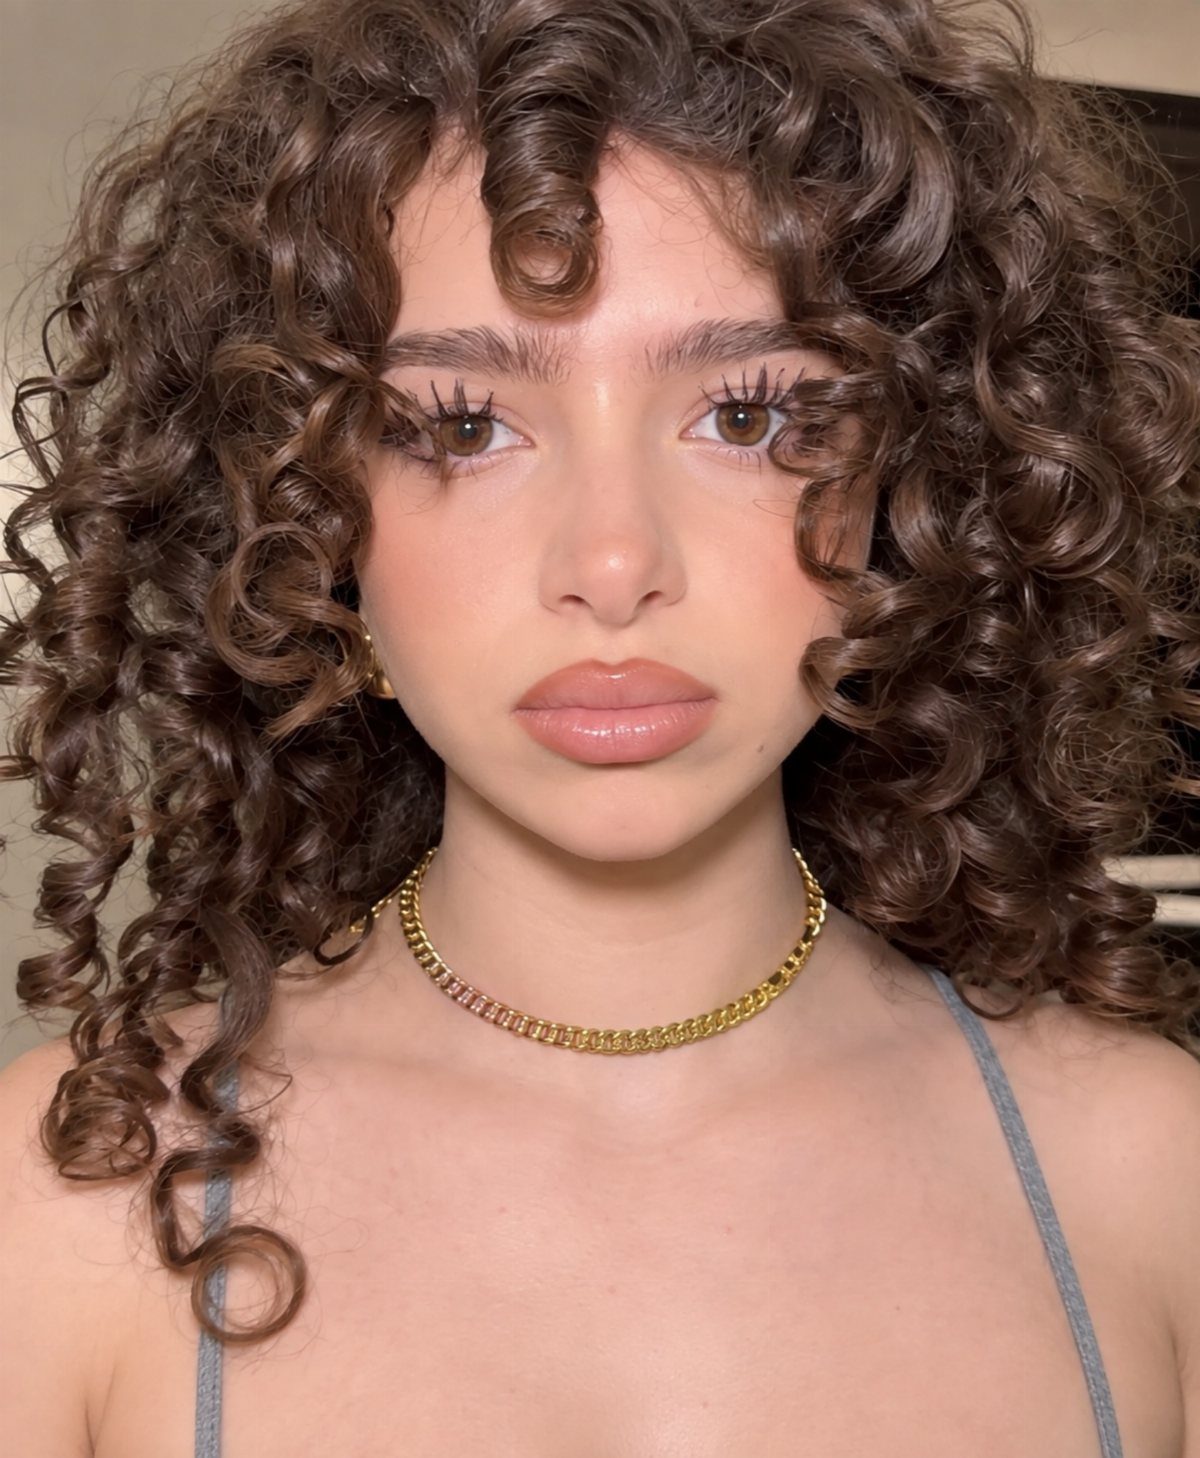
Big, loose curls give the hair body and make it fill the frame in a photo. The volume comes from curling in larger sections and brushing through the finished curls with your fingers or a wide-tooth comb.
A wider barrel works better here than a small wand because it forms a softer wave that still holds.
Start the curl at mid-length rather than at the root so the weight stays balanced, and leave the ends out of the barrel for the last inch to keep them from looking too tight.
The style lasts through the day if you use a light hold spray after curling.
4. High Bun
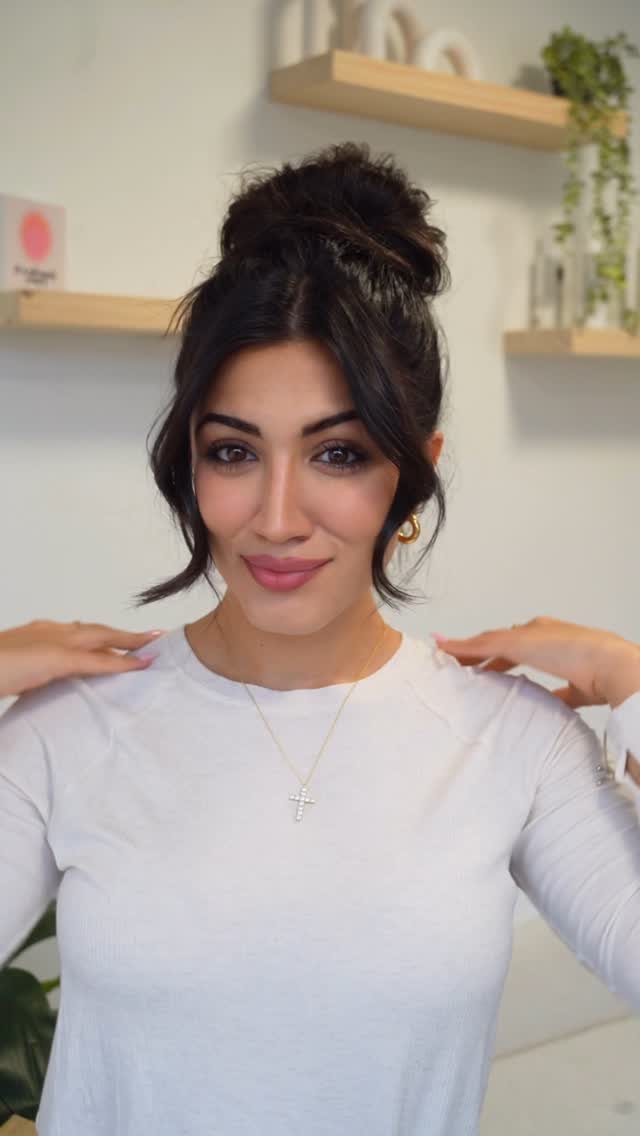
A bun gathered high on the crown pulls everything up and away from the face, leaving the bone structure and neck fully visible. Setting the bun high keeps the whole silhouette tall.
Leaving a few strands loose around the face softens the look without losing the clean updo effect. The bun itself can be smooth and tight or gathered loosely, depending on how polished you want it.
An elastic and a few pins secure it, and it holds all day without needing adjustments.
5. Headband
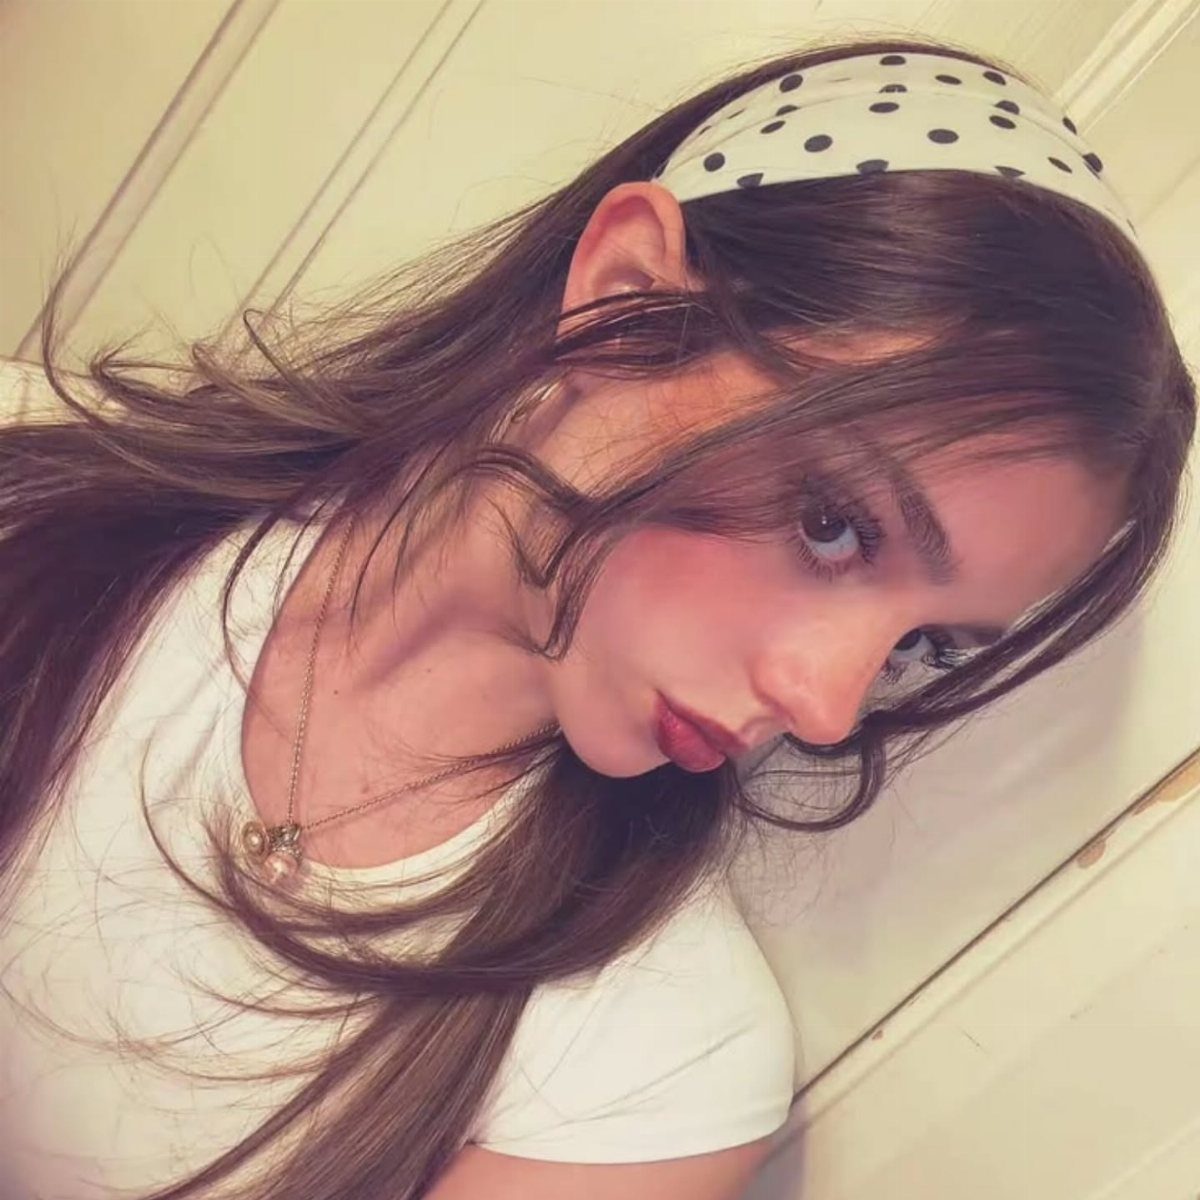
A fabric headband sits across the top of the head and pushes hair back from the forehead while the rest stays down.
The band holds everything in place without heat or pins, so it’s fast and comfortable for a full school day.
Width and pattern both matter here.
A wider band covers more of the hairline, and a patterned or textured band shows up better in photos than a solid neutral. The hair behind the band can be brushed smooth or left with its natural texture.
This takes under a minute to put on and works on any length that reaches the shoulders.
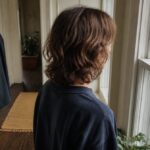
6. Down and Natural
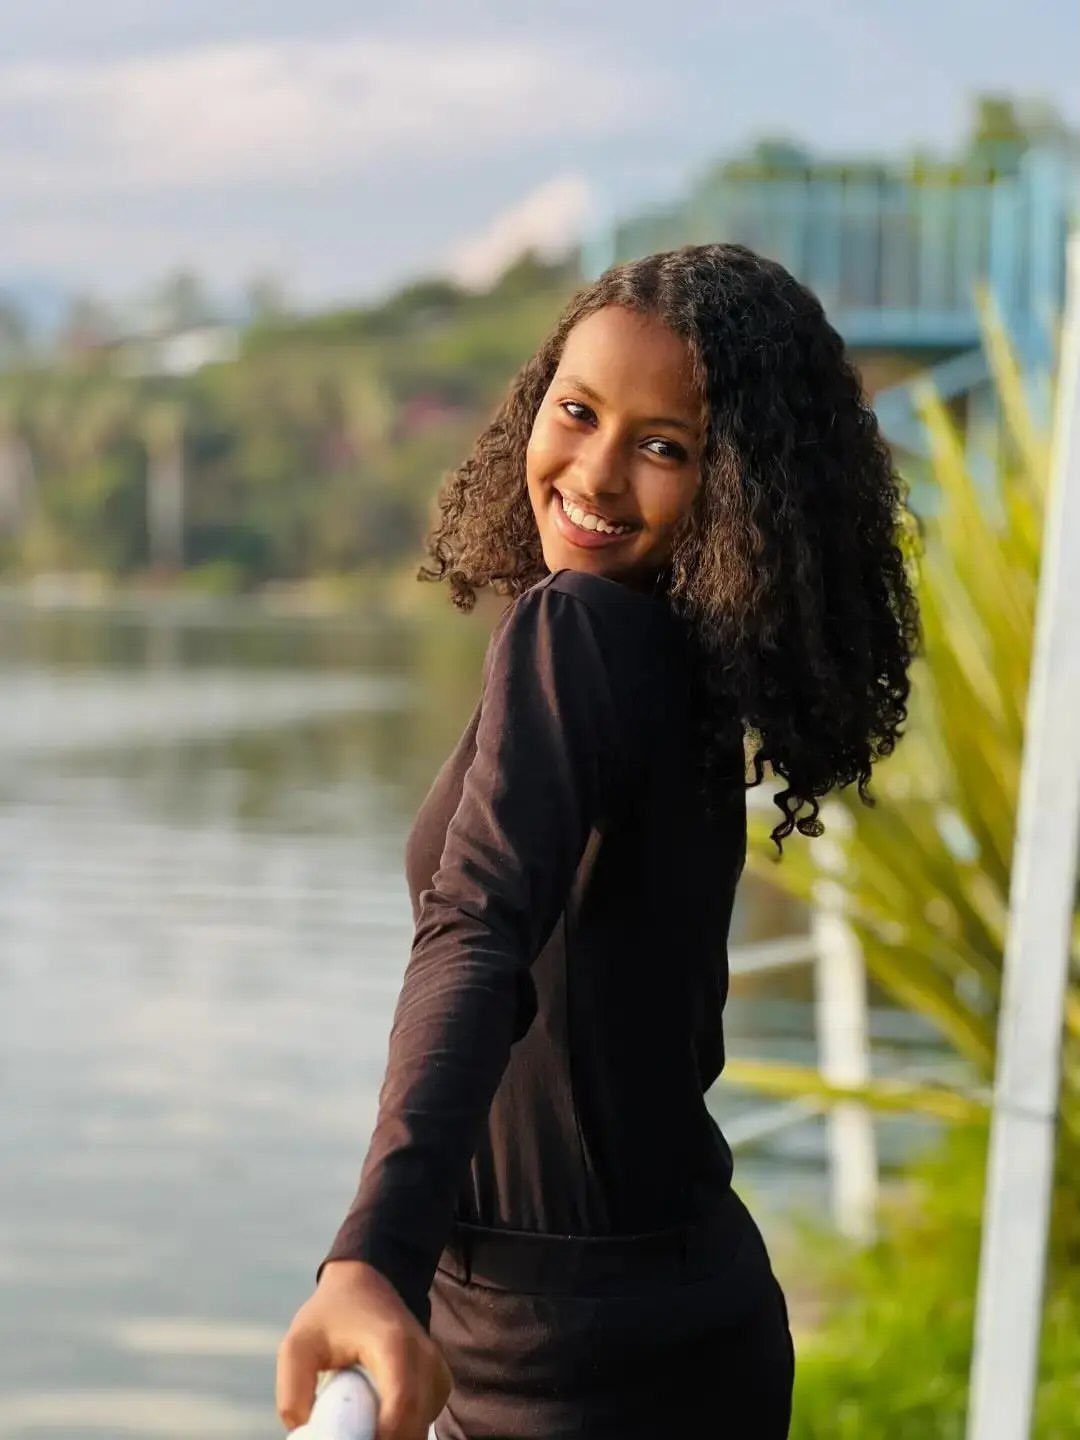
Leaving natural texture as it is gives you the easiest option and the one that photographs as the most genuine. No heat, no product beyond what you already use, and the hair shows its real curl pattern and volume.
This works best when the hair is already healthy and the natural texture is something you want to keep visible.
A light leave-in or curl cream can define the curls a little more if you want them to separate, though this look is meant to need as little as possible.
It takes no styling time and holds through the day because you’re not asking the hair to do anything it wouldn’t do on its own.
7. Braided Headband
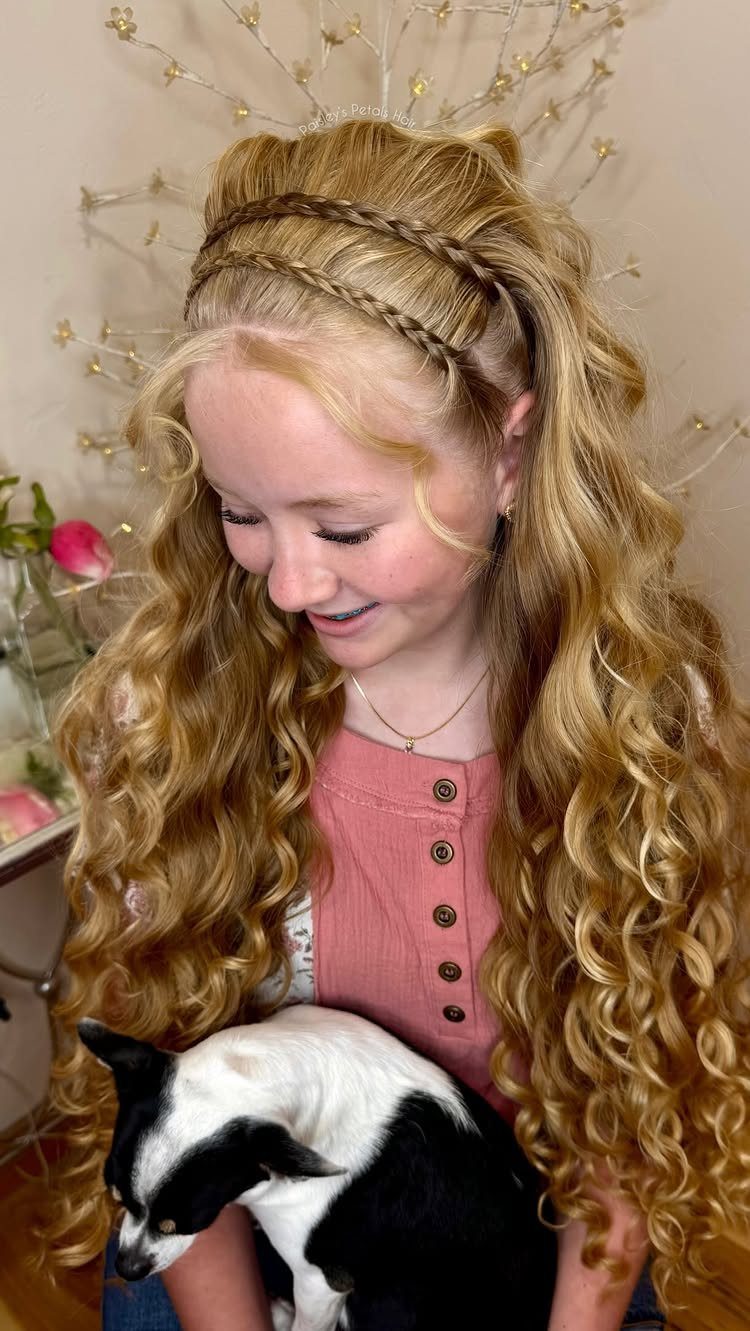
A braid that runs across the head like a band does the job of a hair accessory without adding one.
It keeps hair out of the eyes, which matters on a day when a child sits still for a photo and then runs to recess.
Braiding along the hairline and tucking the end out of sight keeps the front secure. Curly hair hides the braid’s edges a little and gives the look a softer finish.
I like it most on hair with some length, since the rest can stay loose and full.
8. Dutch Braids
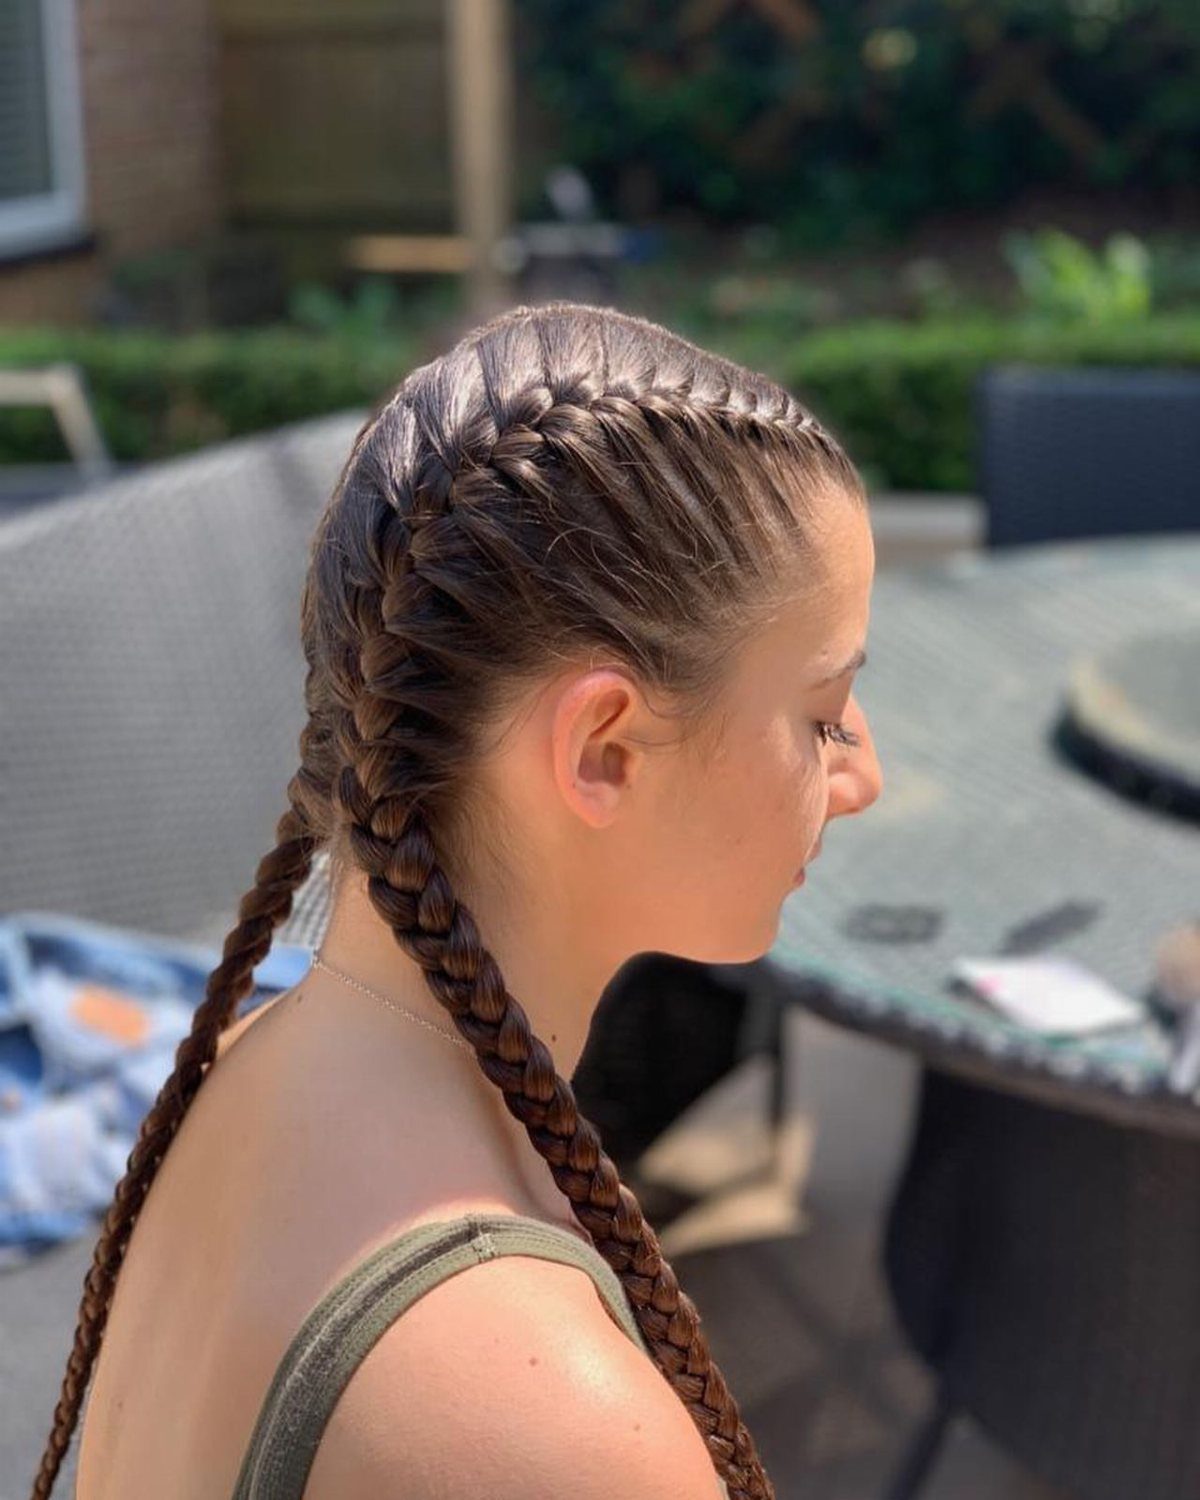
2 Dutch braids take the place of ordinary pigtails and sit flatter against the head, with each section raised on top of the braid. That raised look gives a plain part more definition from the side.
Braid snug, then secure each end with a small elastic. Because the braid starts at the scalp, nothing slides down or loosens by afternoon the way a pigtail can.
Long hair shows the pattern best, though shoulder-length hair will braid too. Of the braided pigtail options on this page, this is the one I would pick for a simple, tidy finish.
9. Four Bubble Pigtails
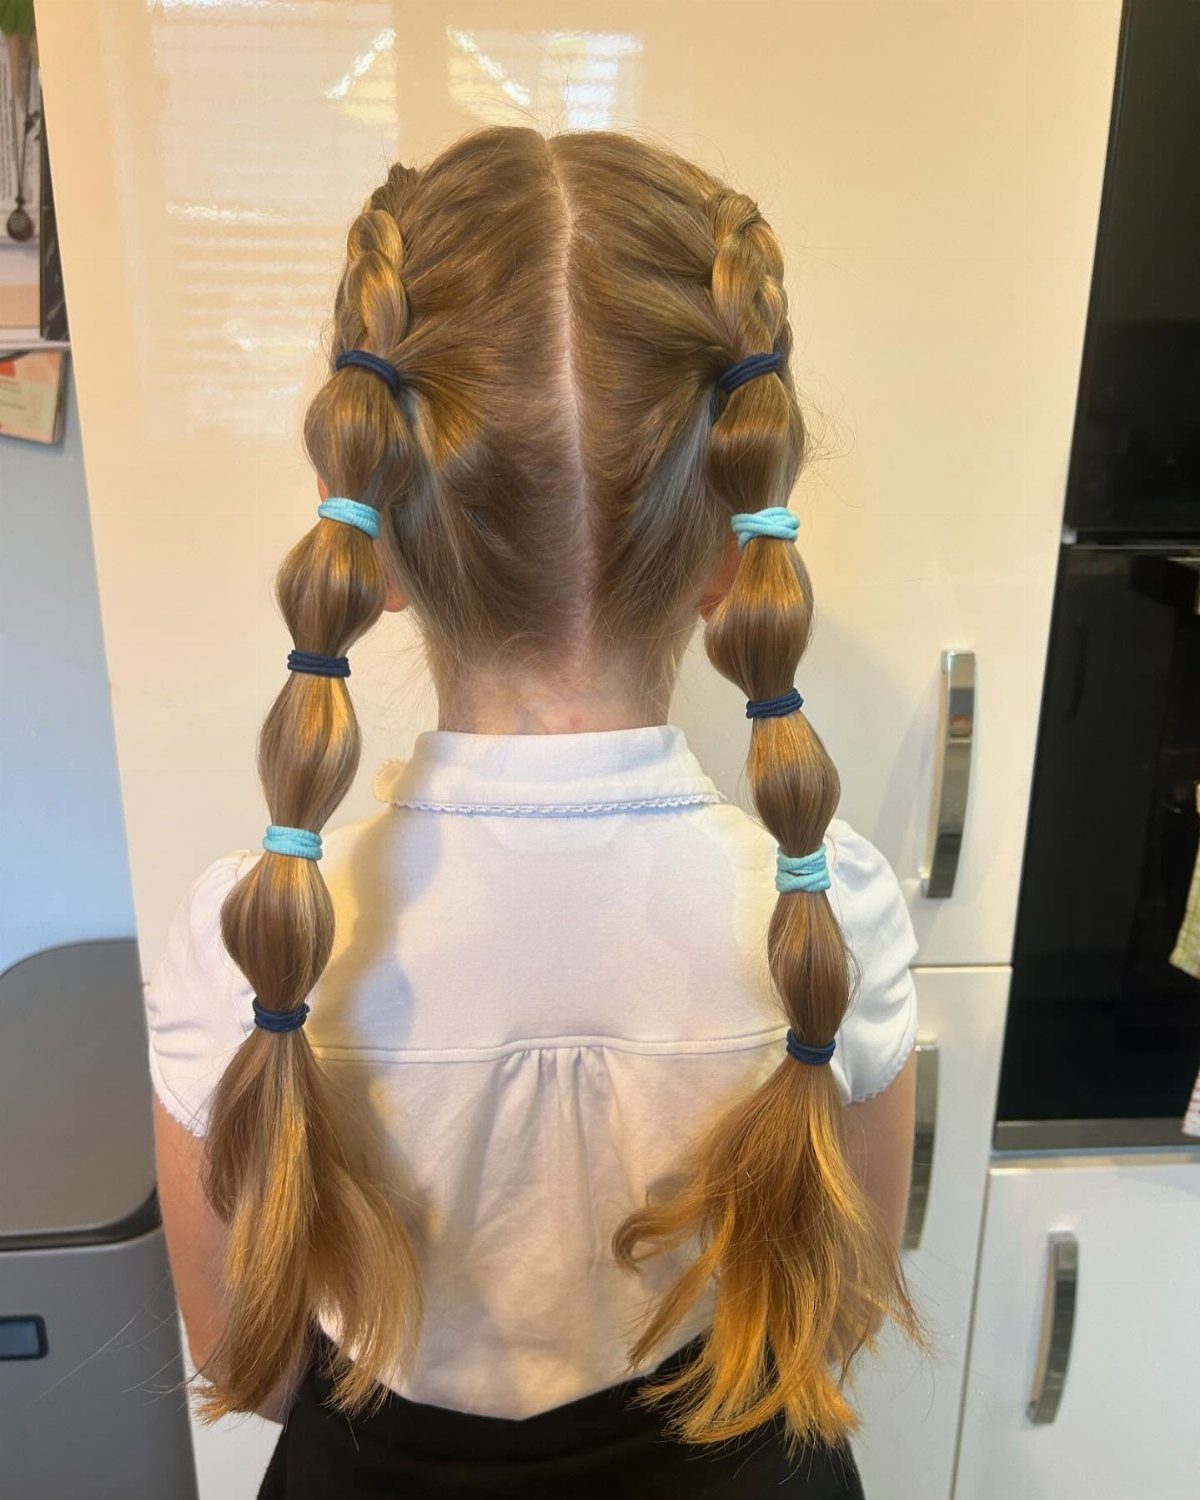
Two Dutch braids run down the back and then split into four separate bubble sections, so the head ends up with a lot of detail from behind. Elastics at intervals puff the hair into rounded segments.
Use small elastics and match their color to the hair so the sections look deliberate. Space them evenly, and gently pull each bubble outward after tying.
It takes longer than a standard pigtail, so I would save it for a day with some extra time. Hair that is thick enough to puff will give the best bubbles.
10. Crown French Braid Pony
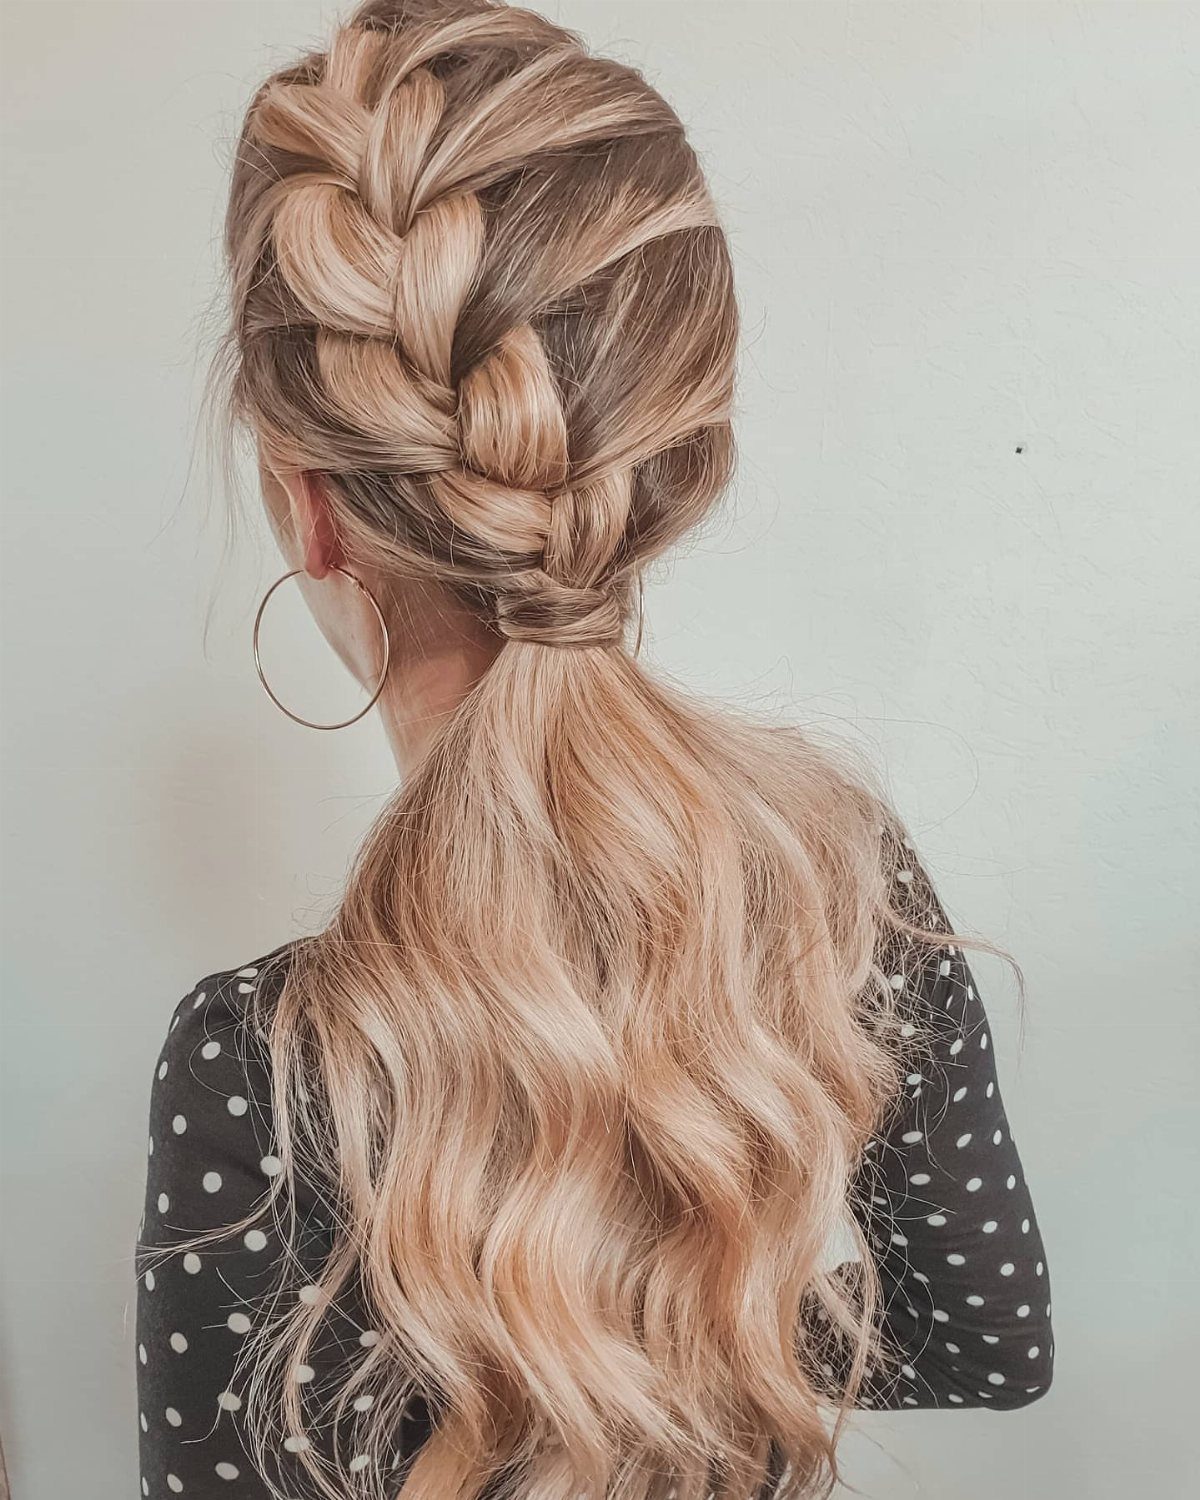
Starting a French braid at the top section and carrying it back into a ponytail gives a neat crown with length still flowing below. The braid keeps the front controlled, and the loose tail keeps the movement.
Gather the braid’s end into a ponytail with a small elastic, then let waves or light curls fall freely. Pull the edges of each braid section slightly to widen the pattern.
Anyone with long hair gets the most from this, and it holds well through a school day.
11. Bubble Braids Into Pigtails
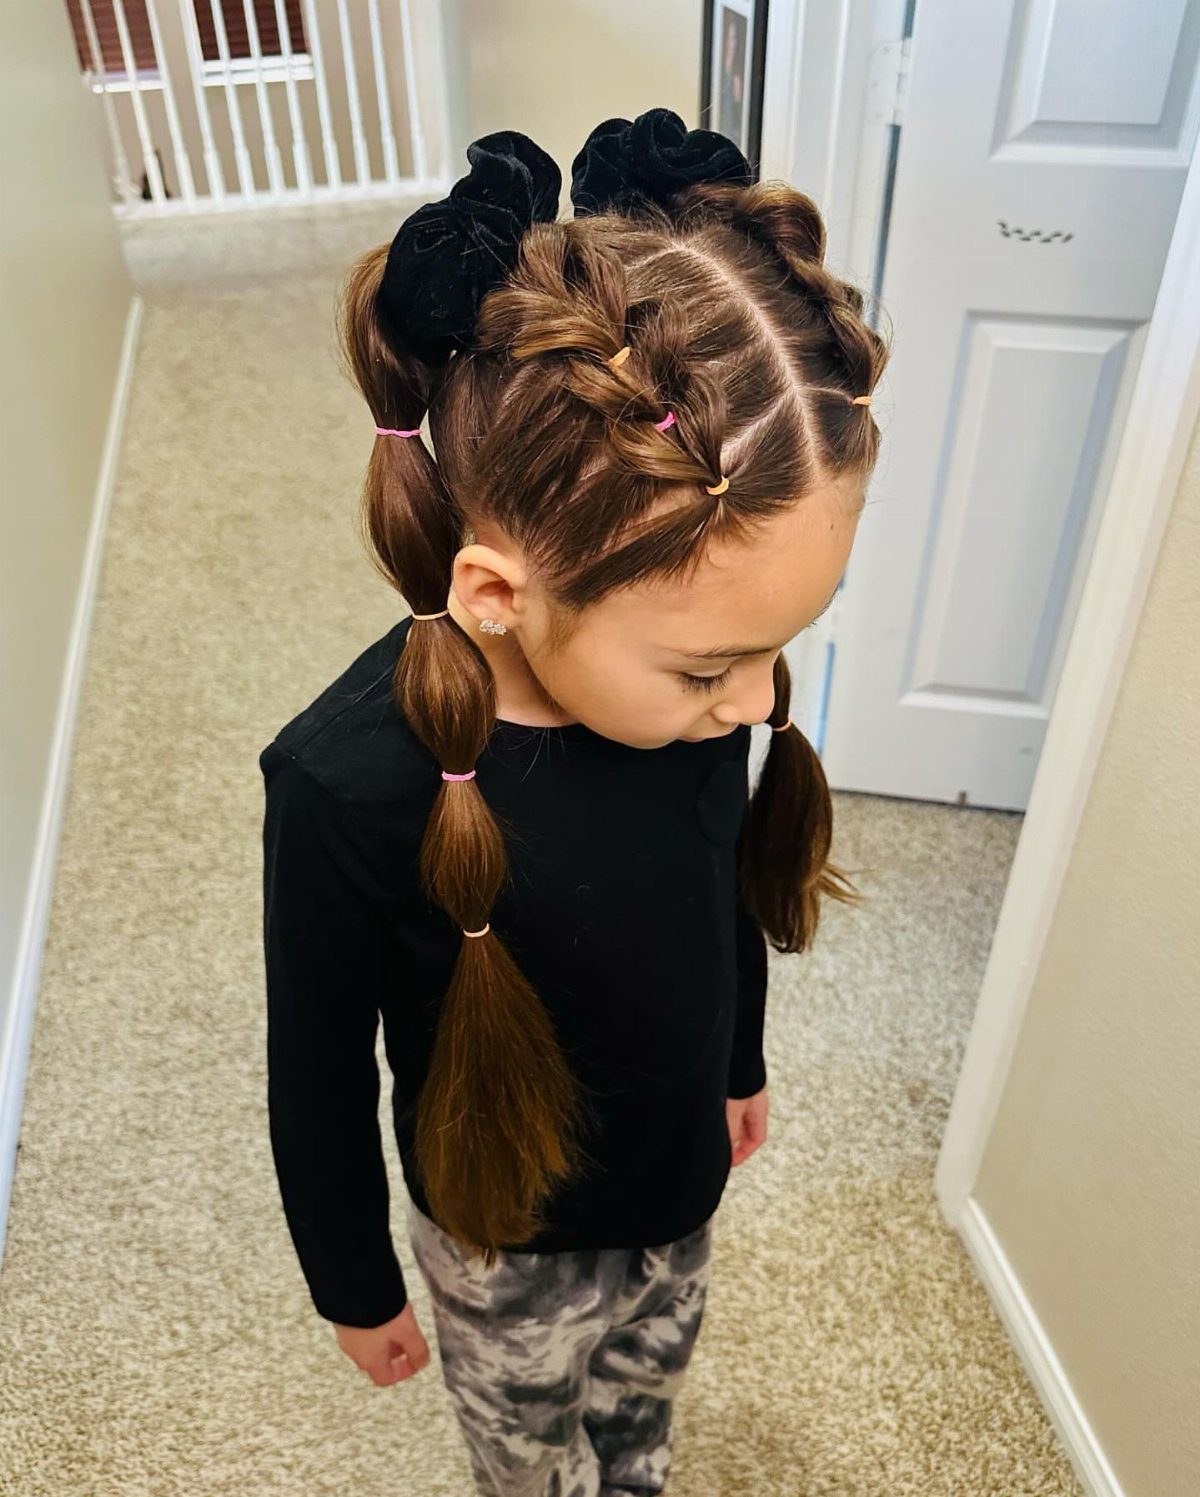
Bubble braids gathered into small low pigtails give two quick style lines in one: puffed sections near the top, then a tidy tail below.
Tie the pigtails first, then add elastics near the top of each one and spread the hair out between them, leaving the tail below smooth.
Keeping the pigtails low leaves the head shape clean and holds better when a child is moving.
This suits mid-length to long hair, and I would choose it over a plain pigtail whenever there is time to spare.
12. Deep Side Part
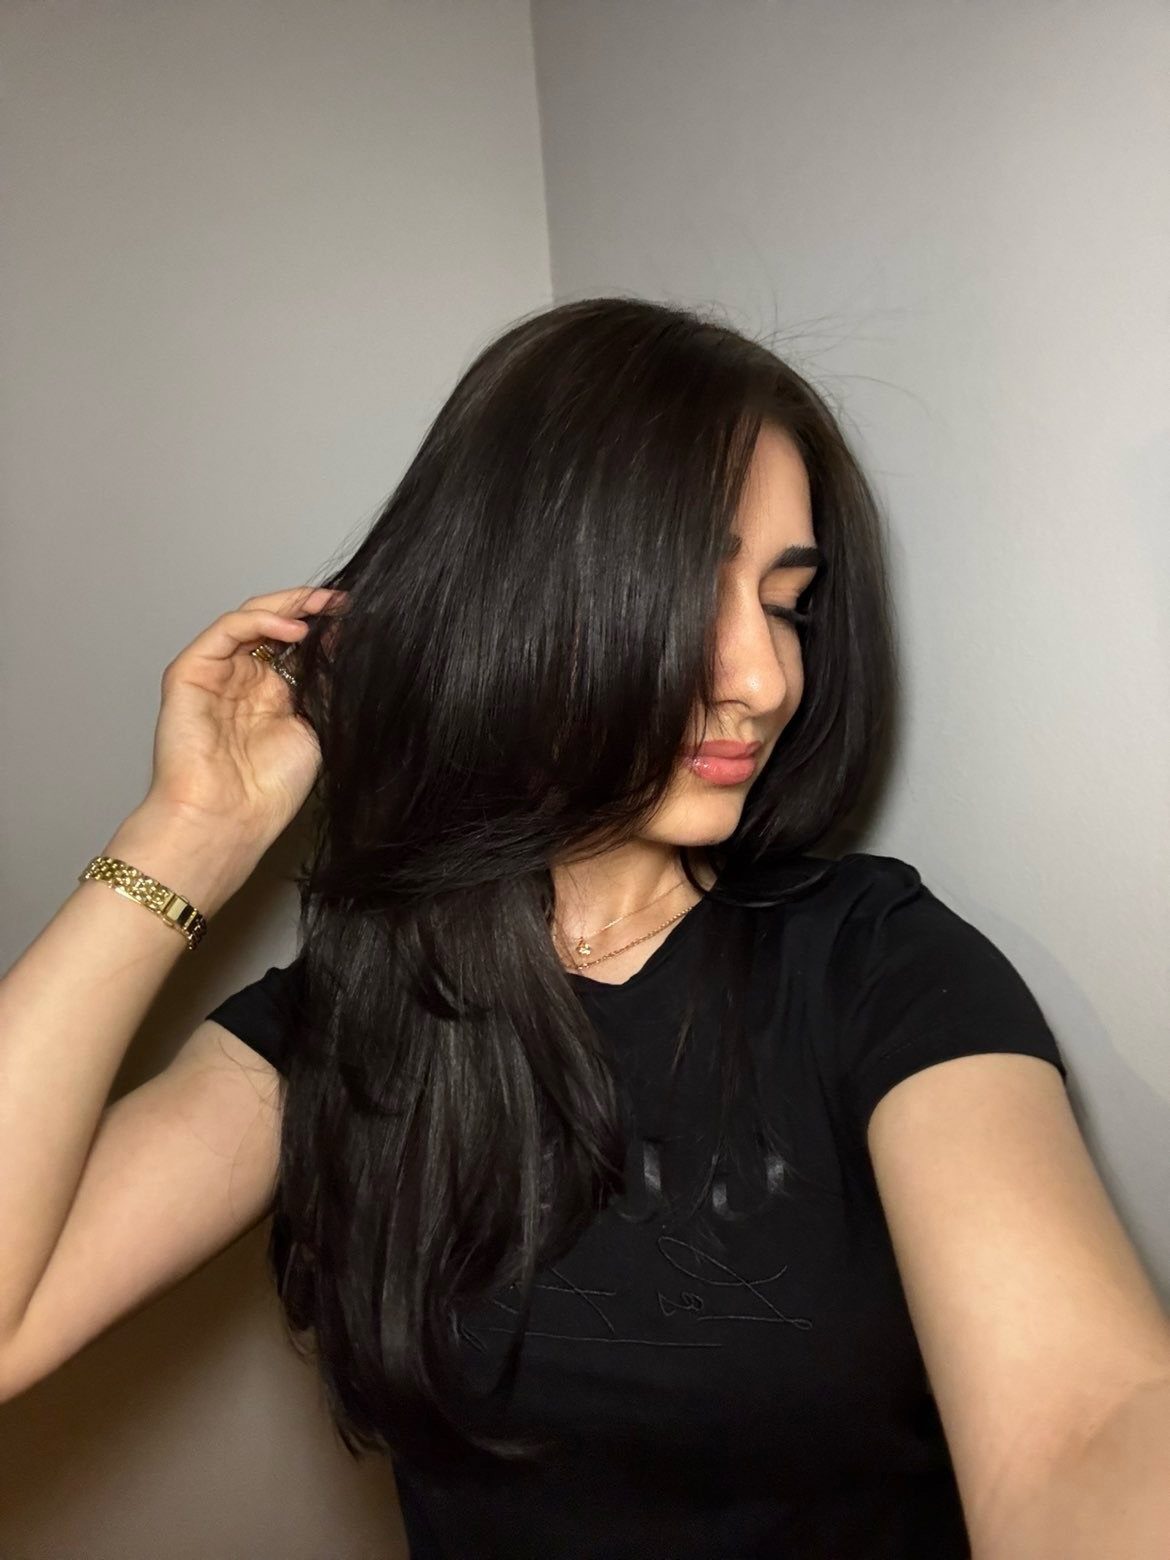
A deep side part throws most of the hair to one side, so a heavy curtain of it falls across part of the face.
The cascade looks polished with very little work, and it suits glossy, straight or softly waved hair best.
Part the hair well off-center, near the arch of the brow, and brush the larger side flat. A little smoothing serum keeps flyaways down.
It has a trade-off: the hair covers one side of the face, so a clip can pin it back if that side needs to show.
13. High Ponytail with Face-framing Strands
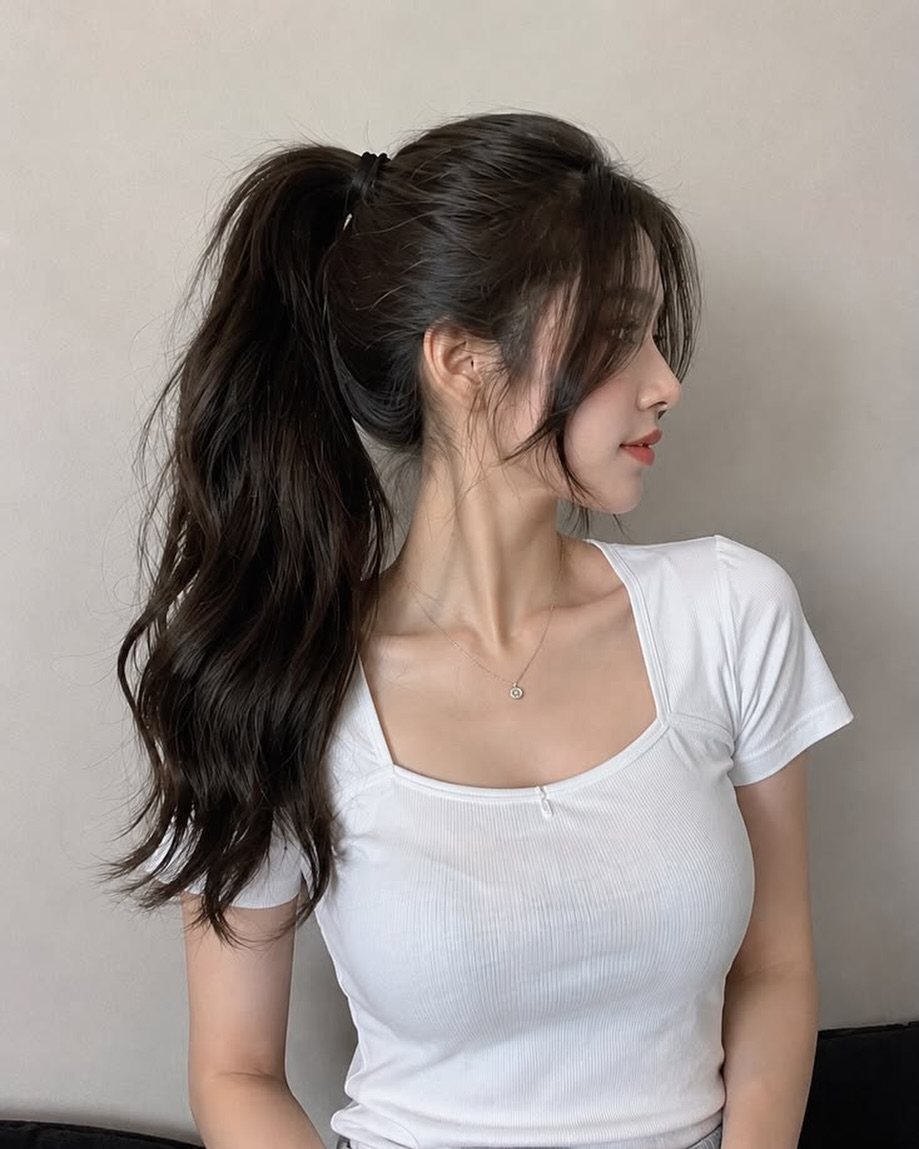
Pulling the hair up high and leaving a few strands out at the front gives a ponytail that looks polished without looking tight. Those loose pieces soften the hairline and the sides of the face.
Gather the ponytail at the crown with one elastic, then pull out the face-framing strands before you finish, so they fall evenly on each side. Smooth the rest back so the contrast reads.
Keep the strands thin. A thick piece left out tends to look like an accident instead of a choice.
Speaking of side-swept hairstyles, a side-swept ponytail is another great option for picture day.
14. Ribbon Braid with Bow
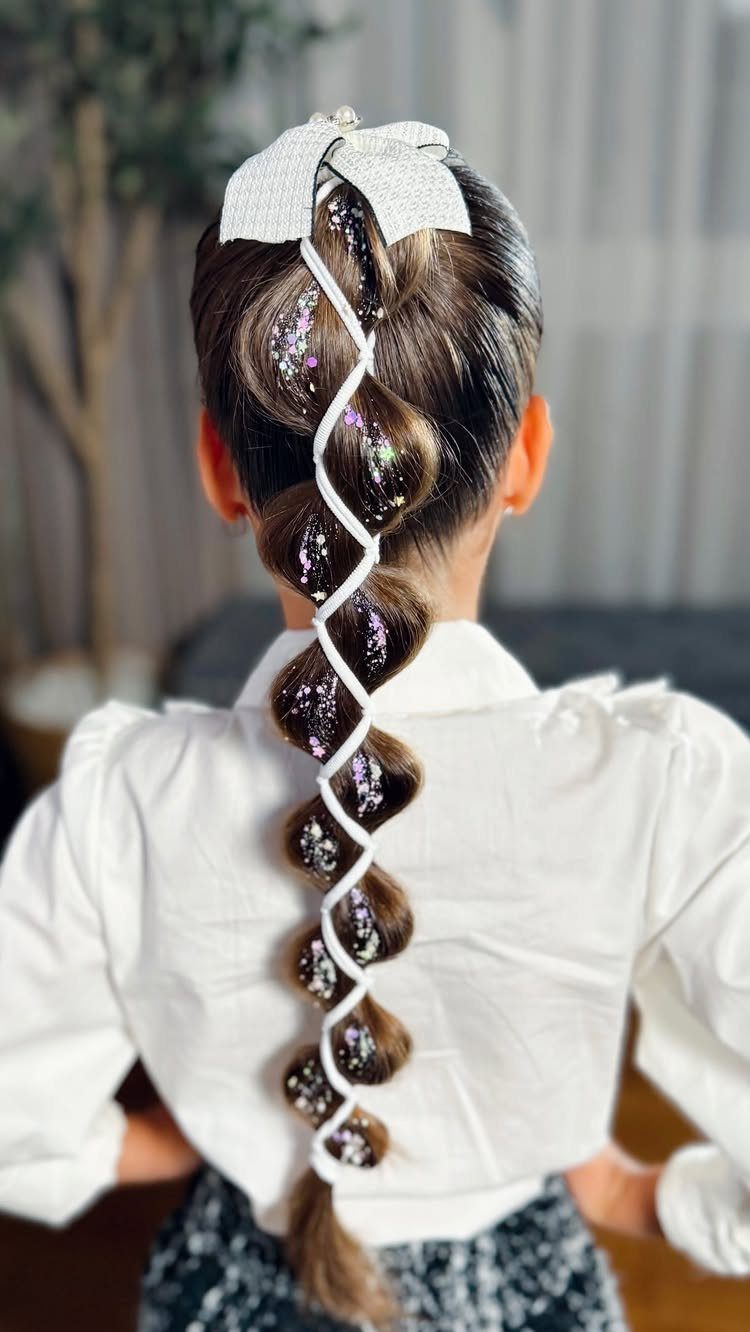
A white ribbon woven into a long braid and tied off in a large bow does the work of a hair accessory and a braid at once.
It suits a school day because the bow sits at the top of the braid and stays out of the way.
Start the ribbon at the top of the braid and treat it as one extra strand. Leave enough length at the bottom to tie a full bow, since a short tail gives a small, weak one.
I would pick this over a plain braid with a clip. The ribbon keeps the braid snug, and it reads as finished from the back.
15. Waterfall Braid
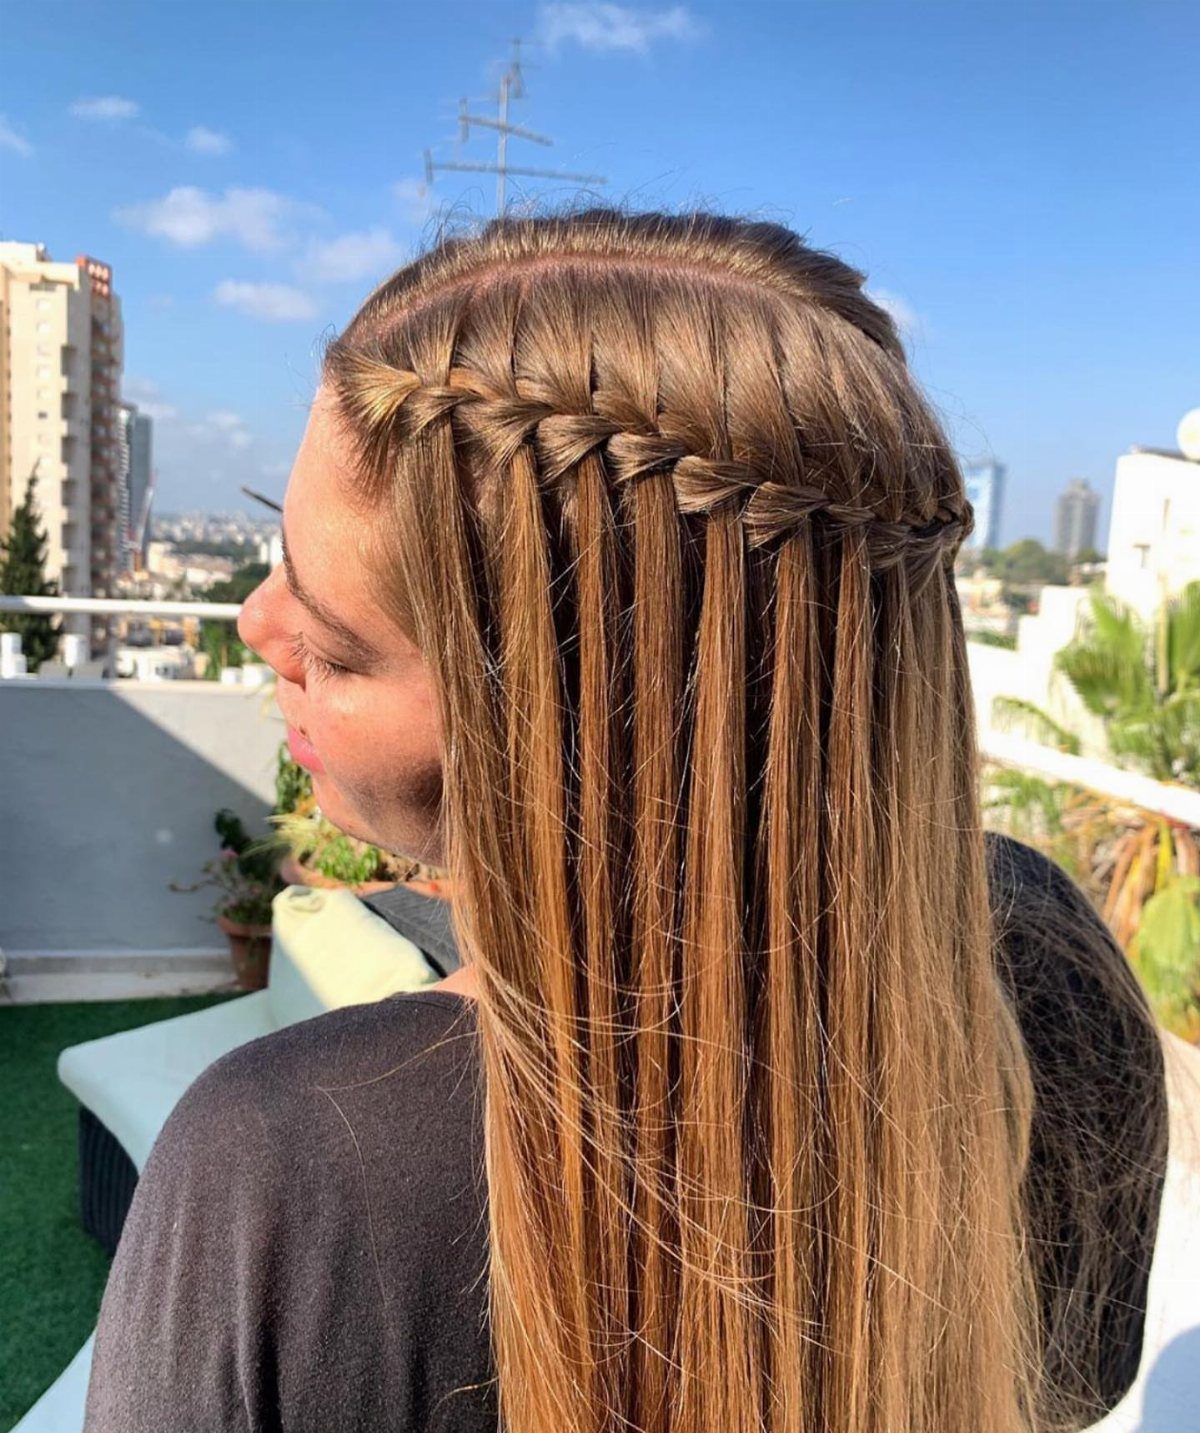
Long, straight hair is where a waterfall braid pays off. The braid sweeps across the head in a horizontal line while the hair below it hangs free, so the length stays on show.
Drop a strand from the braid at each turn instead of carrying it along; that dropped hair makes the falling effect.
A thicker braid looks fuller, so take larger sections as you go and pull the edges out slightly once it is done.
It takes more practice than a headband, so try it once before the morning that matters.
16. Cornrows with Curly Sections
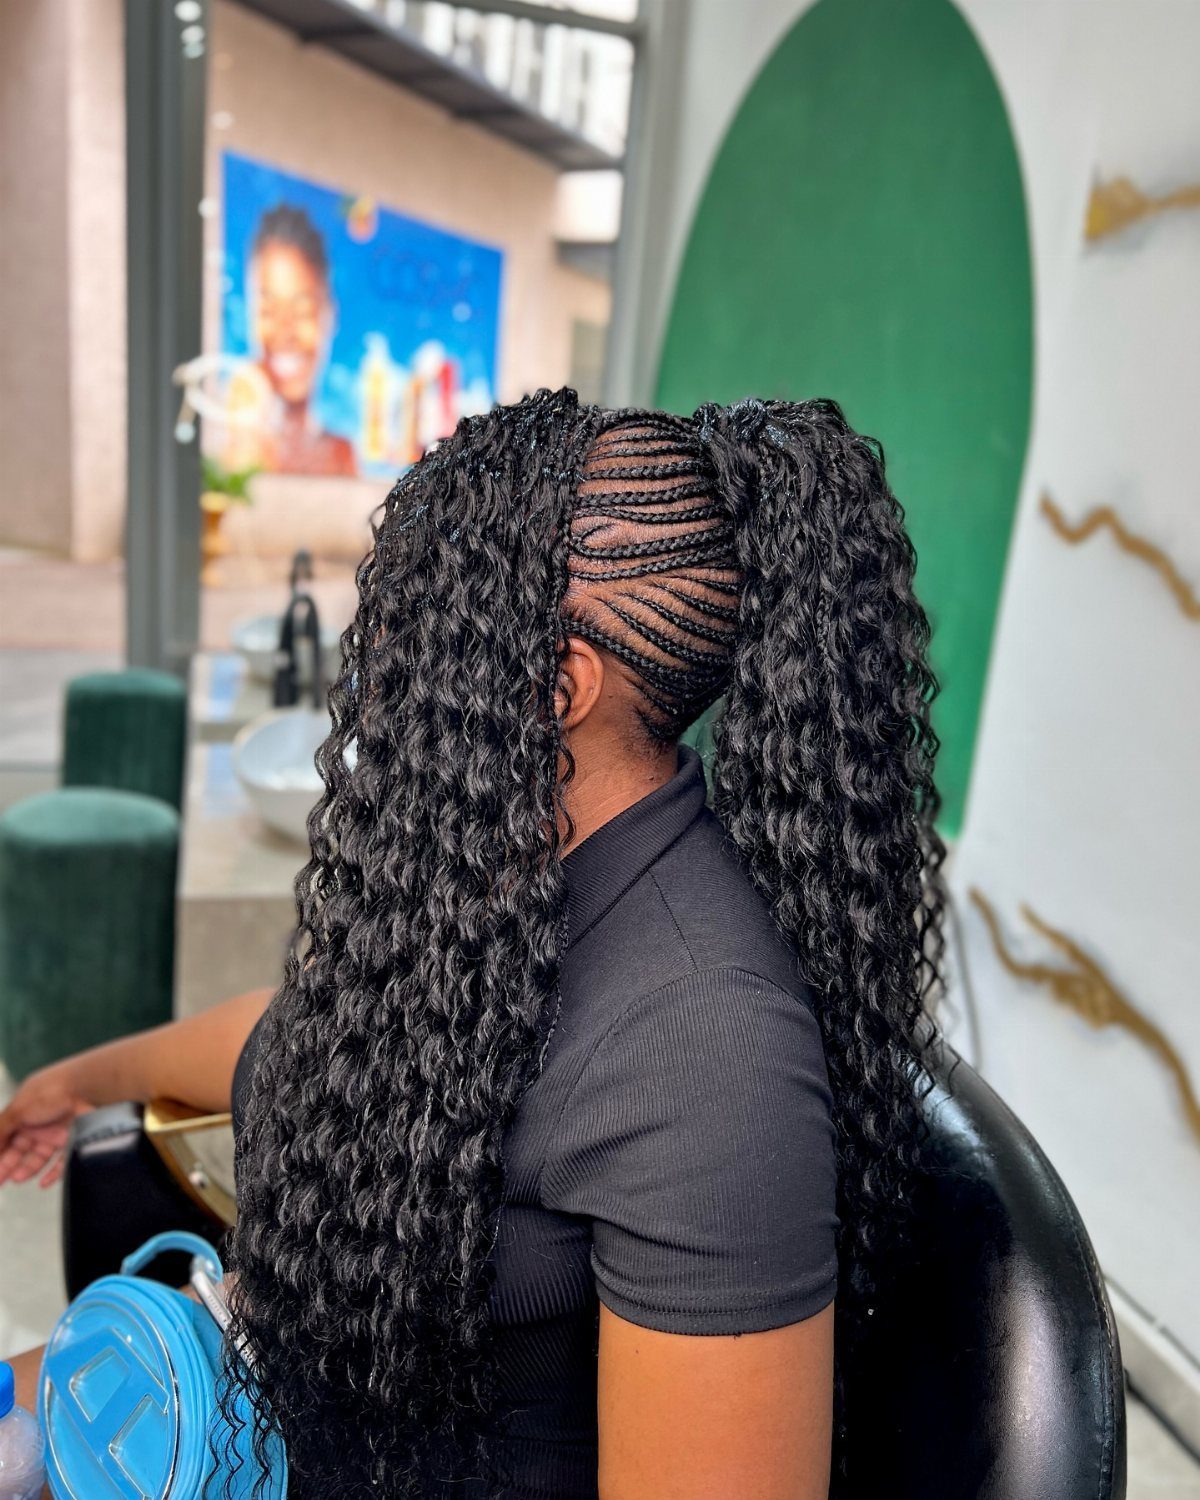
Narrow braids run flat against the scalp on one side, while the rest of the hair stays curly and splits into two long sections.
The pairing keeps the curl pattern as the main event and gives the side a clean, structured edge.
Part the hair down the middle first so the 2 curly sections come out even. Then braid the side before gathering the curls, which keeps the edges tidy.
Scalp braids take real time, so I would plan this for a day with room to spare. They hold well, and the curls need little more than a light moisturizer to look defined.
17. Elastic Sections with Bow
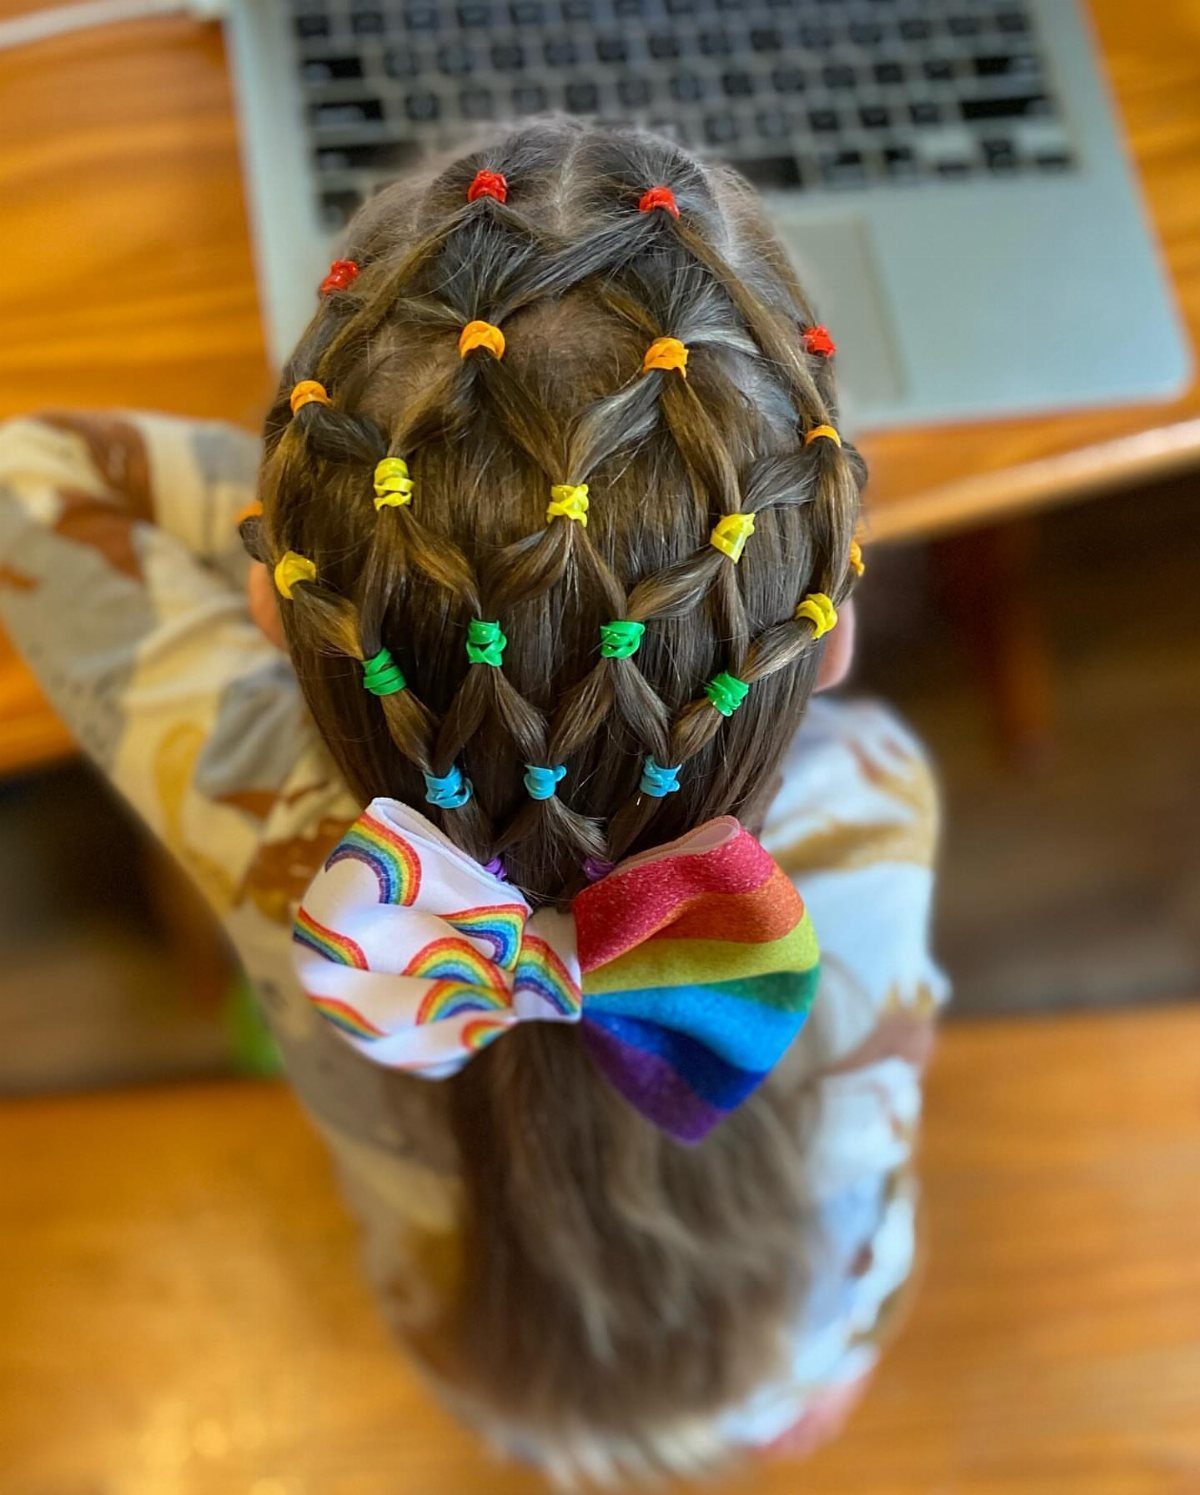
Rows of small sections, each tied off with a colorful elastic, turn the whole back of the head into a pattern.
The big rainbow bow on top pulls the look together, and it suits a child who wants the day’s hair to be fun.
Part each row with the tail of a comb and keep the sections about the same size so the rows stay straight. Pick elastics in a repeating color order for a deliberate look.
It takes patience, since every section is its own elastic.
18. Braided Low Bun
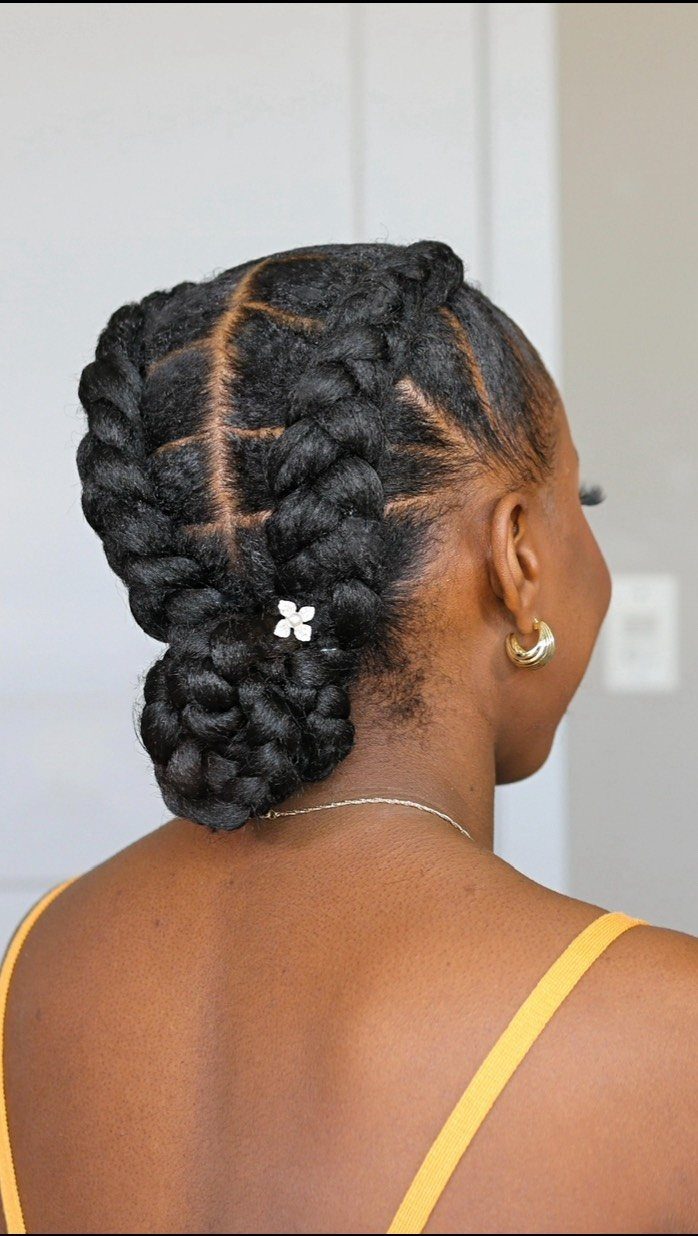
Large braids gathered into a low bun give a heavy, sculpted shape at the nape. A small white clip at the base finishes it and covers where the braids meet.
Wrap the braids around each other in one direction, then pin or clip the bun so the weight sits low and centered.
Thick braids carry a lot of heft, so a single flimsy clip will not hold alone; use pins underneath, with the white clip on top as the accent.
I like it on a day that needs the hair fully off the neck and shoulders, with no loose ends to fuss over.
Keep Styles Comfortable and Durable
Do a trial run before the morning that counts. Style the hair the way you plan to, let the wearer play hard for a while, then check what is left.
A style that feels tight or bothersome gets pulled at, and a hand in the hair can undo the whole thing fast. Ask how it feels after an hour of wear, not just in the mirror.
Braids, ponytails and buns stay put longest. If the trial run shows an elaborate style coming apart, I would drop to a simpler one rather than hope it survives.
Any clip or headband needs to be anchored well. Give it a gentle tug and a head shake before leaving the house, and add a pin or a second clip if it shifts.
Frequently Asked Questions
How should I wear my hair for picture day?
Go with a simple style that lasts all day: a half up, a high ponytail with a few thin face-framing strands left out, a braid, or natural texture with nothing added.
For hair that lasts a full school day, a braid, ponytail or bun is the safest pick, and a low side ponytail with a couple of loose strands framing the face holds up well too.
What hairstyle looks best in photos?
Big, loose curls fill the frame well, especially when you curl larger sections with a wide barrel and brush through them with your fingers. A high bun is the pick if you want the bone structure and neck to show.
Healthy hair left in its natural texture reads as the most genuine, and a patterned or textured headband shows up better on camera than a plain neutral one.
Can a child easily mess up their hair or pull out clips on picture day?
Yes, and that is why braids, ponytails and buns are the safest choices: they outlast elaborate styles.
Before heading out, tug a clip or headband lightly and shake your head, and if it slides, add a bobby pin or a second clip.
A style that feels tight gets pulled at, so do a trial run with some active play and check how it feels after an hour.
Does picture day hair need to look good from the front?
Yes, since the camera mostly sees the front. Pick styles that frame the face, such as thin face-framing strands, a high ponytail, or a headband across the top of the head.