Hair texture decides which of these half-ups is yours: curls pair well with Half-Up Twists or Twisted Bun and Curls, while straight hair gets its texture from Half-up Braids or a Thick Fishtail Braid.
The list runs from a simple Half-Up Ponytail to the Bridal Half Up Half Down Hairstyle, with Hair Accessories and Finishing covering the extras.
Length and color narrow it further: Chunky Braid Balayage and Loose Twist for Highlights show off color, and Knotty Style for Long Hair is the one built for length.
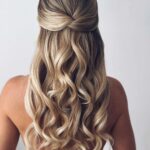
1. Bridal Half Up Half Down Hairstyle
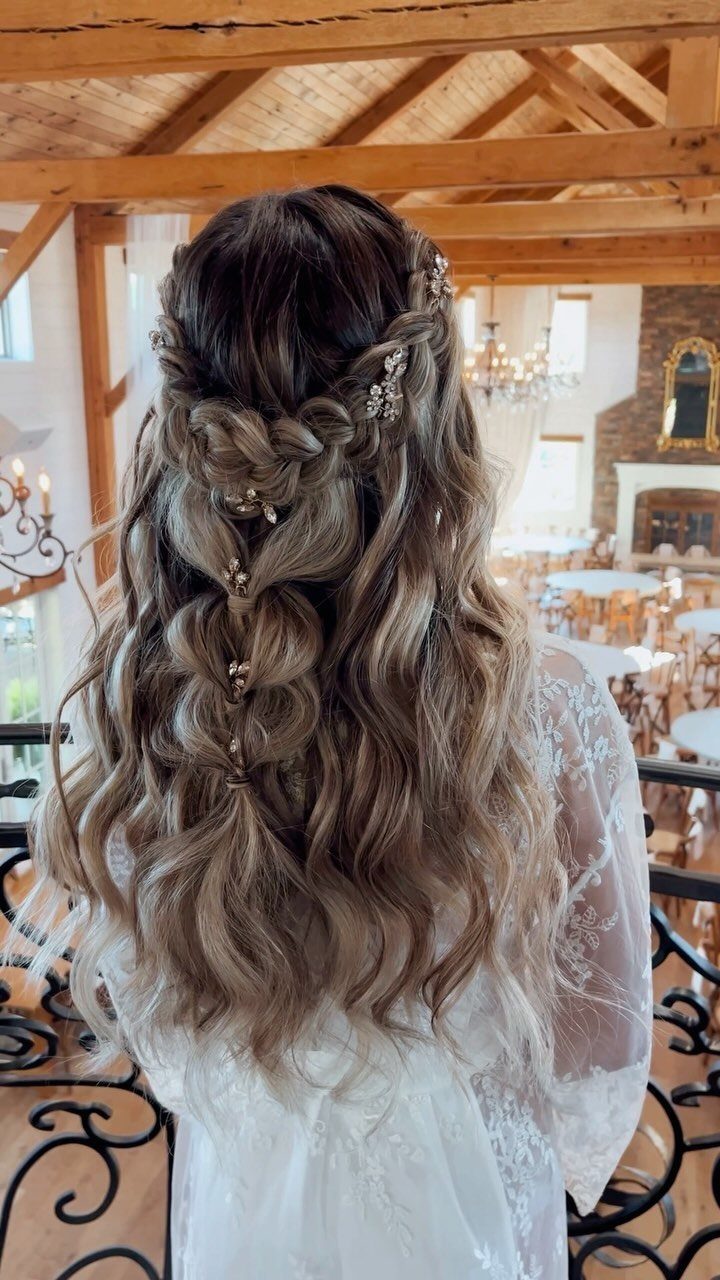
Loose lace braids pinned back at the sides give this bridal half-up its modern edge, while the long waves stay free below. The plaiting is the only fussy part, and I like that.
Hair jewelry set along the braid adds shine without crowding it. Keep the braids relaxed, because tight ones fight the soft, flowing shape.
2. Half-Up Half-Down Hairstyle
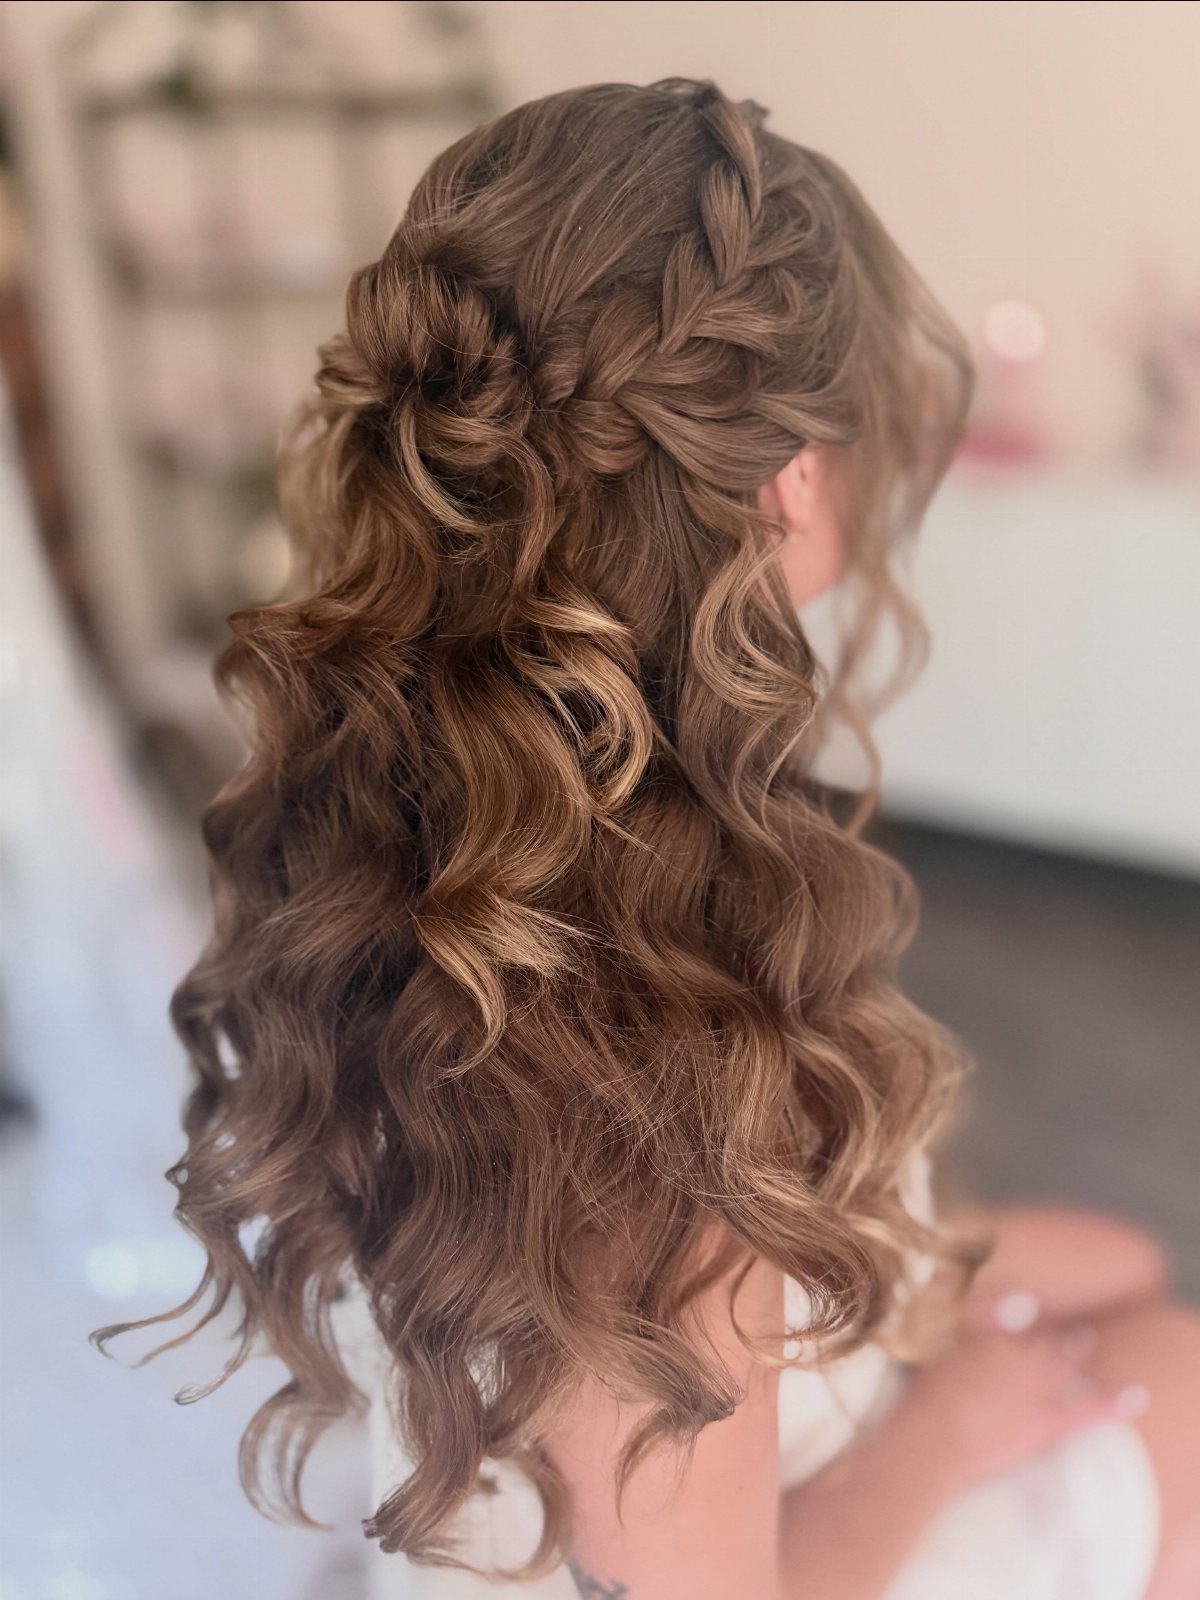
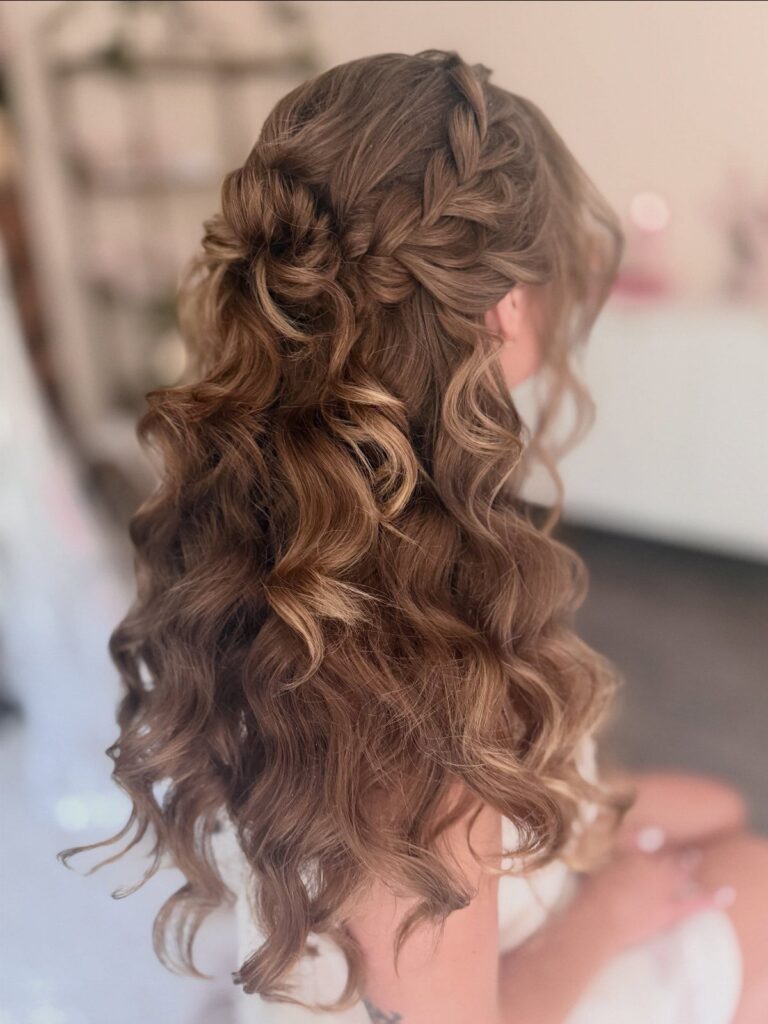
For this look, braid or twist a couple of small front sections, pin them together into a small bun at the crown, and leave the curled lengths loose underneath.
For curly hair, it keeps the top off your face without flattening the pattern below.
I’d keep the bun compact so the long curls stay the main event.
3. Half-up Braids
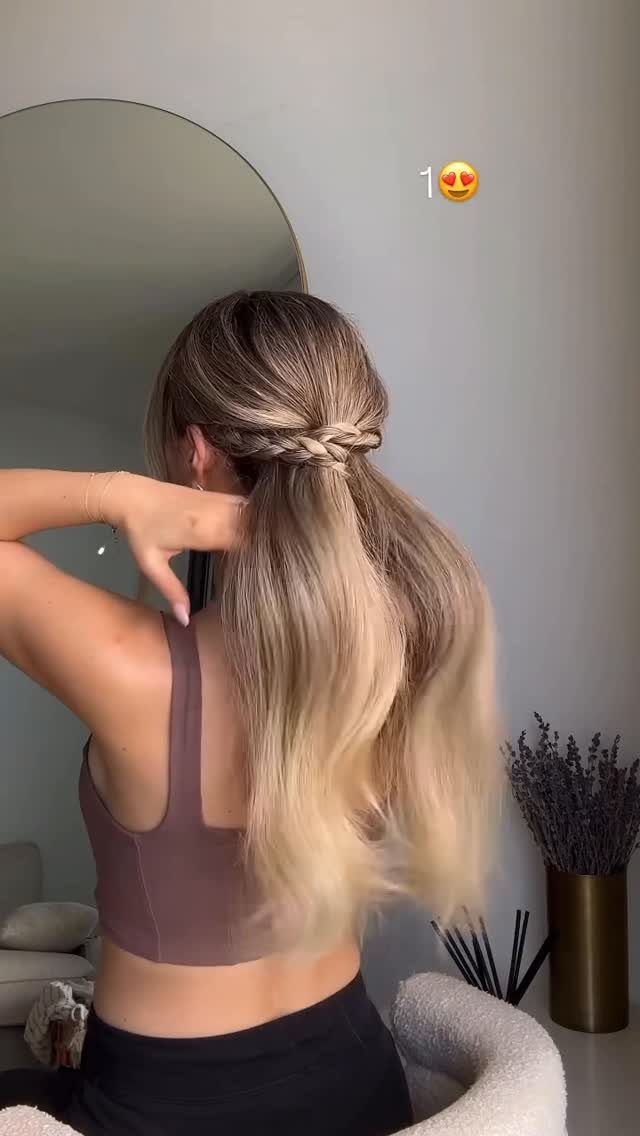
Braiding the top section instead of simply twisting it gives a half-up ponytail some built-in texture. The lower lengths stay down, and on long blonde hair like this the contrast between plaited and loose is the whole look.
I’d keep the lengths smooth so the braid reads as the detail.
4. Half-Up Ponytail
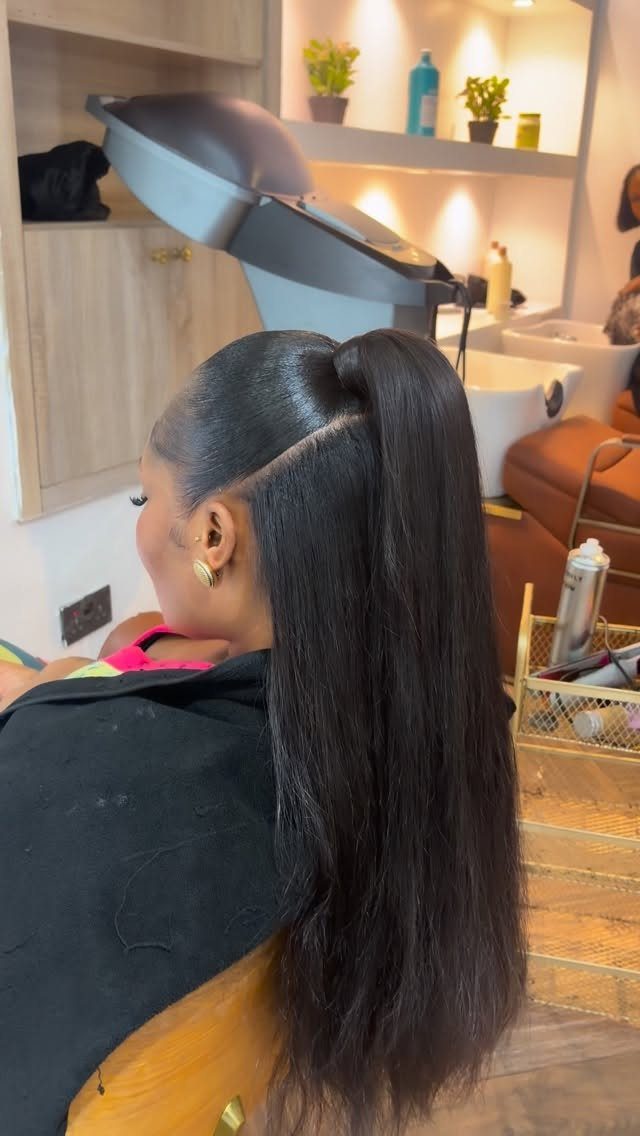
Gather the upper section high, tie it off, and let everything beneath fall loose. Placed up at the crown, the ponytail adds lift, and on long dark hair it shows off the length without any extra styling.
Gathering just the top section into a ponytail takes under 2 minutes, and it keeps hair out of your eyes while still looking put together.
5. Curly Half-Up Style
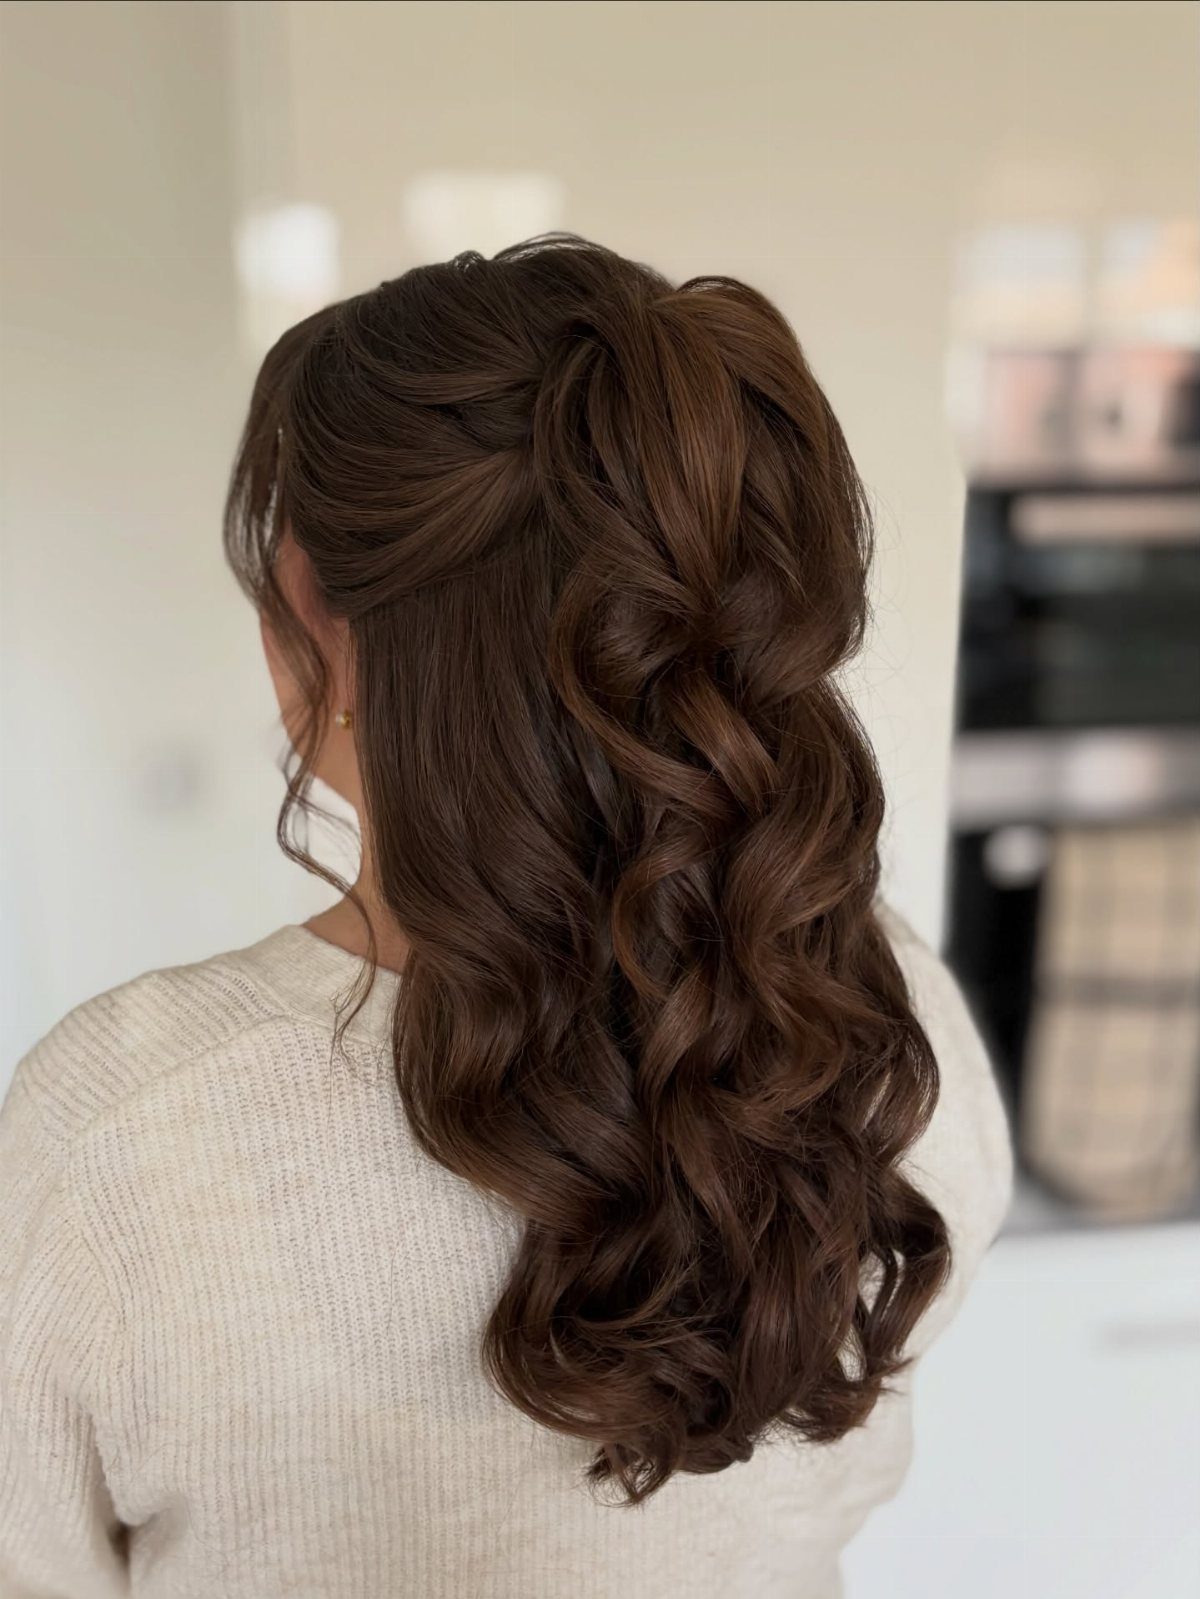
Twisting the top section at the crown holds the front back and leaves the curls below free to cascade. Curls bring their own texture and volume to a half-up, so a simple twist is plenty.
I’d skip anything tight or sleek up top, which can make the shape look flat next to the curls.
6. Half-Up Style with Waves
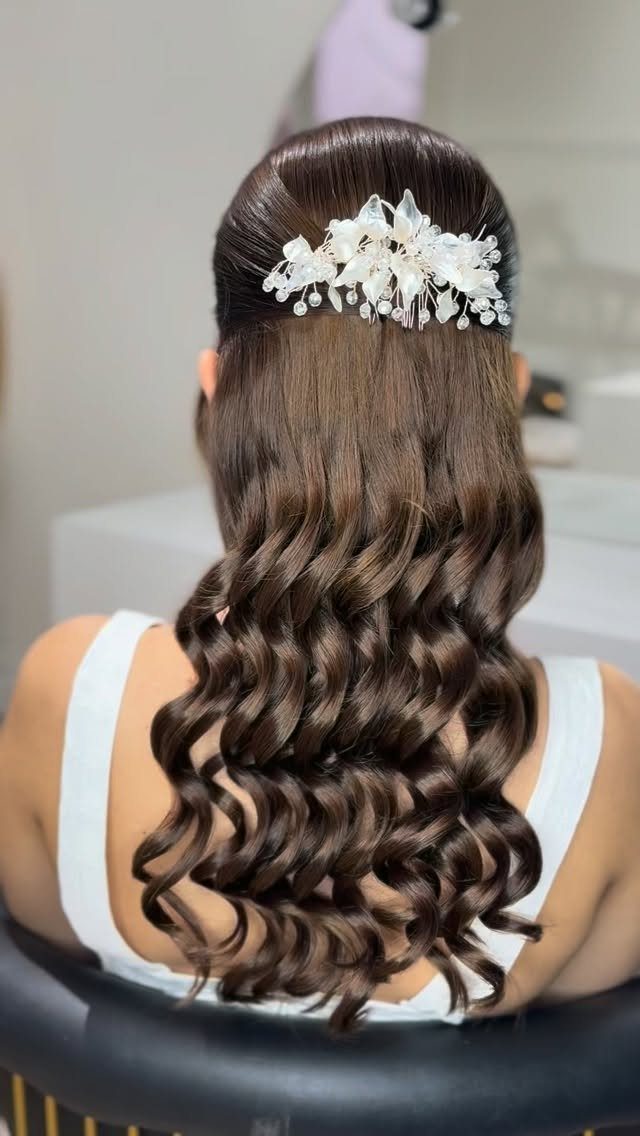
Waves add movement to the lengths left down, and a white floral hairpiece pinned into the half-up gives the style a finished feel. Place it where the gathered section meets the loose hair, so it covers the join.
Dark hair makes a white piece stand out clearly. For a quieter look, choose a smaller one.
7. Curls with Crown Braid
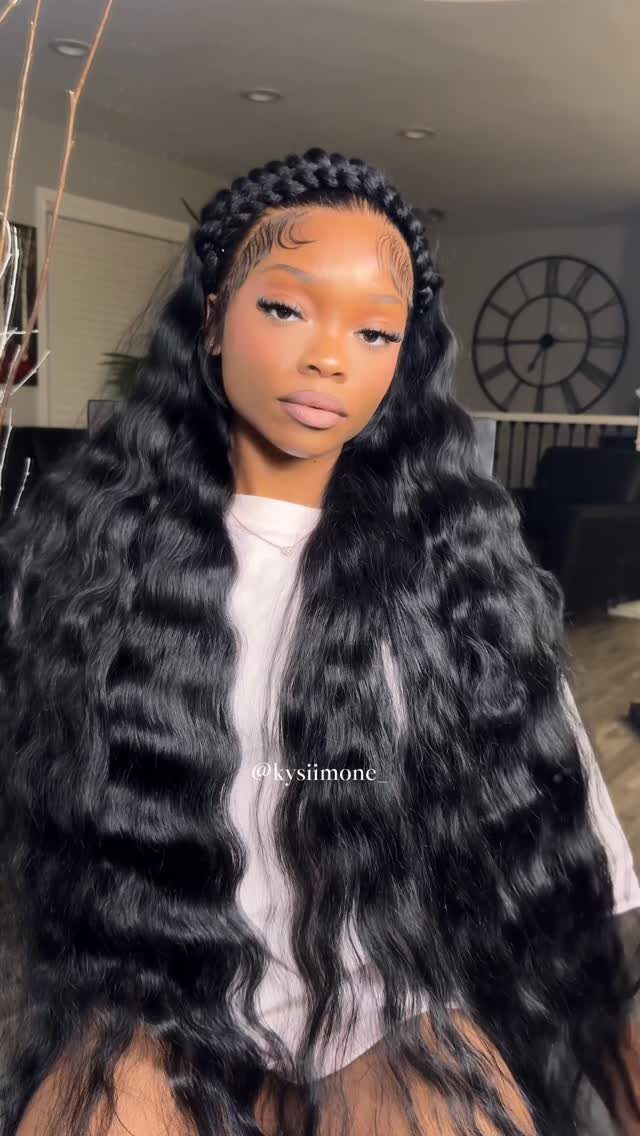
A flat, lacy braid circling the head sits above the waves like a headband made of hair. It keeps the front controlled, so the curls below stay loose and glossy.
I’d leave the braid slightly loosened and pull gently at the edges to get that lace effect. Tight plaiting looks stiff against long waves.
8. Teased Crown for Curls
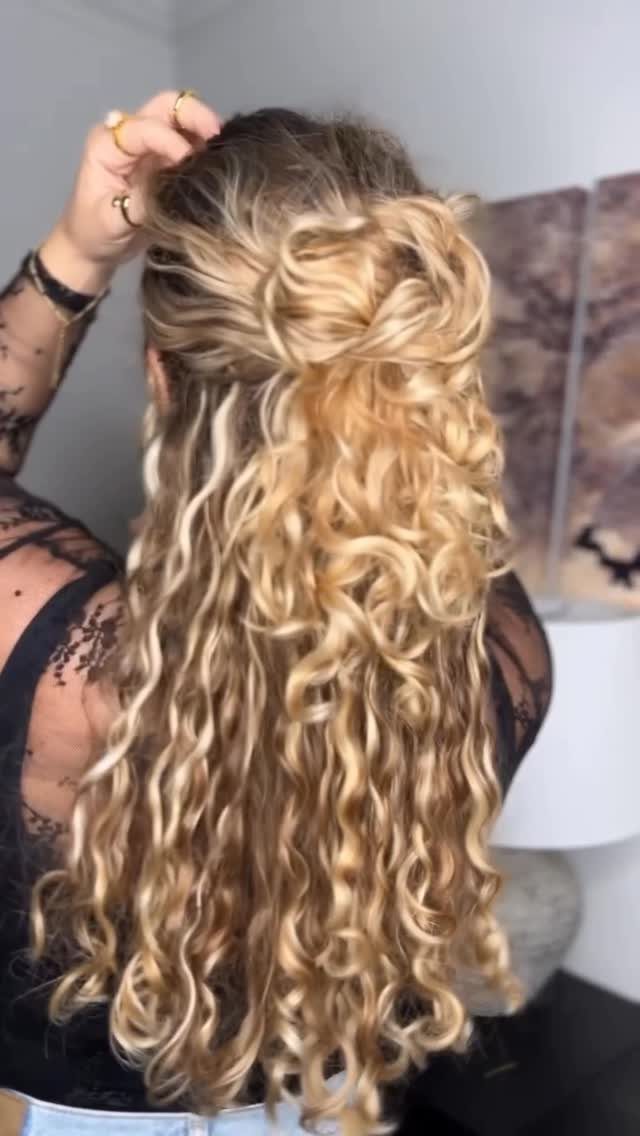
Volume at the crown is what makes this one work on curls. Tease the roots of the upper section, smooth the surface lightly, then twist the sides back so the height holds above the curls below.
Blonde curls show the lift well from behind. I’d keep the twists loose so the crown stays the focus.
9. Half-Up Top Knot
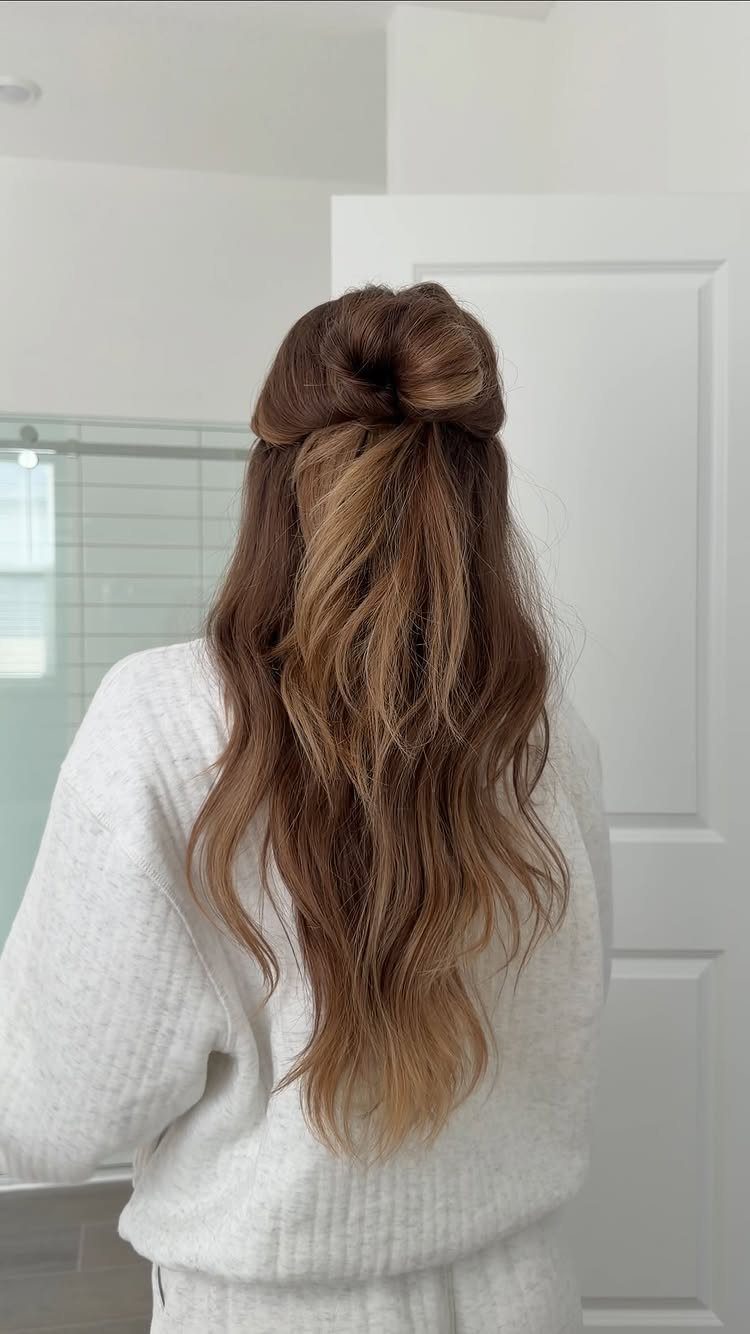
One loose bun at the crown, everything else left down: that is the whole idea, and it is nearly impossible to get wrong. Wavy hair gives the knot a soft, full shape without much effort.
A messy, slightly undone knot suits long waves better than a tight, polished one. Pulling a few strands out near the face finishes it in under a minute.
10. Half-Up Twists
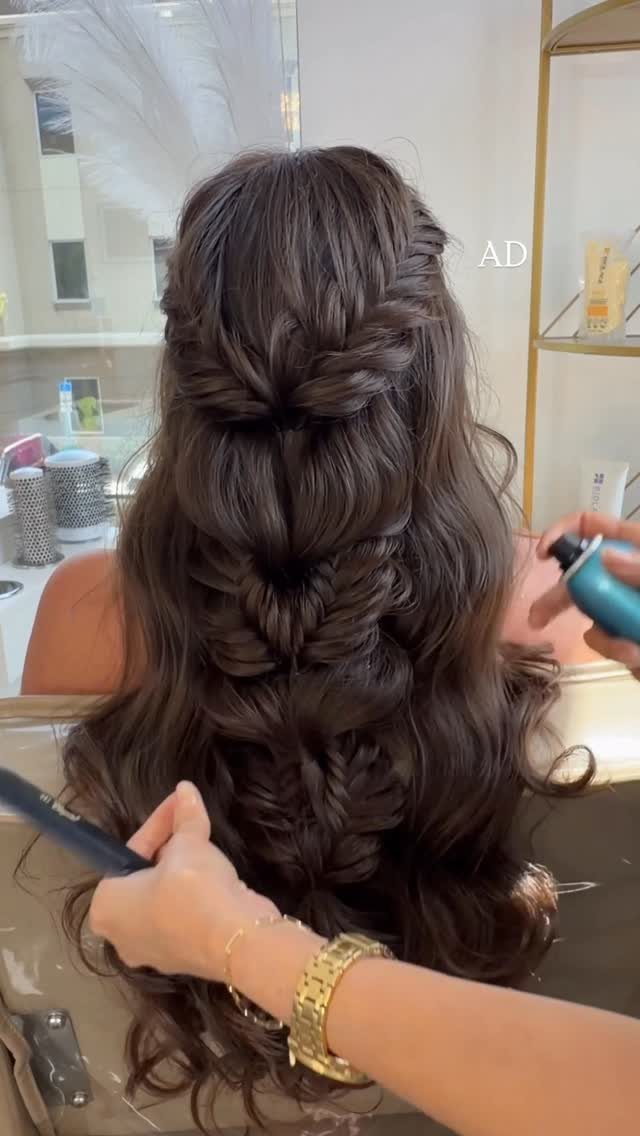
Twisting sections back, rather than braiding them, gives a pulled-back look that is quicker and softer. Wrap 2 strands around each other, pin them at the back, and let the curls fall beneath.
Mixing a couple of twists with a braid adds variety. On dark, textured hair, a light mist of spray is enough to keep small twists from loosening through the day.
11. Half-Up Style with Bow
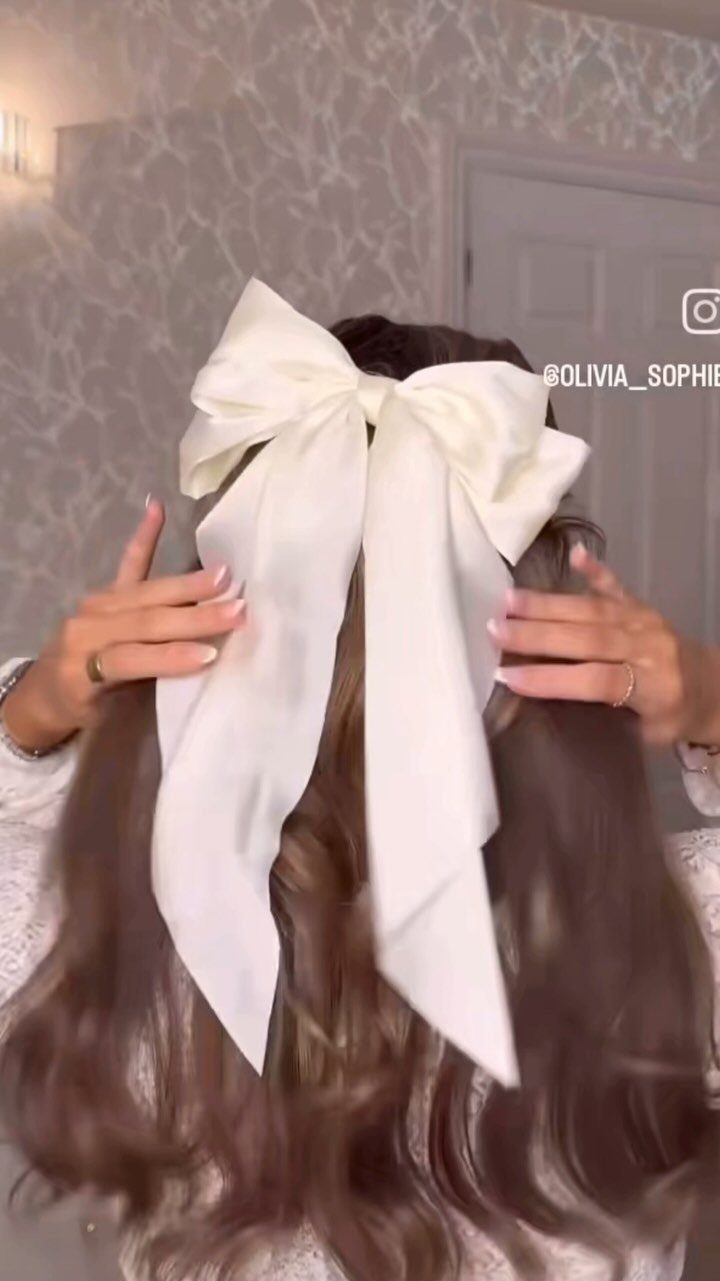
A large bow at the back of the head does the work of a ponytail holder and a decoration at once.
Pull the top section back, fasten it with a pin or small elastic, then place the bow right over the spot where the hair is joined so it hides the hold.
A white bow reads clearly against brown hair. Wavy lengths below keep it relaxed, and I’d pick a bow in a fabric with some body so it doesn’t flop.
12. Half-Up Style with Flowers
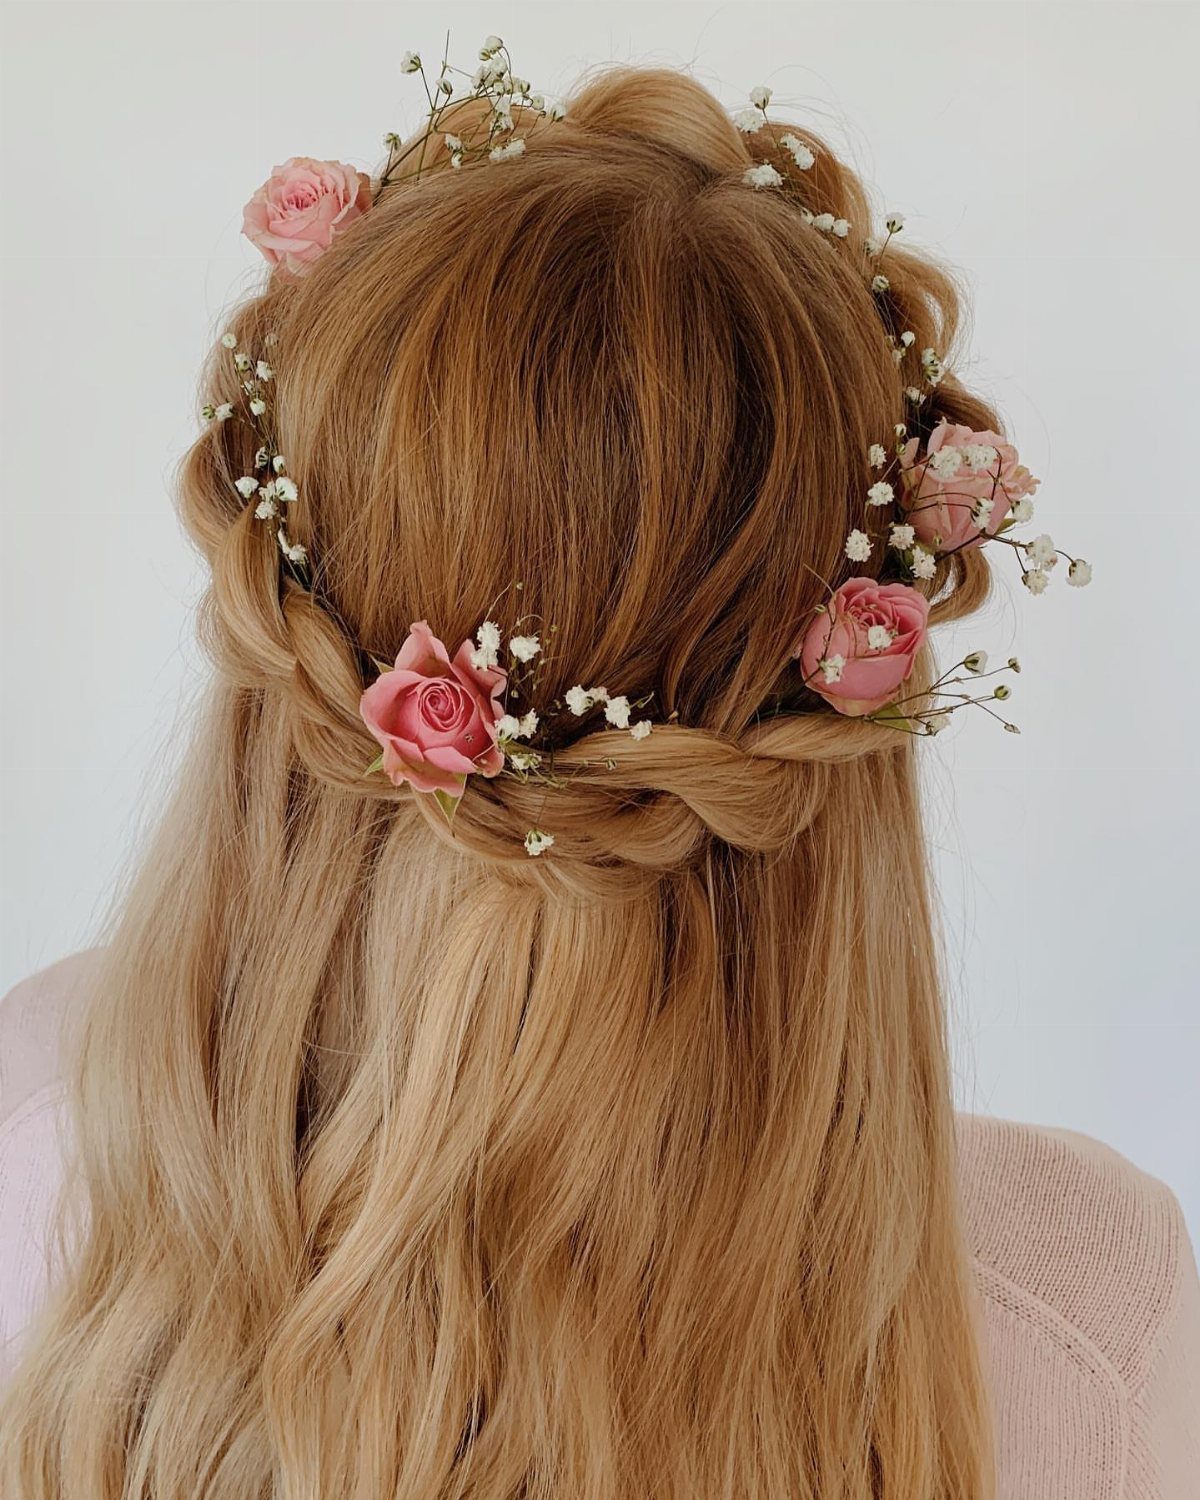
Fresh roses and baby’s breath turn a basic half-up into something for a wedding, a party or a photo day. Pin the gathered section first, then tuck small stems in along the join.
Real flowers wilt, so I’d add them last, just before you head out.
13. Mini Bouffant with Waves
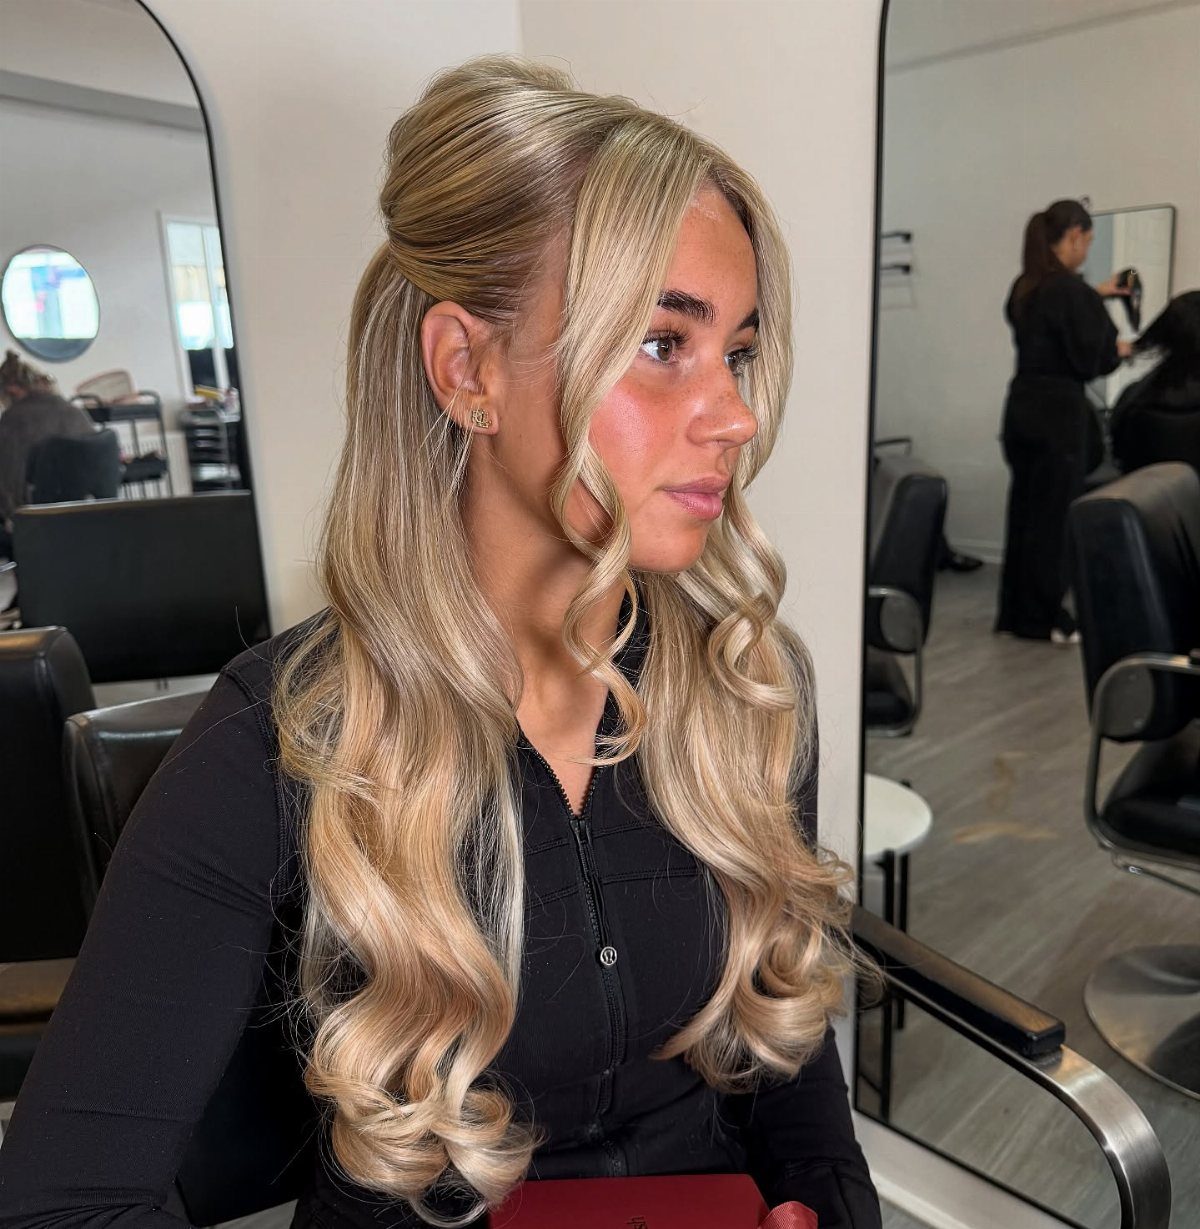
A small bouffant is a lift at the crown, pinned back so the long waves stay loose underneath. On blonde hair it adds height without turning the look formal.
I’d tease only the roots, smooth the top layer over the bump, and pin it at the back. Keeping the volume modest is what makes it read as a mini bouffant instead of a full 60s shape.
14. Braided Rose
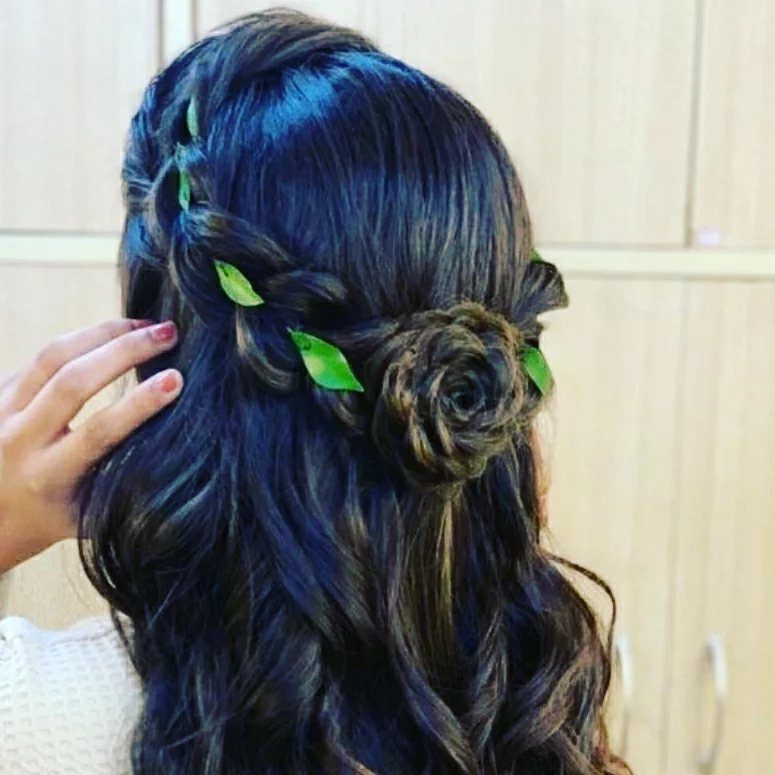
Shaping a braid into a rose at the back of the head turns a plain half-up into the detail people ask about. Long, dark waves hang below it, so the rose is the only fussy part.
Braid loosely, then coil the braid around itself and pin it flat against the head. Tugging the loops gently apart makes the petals fuller.
I’d add green leaves only if you want the garden look.
15. Boho Waterfall Braid
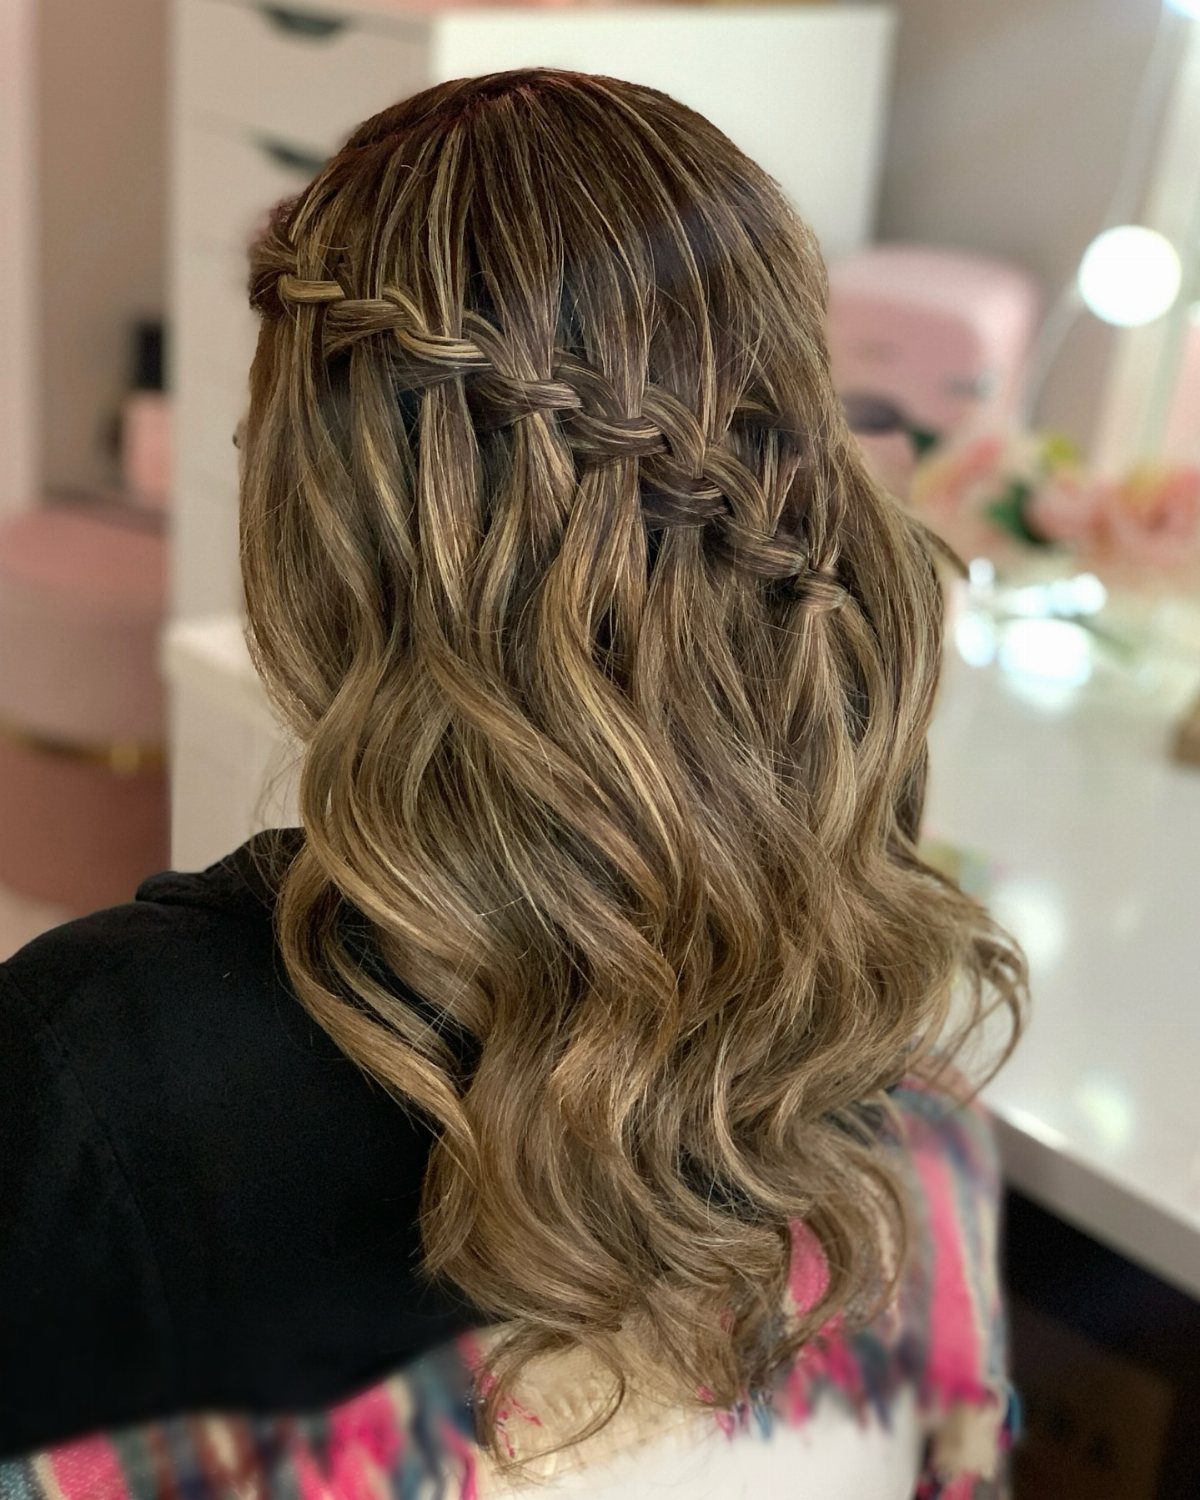
Each pass of a waterfall braid drops a strand instead of picking it up, and that is how the loose pieces cascade through the plaiting.
Here the braids join across the crown, so the lengths below look like they are spilling out of them.
Wavy brown hair gives the dropped strands enough body to stay visible. Starting on one side and crossing to the other takes some practice, so I’d try it once on a day with no plans.
16. Voluminous Curls with Side Braid
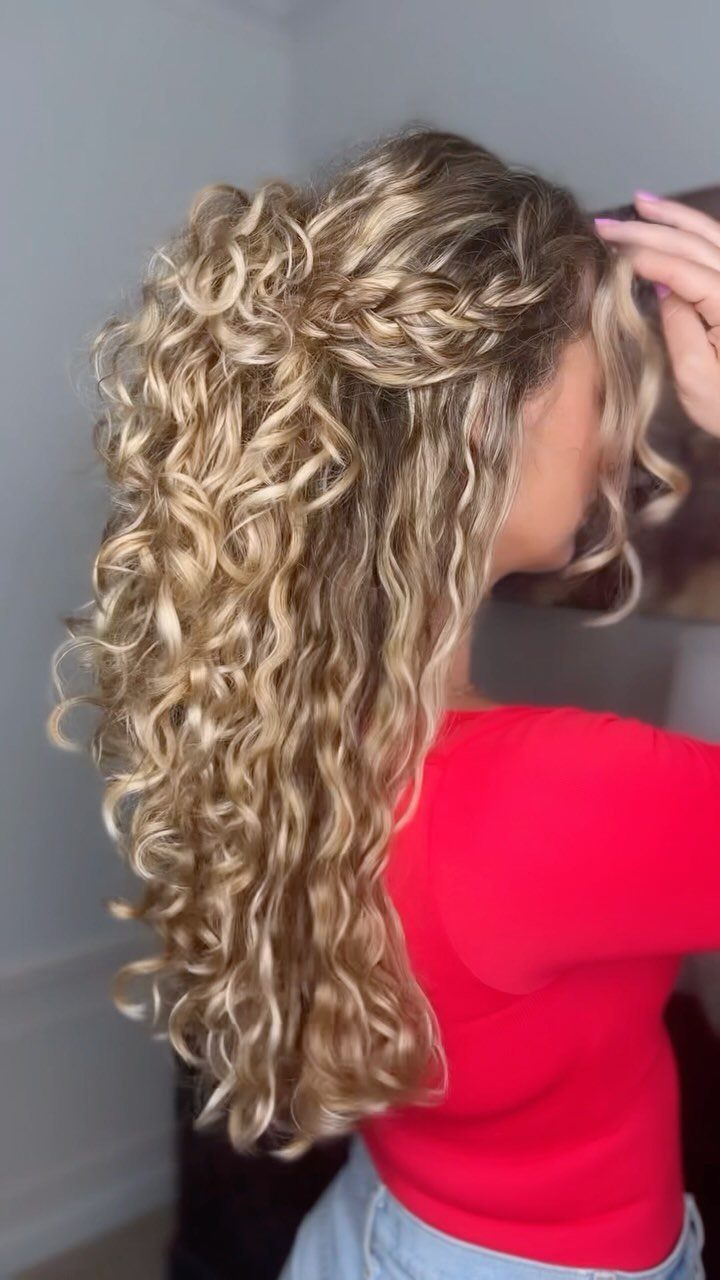
Big, bouncy curls need very little help, and a single thick braid swept across the crown is enough. It keeps the front controlled and leaves the volume to do the talking.
Make the braid chunky, not tight, so it sits against the curls instead of fighting them. I’d braid before the curls are brushed out, since a looser, fluffier braid matches the shape better.
17. Chunky Braid Balayage
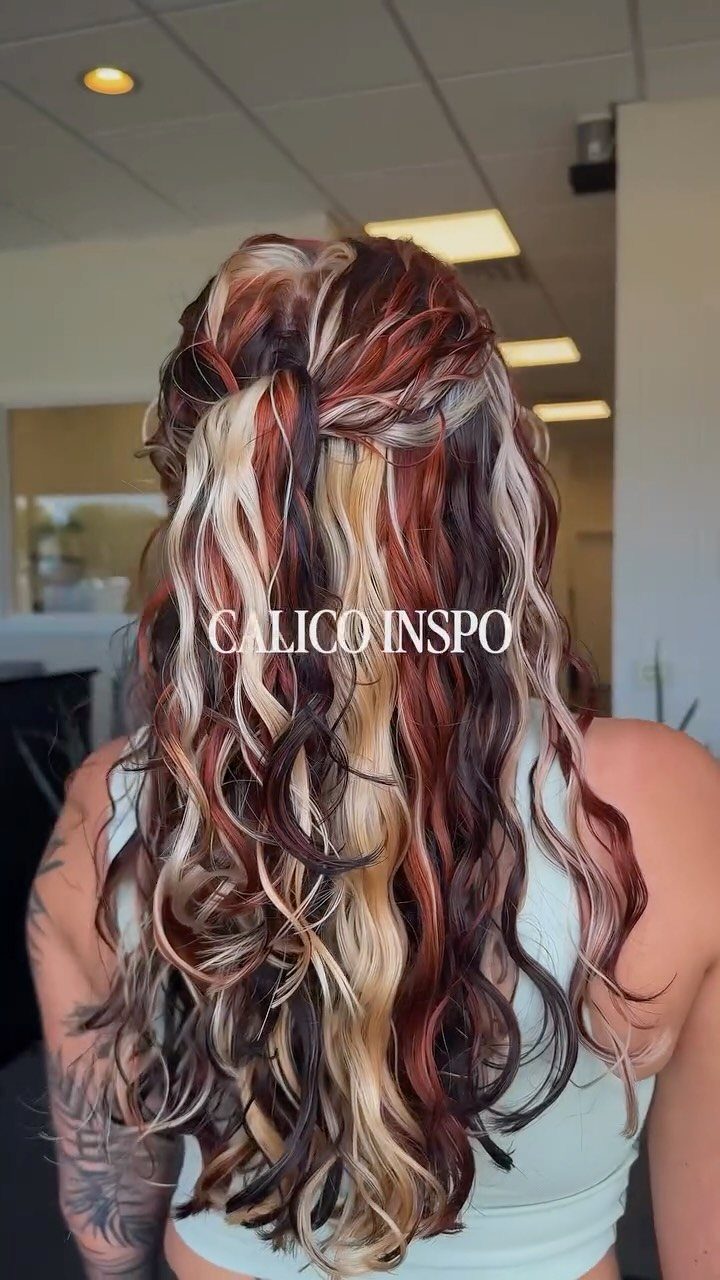
Color is the point here. A chunky braid pulls the blonde and reddish balayage strands together, so the shades show side by side instead of blending away.
Wide, thick sections do this best. Thin braids hide the contrast, so I’d keep each section generous and pull the edges out slightly.
Wavy lengths below keep the whole thing relaxed. This is a good one to show a stylist if you’re deciding where the lighter pieces should fall.
18. Thick Fishtail Braid
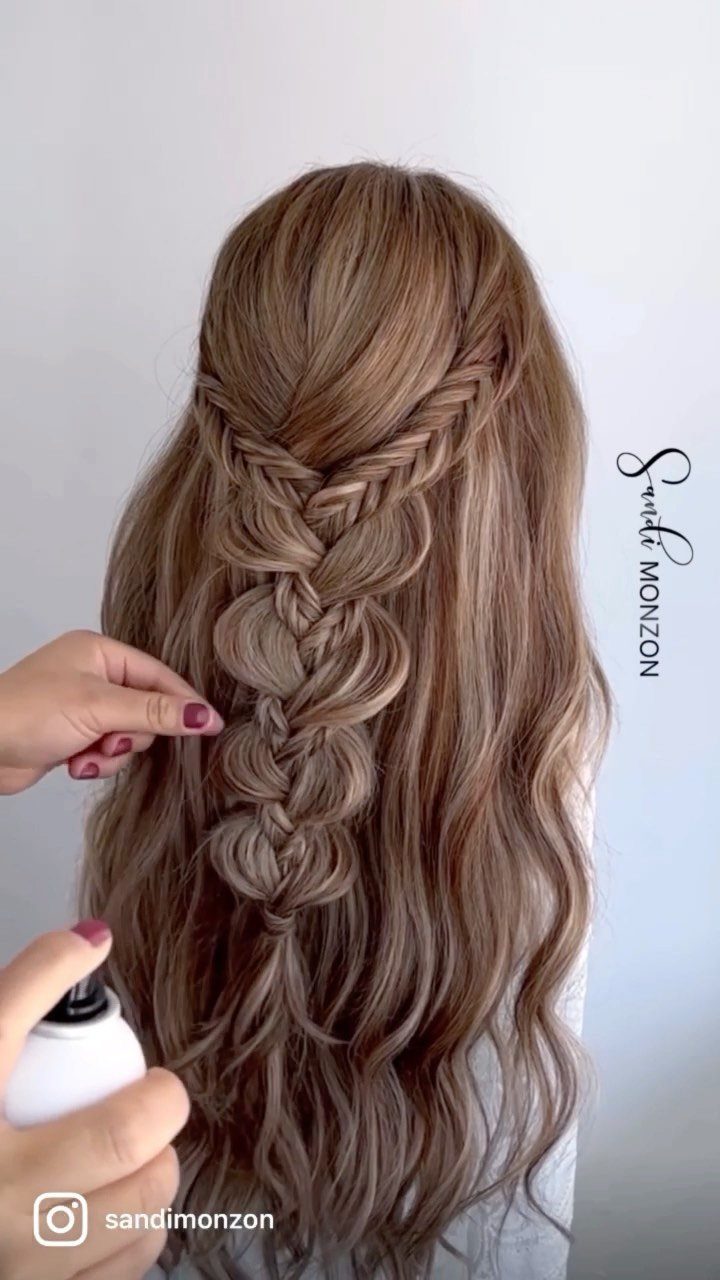
A fishtail braid usually looks tight and intricate, and I like this version because it doesn’t. Loose and thick, it runs down the center of the back and the rest of the long, wavy hair stays down.
Split the section in two, then keep crossing thin pieces from the outside of one half over to the other. Pull the weave apart afterward to make it chunkier.
It’s a minimalist detail, so I’d skip the accessories.
19. Twisted Bun and Curls
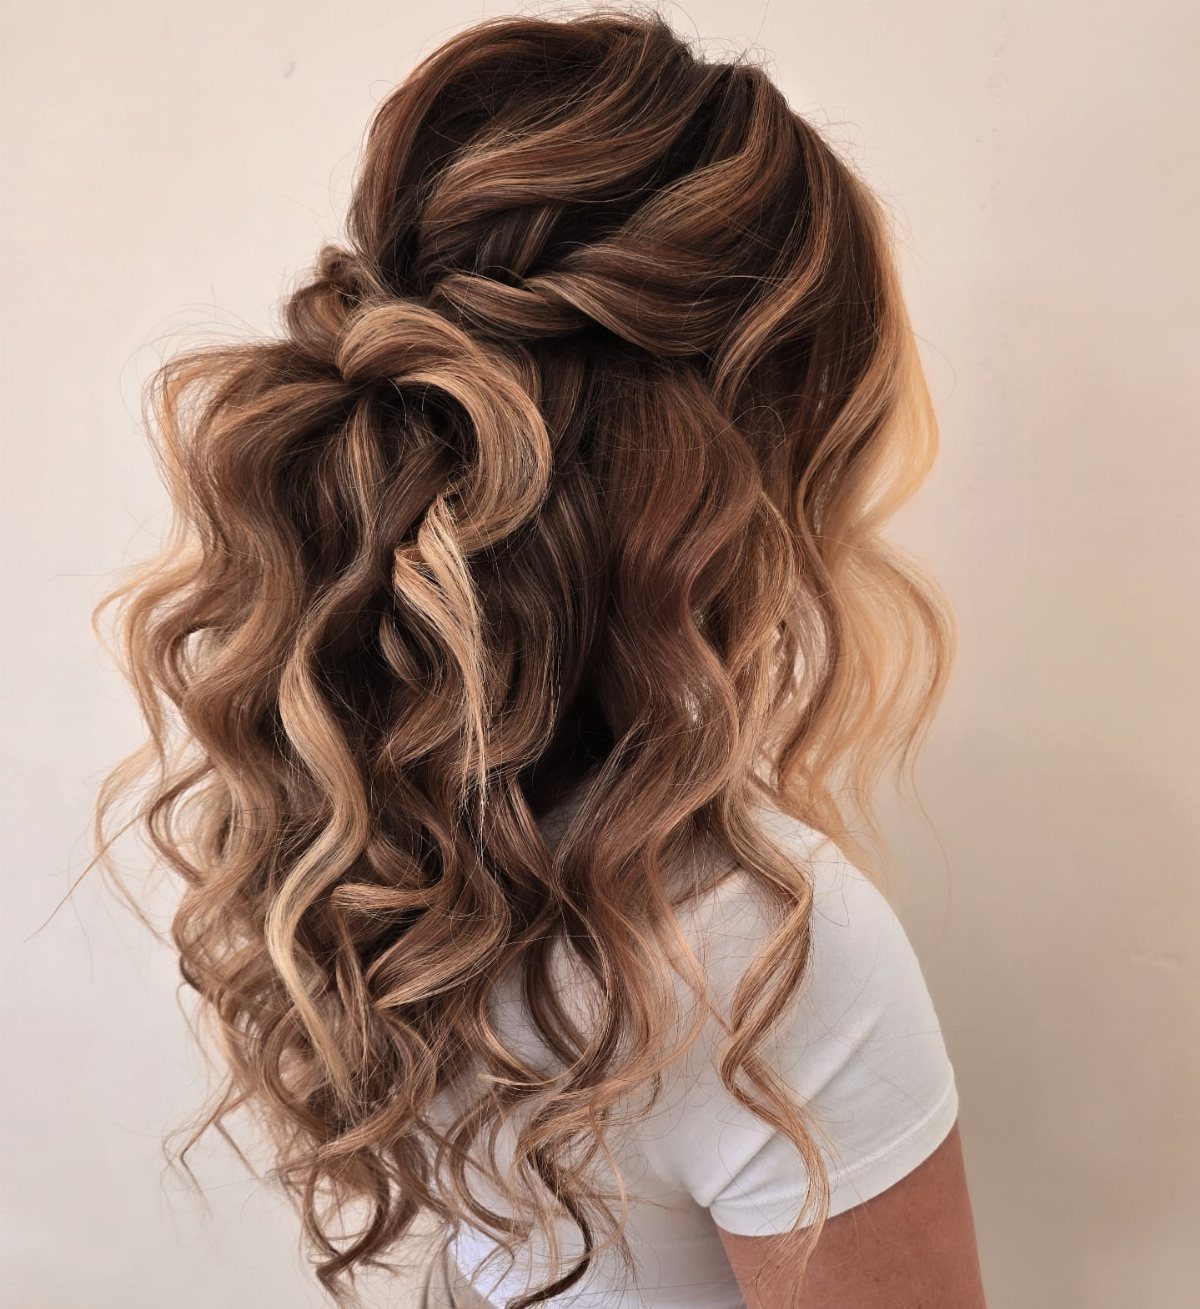
Ringlets this defined need very little company, and one twisted bun at the crown is about the right amount. Twist the top section into a bun, pin it, and let the curls hang free below.
Brown and blonde tones show up well in a spiral pattern, since each ringlet carries both colors.
20. Pulled-Back Pieces and Curls
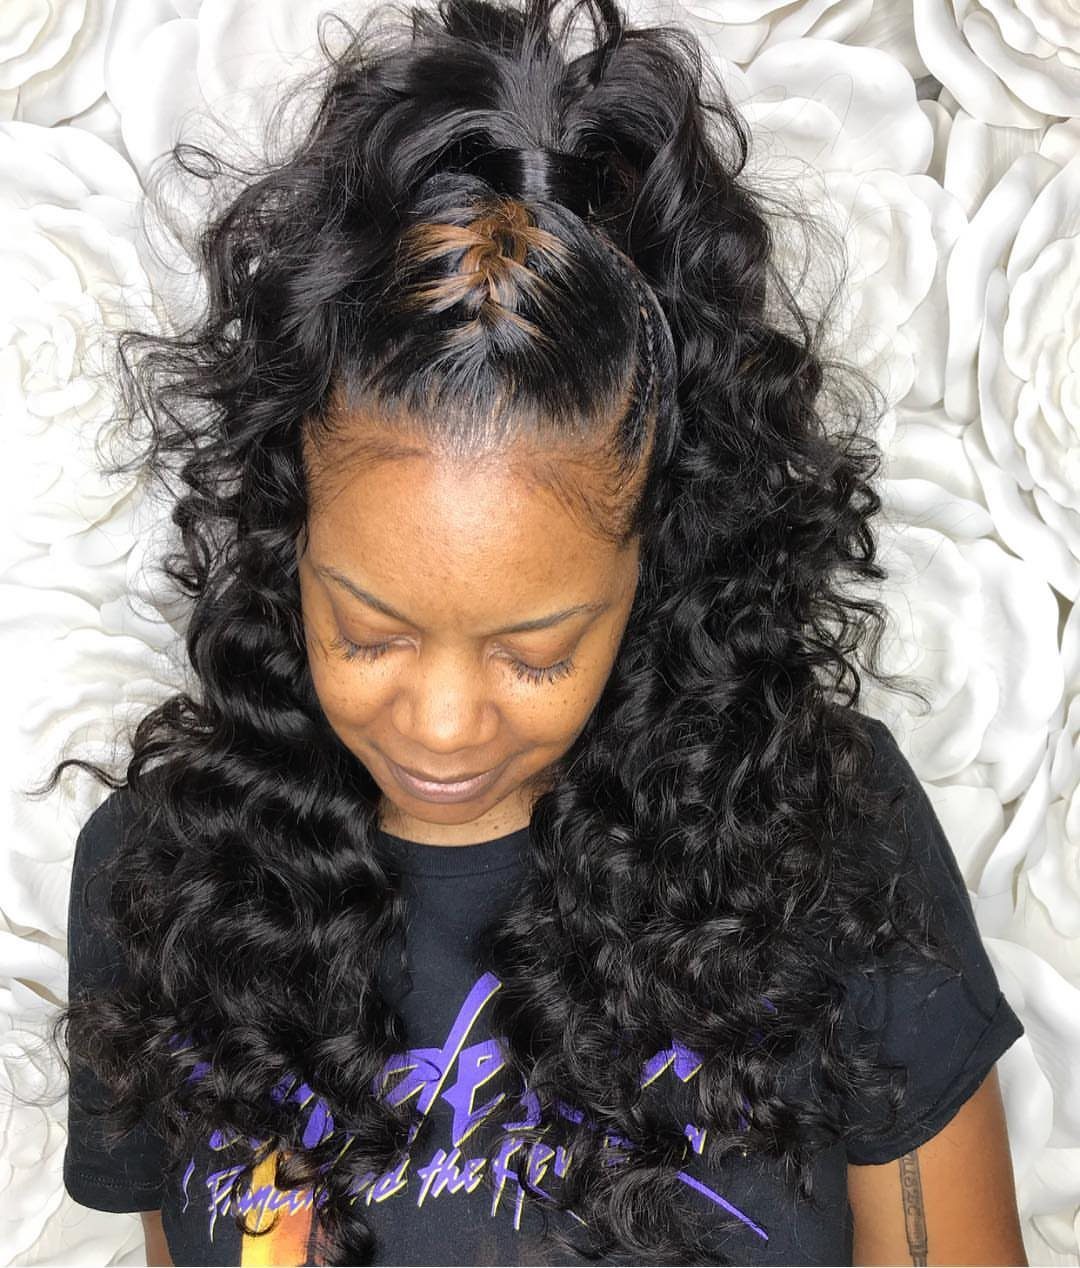
Only a few curled pieces get pulled back here, which keeps the look light and easy to do on long hair.
Take a small section from each side at the front, bring them to the crown, and secure them with a clip or pin.
Black curls with this much volume hold their own shape, so I wouldn’t smooth the pulled-back pieces flat. Leaving them a little loose keeps the crown full and the face open.
21. Chunky Crown Braid
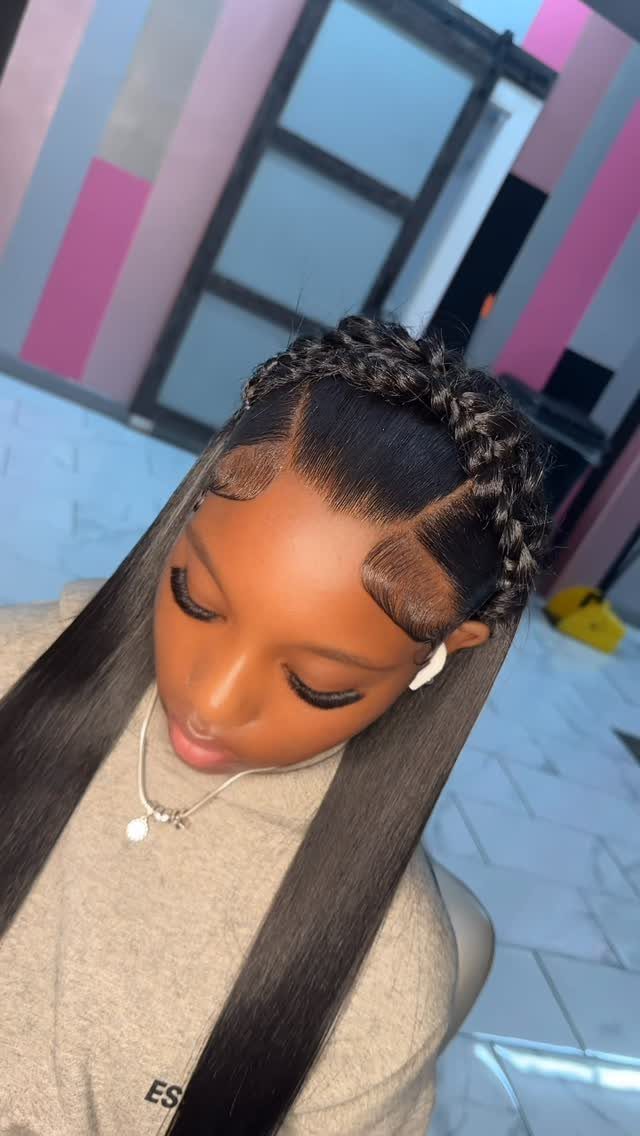
A crown braid like this only works when each section is fat and soft, so I pull the weaves loose until the braid looks 2–3 times wider than it did coming off the comb.
Straight hair sits slick against the head, and a few wide strands braided loosely give it the texture it lacks.
Braid across the top and around, then pull gently at the edges to widen each loop. Pin the end out of sight beneath the braid.
On long black hair, a braid this size reads as bold without any accessories. I’d leave it plain.
22. Floral Soft Twists
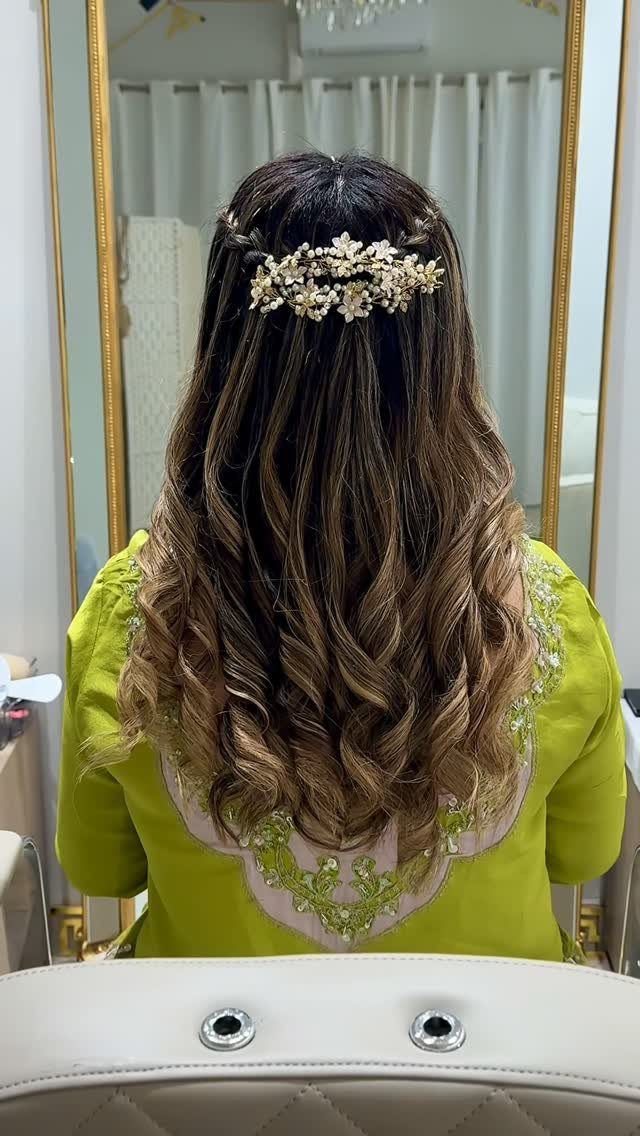
Soft twists keep the front of the hair back, and a pearl floral hairpiece does the finishing.
Twist 2 small sections loosely, pin them together at the back, and set the pearl piece right over the pins so it hides them.
Long curled lengths stay down below. A single statement piece is plenty, and I’d skip any other accessory so the pearls don’t compete.
23. Teased Style with Braid
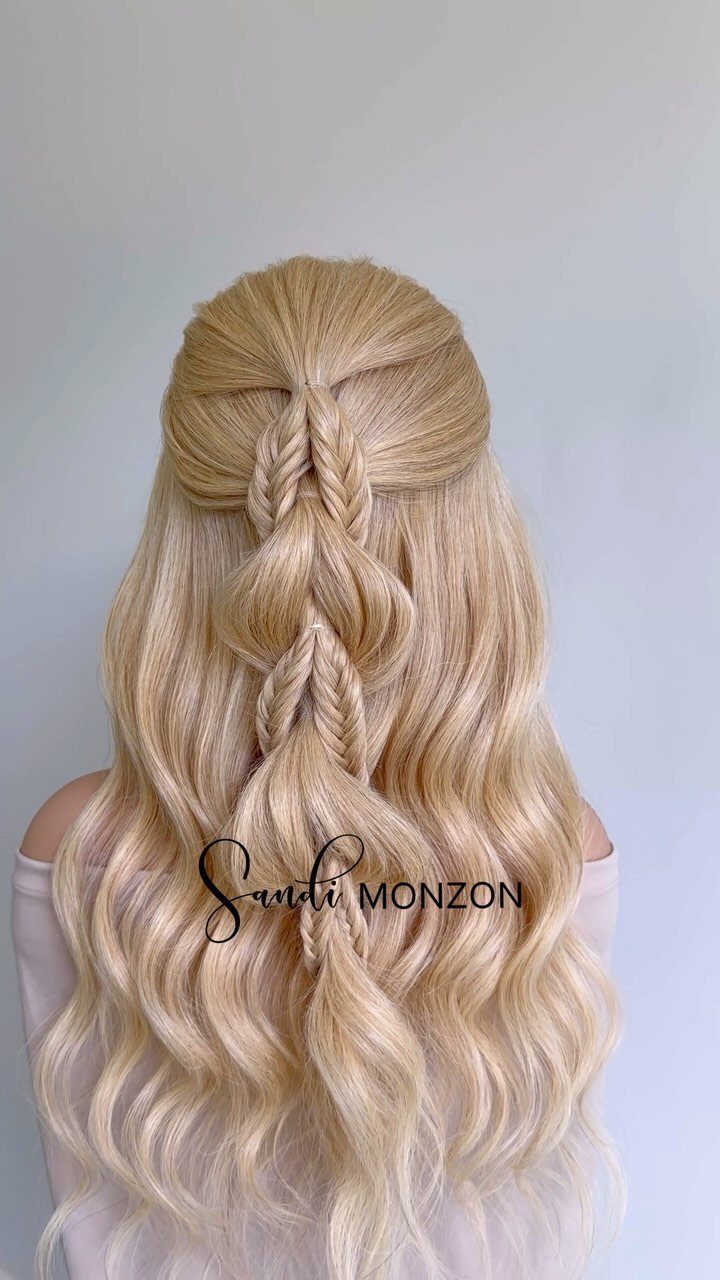
A thin braid is a clever way to anchor teased hair, because it holds the lift in place without adding bulk.
Tease the roots at the crown, smooth the top lightly, and braid a slim section to pin the height back.
Layered lengths fall down from there, and blonde waves make the contrast between the volume and the loose ends easy to see.
24. Loose Twist for Highlights
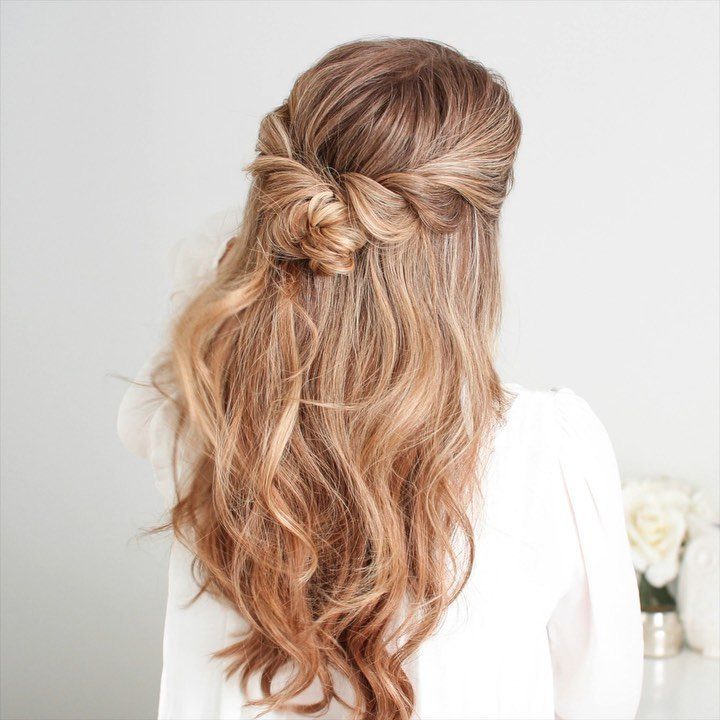
Highlights and lowlights are what a loose twist shows off best. Twisting wavy hair back keeps the strands in layers, so the lighter and darker pieces sit beside each other instead of blending.
I’d leave the twist a little undone, since a tight one hides the color contrast.
It’s a good look to show a stylist when you’re planning where the highlights should go.
25. Bouncy Curly Half-Updo
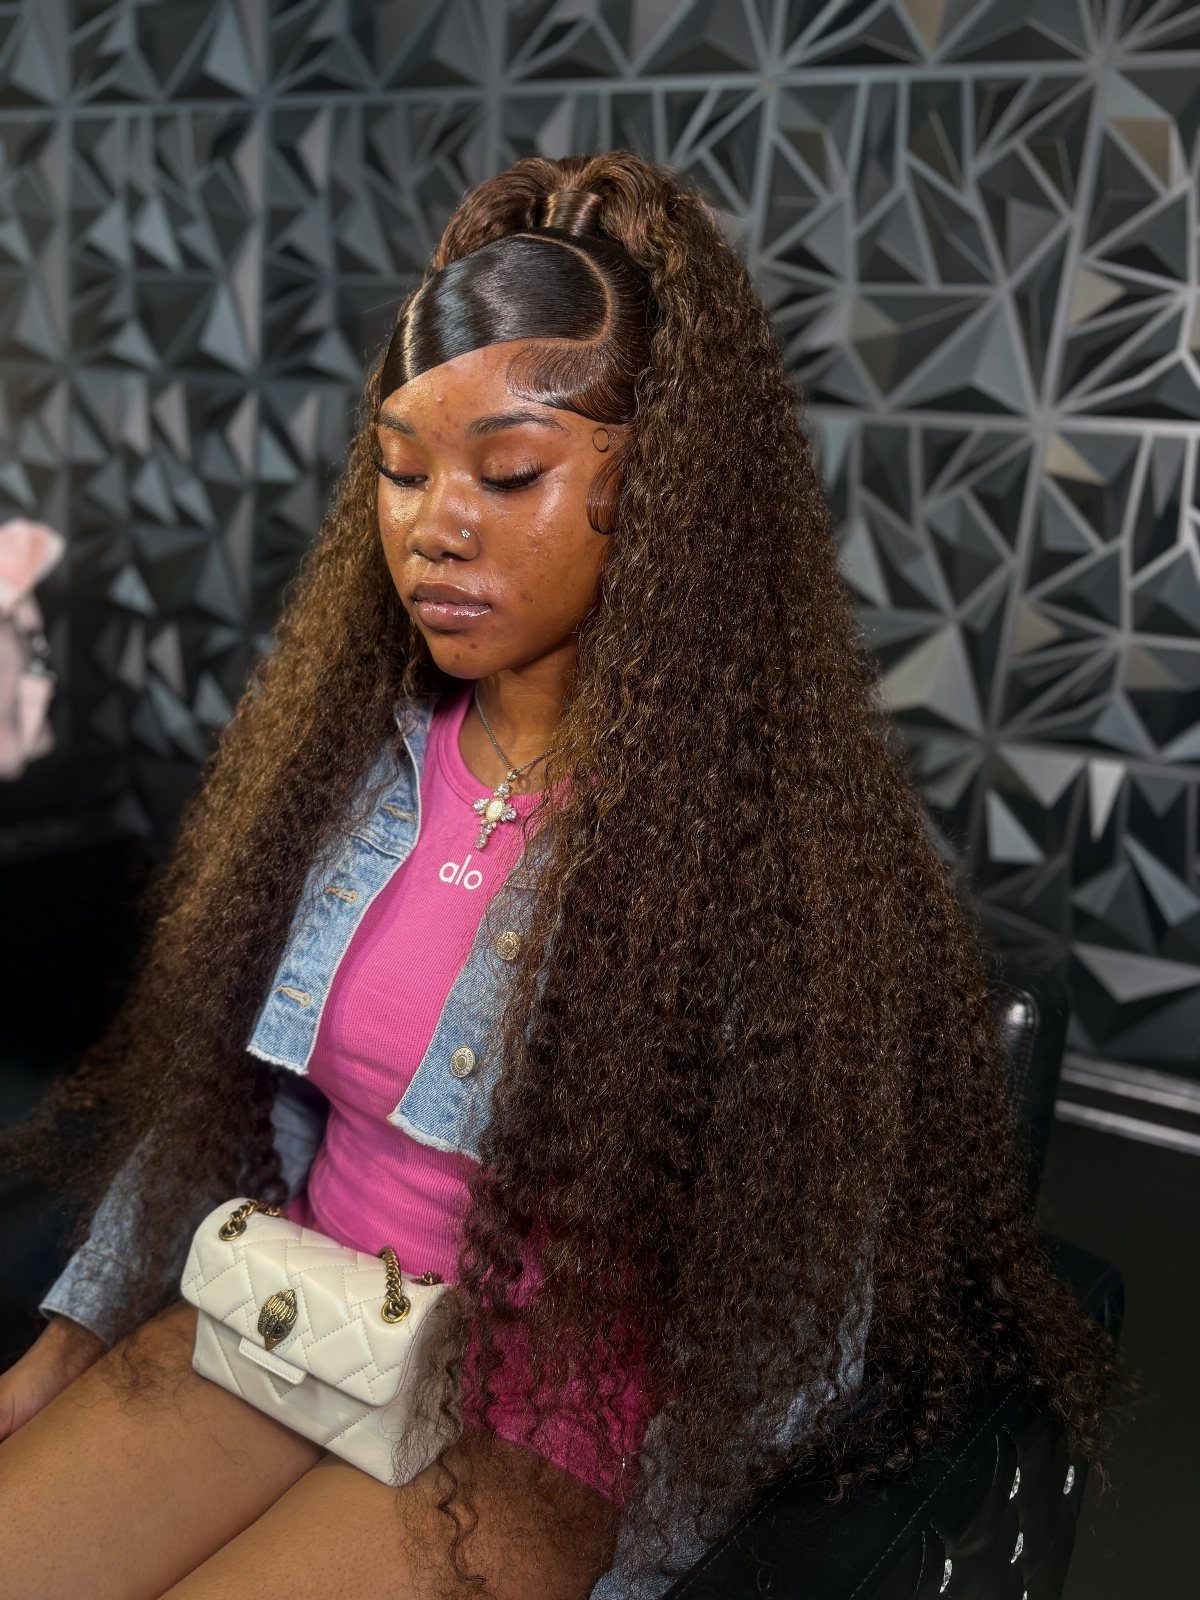
Pinning the front section high and leaving the rest of the curls loose gives you a half-up with lift at the crown and bounce all the way down.
Because the curls are left alone and only the top section is pulled back, the natural pattern stays front and center.
I’d gather only the top section and secure it with a snag-free elastic, then fluff the ends of the gathered curls so they blend into the loose ones.
Brushing out the roots first would flatten the shape, so I’d skip it.
26. Knotty Style for Long Hair
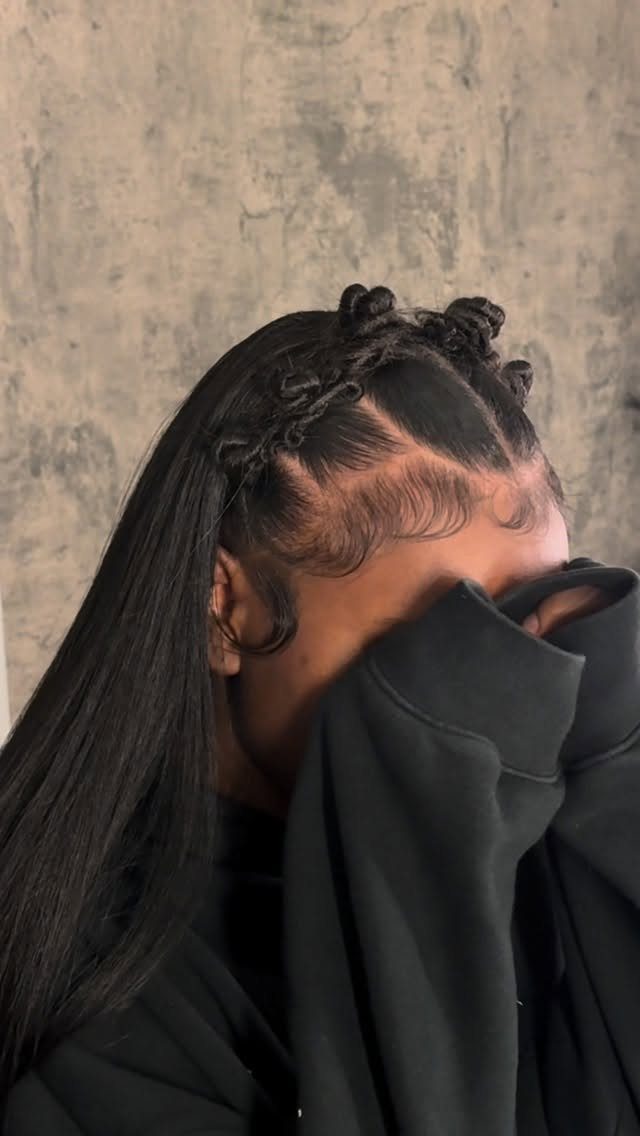
Small knots set along the crown give half-up hair a built-in shape, and long, dark lengths show them clearly.
Take a few slim sections from the top, tie each into a loose knot, and pin them flat so they sit in a line.
A small knot reads as a finishing touch on the half-up; once it grows large, it starts to look like a bun.
The rest of the hair stays down, so I’d leave it smooth and let the knots be the only busy part.
Hair Accessories and Finishing
A chunky headband set just above the gathered section gives a half-up a sleek, polished finish.
A velvet bow at the back or to one side is the more playful pick. Crowns, clips and headpieces suit bigger occasions.
For bridal pieces, Lelet NY and Epona Valley Hair both make options worth a look. If you want a custom bow, ribbon from London’s V V Rouleaux is a good starting point for making your own.
Choose one accessory and let it be the detail. Two or three competing pieces make a half-up look busy.
Whatever holds the top section, use snag-free or silk hair ties. They protect your hair, and that matters most when you wear the style often.
Prepare and Protect Hair
Heat protectant goes on before any heated styling, and the tool’s temperature should match your hair type. Fine or fragile strands need less heat than thick ones.
Straight hair behaves best when it’s clean and fully dry, so clip it into sections before the iron comes out. Start low at the nape and work upward, grabbing upright pieces about 1 inch wide and 2 inches deep.
As the iron slides toward the ends, rotate it one direction and then the other, which bends the strand back and forth into a wave.
Textured hair needs a different prep. Work conditioner through the mid-lengths and ends, and use a diffuser to define natural curls without roughing up the pattern.
Hold and Wear Time
A wedding style has to last all day and well into the night, so it needs more structure than an everyday version. Extensions can add fullness and hold without making the hair look stiff.
Loose styles can come undone over a long event. Keep extra hairpins and a small can of spray nearby for touch-ups.
Schedule a trial with your stylist and bring several reference photos. Effortless-looking hair often takes more time, products and tools than you’d expect, so don’t count on it being quick.
Your stylist can tell you how to prep your hair before the big day, and the trial isn’t over until the final look feels right to you.
Frequently Asked Questions
What are some cute half-up half-down hairstyles?
A loose braid circling the head over waves, a twisted bun above defined ringlets, and a relaxed top knot on wavy hair are the ones I’d save first.
A chunky braid, a waterfall braid or a pair of soft twists pinned at the back also work, and a bow or small flowers dress any of them up.
Match the detail to your hair: curls need only a simple twist or small bun on top, while straight hair gets texture from a wide, loosely pulled braid.
Which hair bun is best?
For a half-up, I’d pick a small, loose top knot at the crown.
On long waves, a loose, slightly messy knot looks better than a sleek, tight one; keep it small, because once it grows large it stops being a detail and turns into a full bun.
Tugging loose a few face-framing strands takes under 60 seconds and softens the whole look.
What does half-up half-down mean?
It means the top section of hair is gathered and pinned back, as a bun, ponytail, braid or twist, while the rest hangs loose.
It sits between a full updo and hair worn completely down: dressier than plain loose curls, less formal than an updo.
You can wear it to the office or to a wedding, and it adapts to fine, thick, straight or curly hair at nearly any length.
How to accessorize a half up half down hairstyle?
A chunky headband set just above the gathered section gives a sleek, polished finish, and a velvet bow at the back or side is the more playful choice.
For weddings and other big events, a crown, a decorative clip or a headpiece does the job. Choose a single accessory; 2 or 3 pieces competing for attention make the style look cluttered.
How to prepare straight hair for a half-up half-down style?
Start with clean, fully dry hair and apply heat protectant before any hot tool touches it.
Rotate the iron one direction, then the other, as it slides toward the ends so the strand bends into a wave. Set the temperature for your hair type, lower for fine or fragile strands.