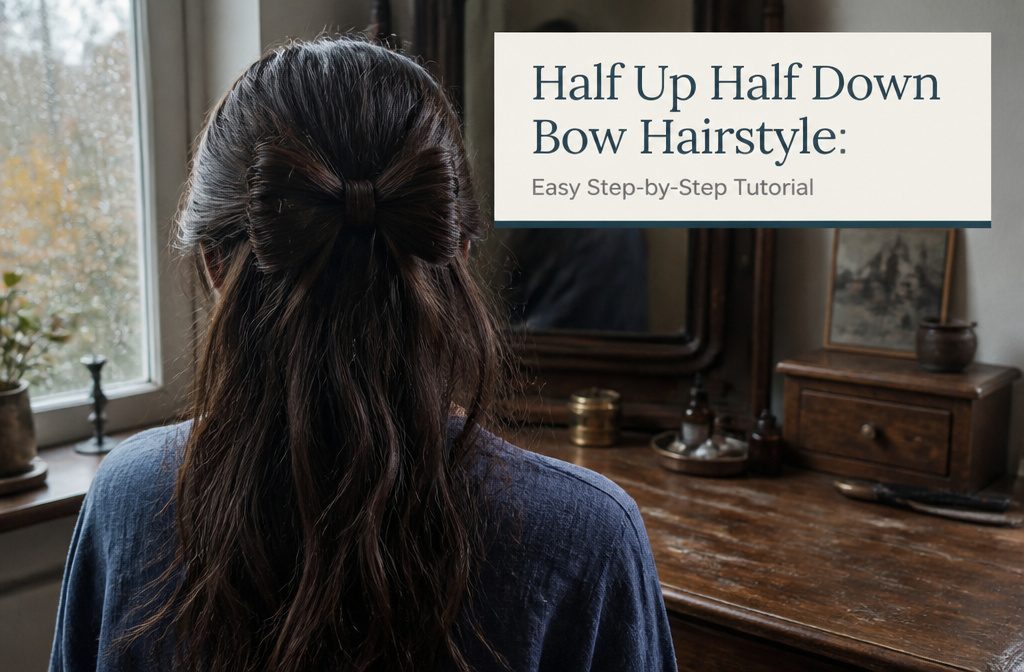
A half up half down bow hairstyle takes the hair from just above your ears, ties it with a clear elastic, and shapes it into two pinned loops, with everything below left loose.
The condition: the loops must match in thickness and height, or the bow reads crooked. Plan on 6–8 bobby pins.
Brush and Part
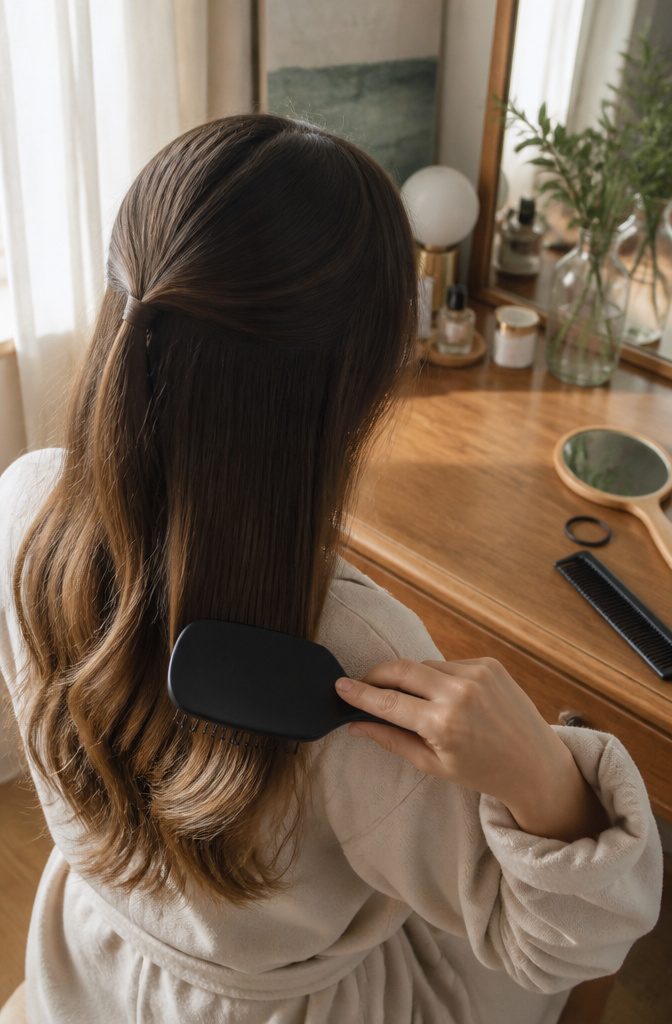
Brush through the whole head first, working from the ends up to the roots until the brush glides without snagging.
A knot left in the hair will catch when you lift the top section and pull the loops apart later, and the bow comes out lumpy instead of smooth.
Part the hair where it naturally falls, since fighting a cowlick makes the top section sit unevenly.
A side part on the right is a good default, but a center part or no part at all gives you the same bow. Skipping the part is the easier route on mornings when the hair won’t cooperate.
Tie the Top Section
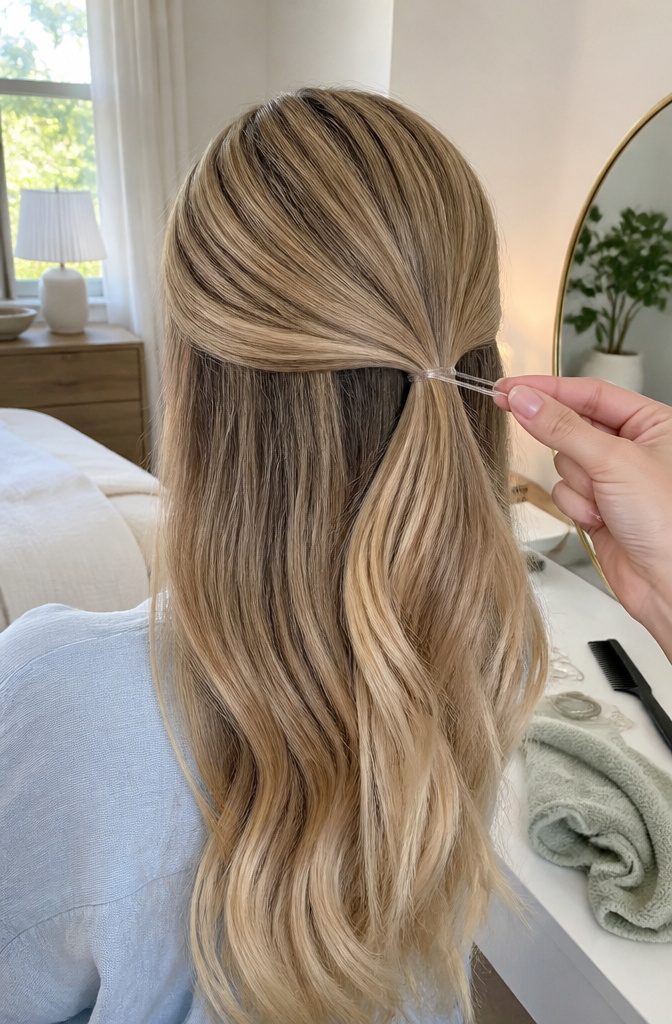
Gather the hair from just above the tops of your ears, sweeping both sides back toward the center of your head.
The line sits roughly level with your temples, and everything below that stays down. I hold the section taut at the back and tie it with one clear elastic, wrapping twice so it grabs without sliding.
The ponytail itself should sit flat against your head rather than lifting up, because that flat base keeps the bow loops from wobbling once you shape them.
Everything beneath the elastic stays loose, which is how you get the half-up silhouette. The elastic holds the section you just gathered, and that becomes the whole bow in the next few steps.
Divide Into Two Halves
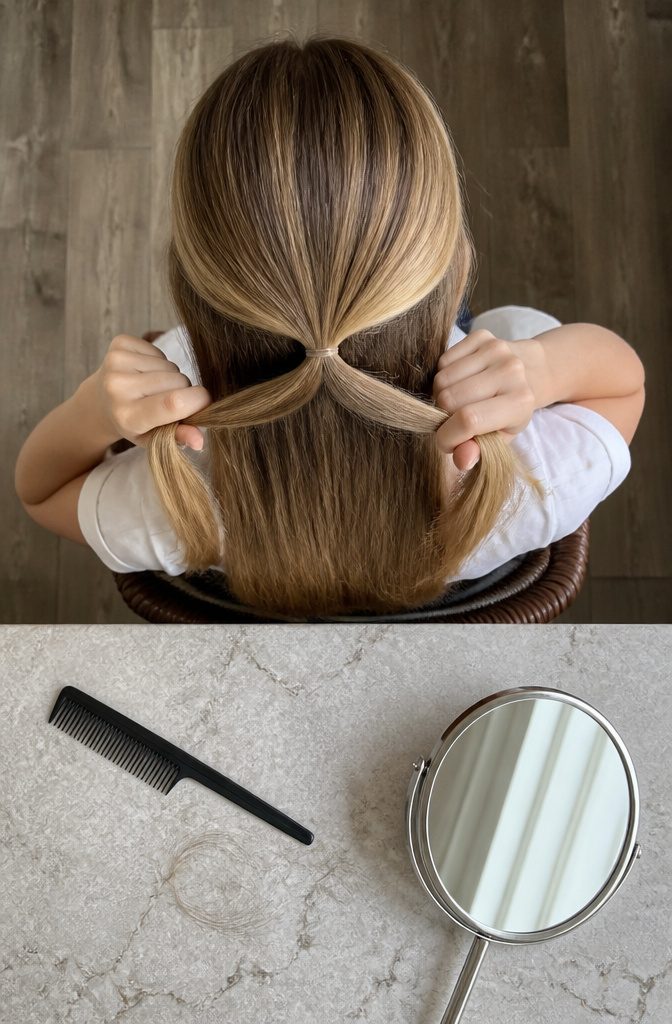
Split the tied-off section into two halves, parting right at the base of the elastic with your fingers.
Make the halves match in thickness, because each one becomes a loop and a fuller side pulls the bow into a lopsided shape.
Hold one half in each hand and compare them. If one feels heavier, slide a few strands across to the lighter side until they balance.
Smooth both halves with your fingers or a comb before moving on. Tangles inside a half show up later as bumps in the loop, and strands that run in one direction fold over more neatly.
I would rather spend an extra 20 seconds here than try to fix an uneven bow once it is pinned.
Loop the Right Half
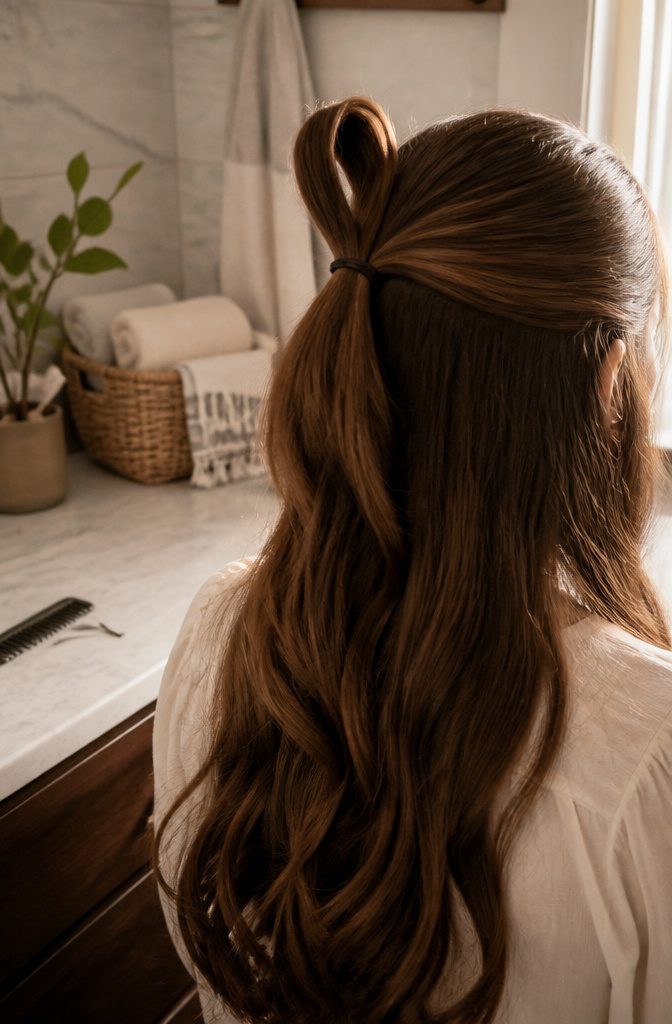
Fold the right half up and over so it forms a loop that sits above the elastic, with the ends pointing back toward the elastic.
Pinch the base of the loop between your thumb and fingers so it doesn’t slide. The loop should stand up above the elastic rather than flop over it, because a collapsed loop can’t become a bow later.
The ends hang down from the base of the loop, close to the elastic, like a short loose tail.
At this point it looks lopsided, and that’s expected. One loop with its ends dangling is only half a bow.
Keep the loop modest. A bigger loop uses more length, which leaves shorter ends hanging below it.
Pin the First Loop
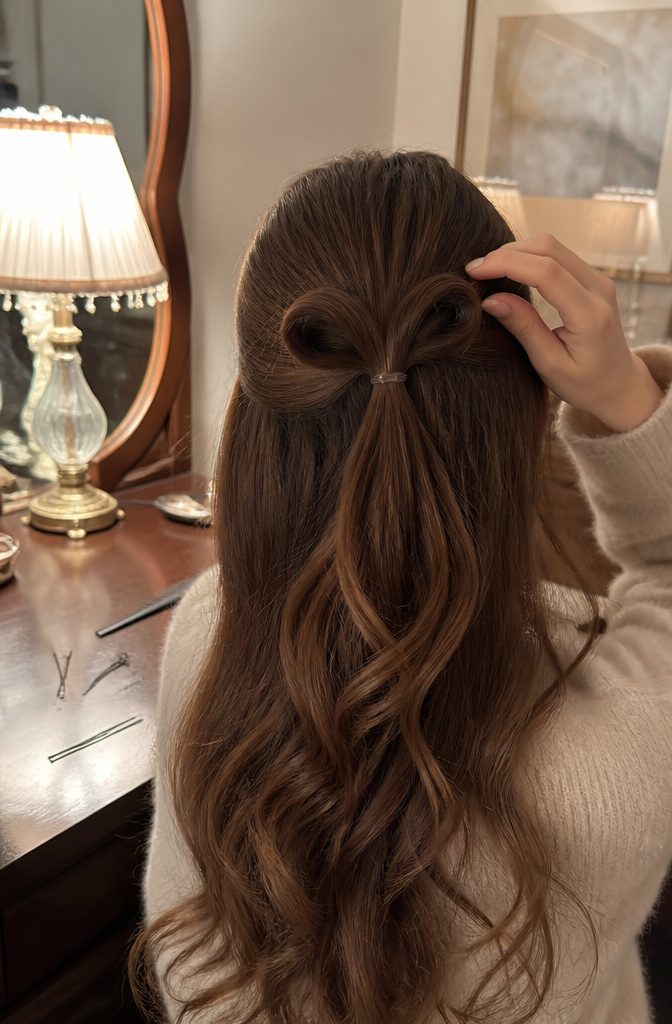
Slide a bobby pin under the top of the loop, right where it meets the elastic, and push it into the hair beneath so the metal stays out of sight.
Do the same at the bottom edge, then add one pin at each side to hold the curve open.
Every pin goes underneath the loop, never across its face. Expect this loop to take 3–4 bobby pins, since the full bow uses 6–8 and the left loop needs its share.
I’d spend the fourth pin rather than let a side sag, because a loose loop flops forward the moment you turn your head. Pin top and bottom first, check the shape in the mirror, then add the sides.
Loop the Left Half
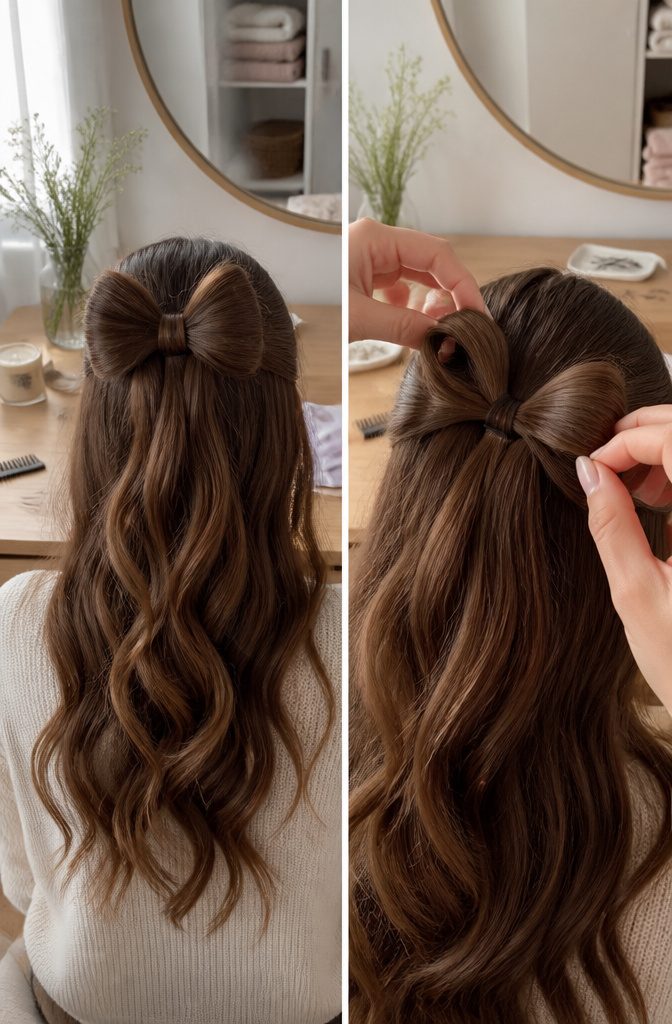
Fold the left half up and over on itself, the same way you shaped the right, so the loop curves toward the center and the loose end tucks in behind the elastic.
Hold it beside the first loop before any pin goes in.
Both loops should sit at the same height and be close to the same size, because a bow looks crooked the moment one side rides higher. Check it straight on in the mirror, not from an angle.
If the left loop runs bigger, pull the end through a little more to shrink it.
If it sags, lift it and move the pin closer to the top. Slide each pin in across the base of the loop and catch some of the gathered hair underneath, so the pin grips more than the loop alone.
Pick Up a Small Section
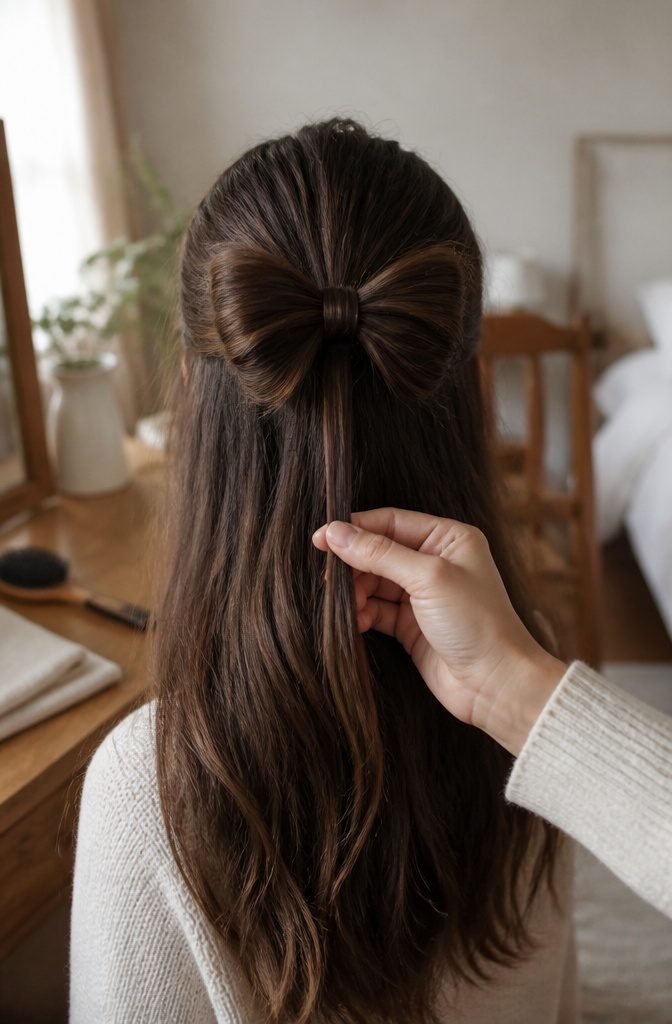
Reach beneath the bow and lift a small piece from the loose hair hanging below it. This piece becomes the center knot, so it only needs to be thin enough to wrap over the elastic and hide it.
Take it from the middle of the hanging hair, right under the elastic, so the knot sits centered instead of leaning to one side.
Go thinner than you think you need.
A chunky piece bulges at the center and pulls the bow flat, while a slim one lies neat and leaves plenty of hair to pin. If it can’t reach around the elastic, add a little more.
If it looks bulky, let some go. Comb it smooth and hold it out of the way until the loops are done.
Tuck Through the Center
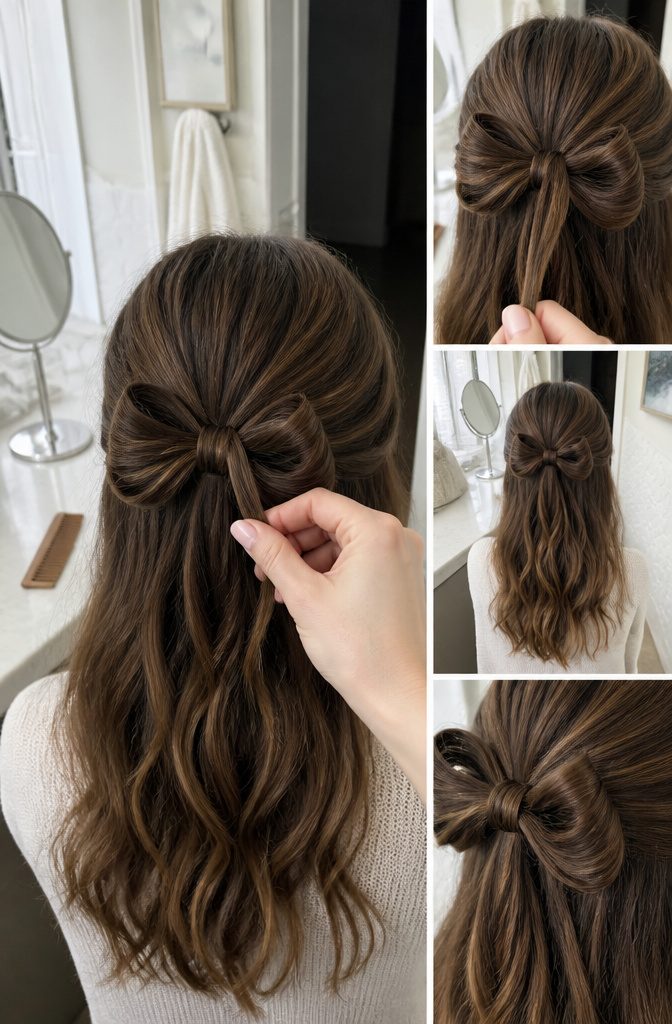
Bring the small section up over the center of the bow, right across the spot where the two loops meet.
Then tuck the ends down through the gap in one of the loops. Pick whichever side opens wider, and tug gently until the strand lies flat and snug.
That one wrap does two jobs. It covers the elastic, the least pretty part of the style, and it pinches the middle so the loops puff out on either side instead of slumping together.
A thin, neat wrap looks best to me, because a bulky center starts to read as a knot instead of a bow.
Pin the Center Piece
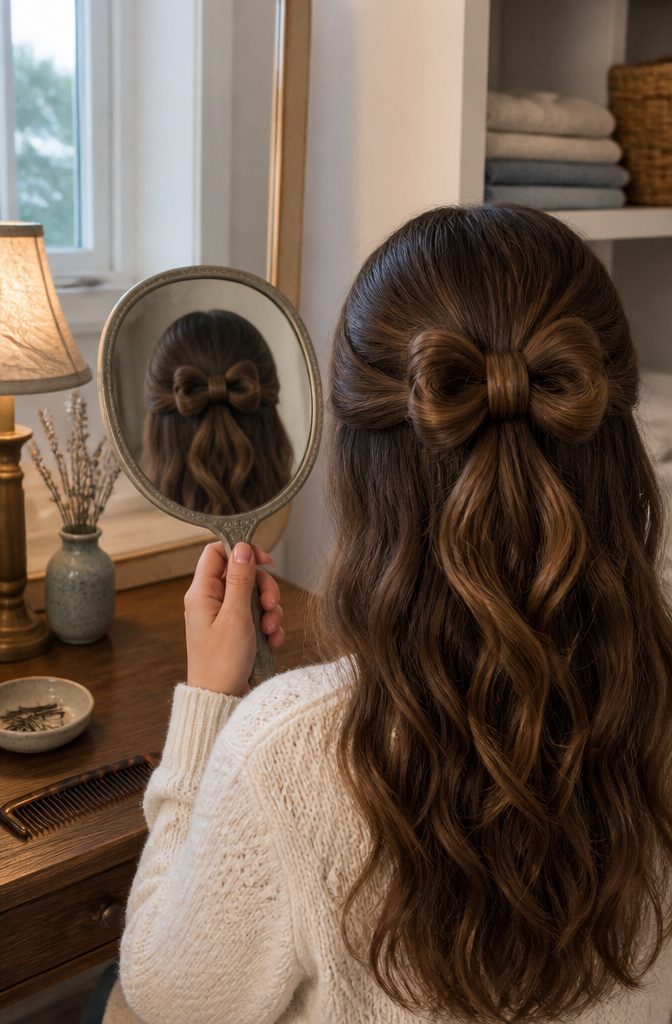
Once the center piece is tucked through the gap, it needs two pins, not one.
Pin the tucked section at the top and again at the bottom, so the strand can’t swing loose and drag the center out of line. A single pin only holds one end.
Slide each pin in where hair crosses over hair, under the top layer, so the surface covers it and only the bow shows.
Pins that match your hair color disappear fastest, and I’d choose two small ones over one large one because they tuck flatter.
Push the pins in parallel to the bow, never across its face, and check the back in a hand mirror before you move on to curling.
Curl and Spray
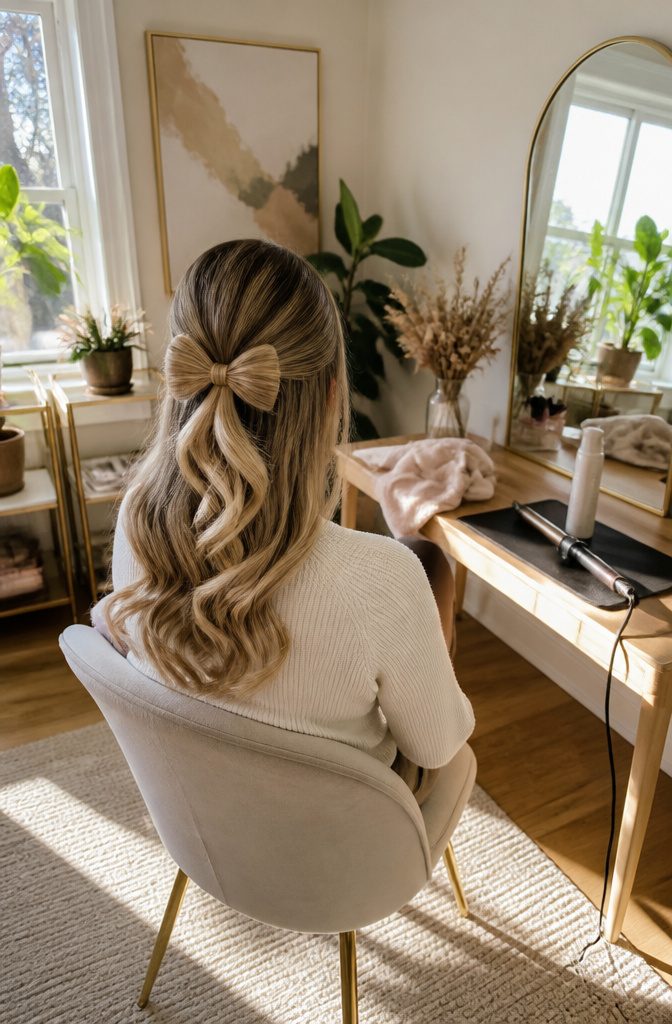
Curl only the loose lengths hanging below the bow, using a 1″ curling iron on the ends.
Soft, bouncy ends under the knot echo the loops above without competing with them, and I’d leave the bow itself untouched so its edges stay clean.
Finish with a medium-hold hairspray. Loops are the first part of this style to sag, and medium hold grips them enough to stay put.
A strong formula would set them rigid and leave the curls crunchy, which looks stiff on a style meant to be soft and playful.
Mist the bow first, then the curled ends, and the style should keep its shape through the day while the curls still move when you do.
Why It Counts as Half-Up
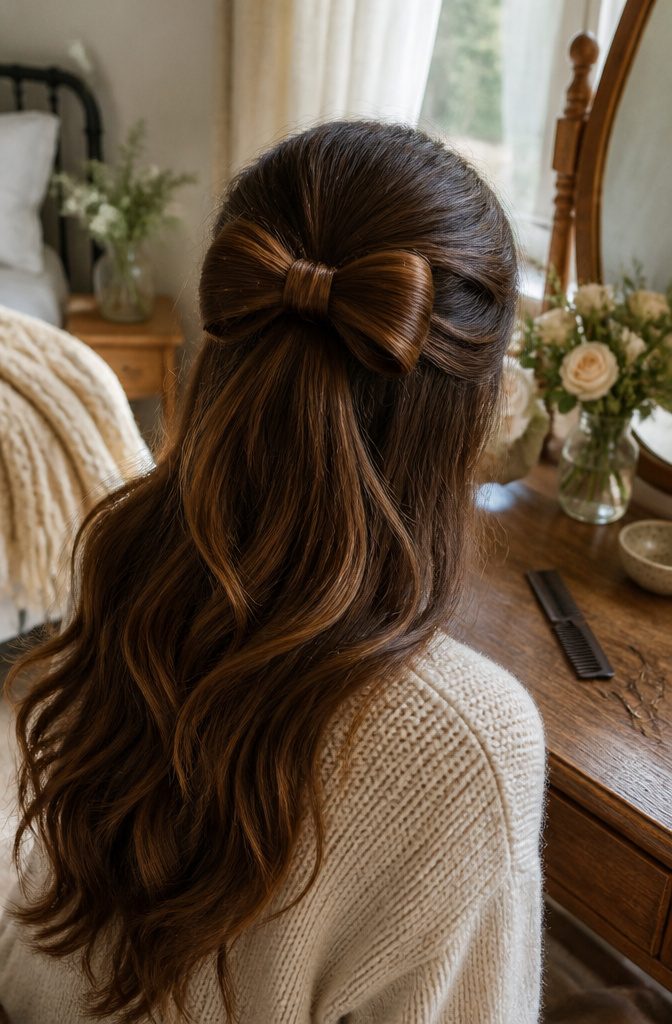
Only the top section of hair goes into the bow. It’s sectioned off at the top of the ears, gathered toward the back of the head, and tied with a clear elastic, then shaped into two loops.
Everything below that tie stays down, which is why the Half-Up Hair Bow counts as a half-up style and not an updo with a bow on top.
I prefer it for that split.
The length, weight and face-framing of down hair stay, and the bow works as an accessory made from your own hair, so a clip or ribbon is optional. On a busy morning, that means one elastic and a few pins.
Cute, Quick, and Easy
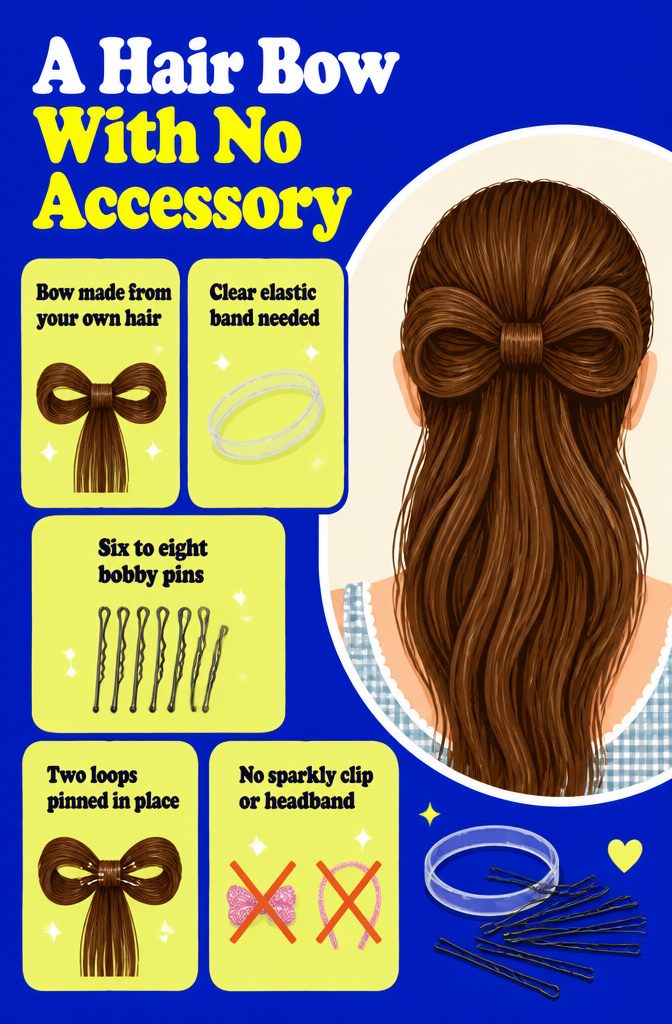
The bow is made from your own hair, so you get the look of an accessory without buying or losing one. All you need is a clear elastic band and 6–8 bobby pins.
It reads as cute and feminine, and it looks harder than it is. A bow sounds like it needs a tricky twist or braid, but it comes down to two loops pinned in place.
That makes it quick enough for a weekday morning, so I’d call it an everyday style first. It also suits the holidays, when you want something a little dressed up without a sparkly clip or a headband.
Frequently Asked Questions
What’s the hairstyle called with half up half down?
A style that gathers the top section and leaves the rest loose is called a half-up style, and this bow version is the half-up hair bow.
Only the hair above the ears goes into the bow, and everything below the elastic stays down.
Is 50 too old to wear a bow in your hair?
Nothing about this style ties it to an age group. The bow is made from your own hair with one clear elastic and 6–8 bobby pins, so there’s no ribbon or clip involved.
It works as an everyday look and also suits the holidays when you want something a little dressed up.