Hair texture and length decide which of these buns stays put, more than the look you saved.
Fine hair needs texturizing spray and a claw clip for body, thick hair needs a durable coiled tie and a medium height, and short hair holds best with matching bobby pins instead of elastics.
The styles range from a loose knot pinned just enough to hold to a peony blossom built from separately pinned loops.
1. Curly Hair Messy Bun
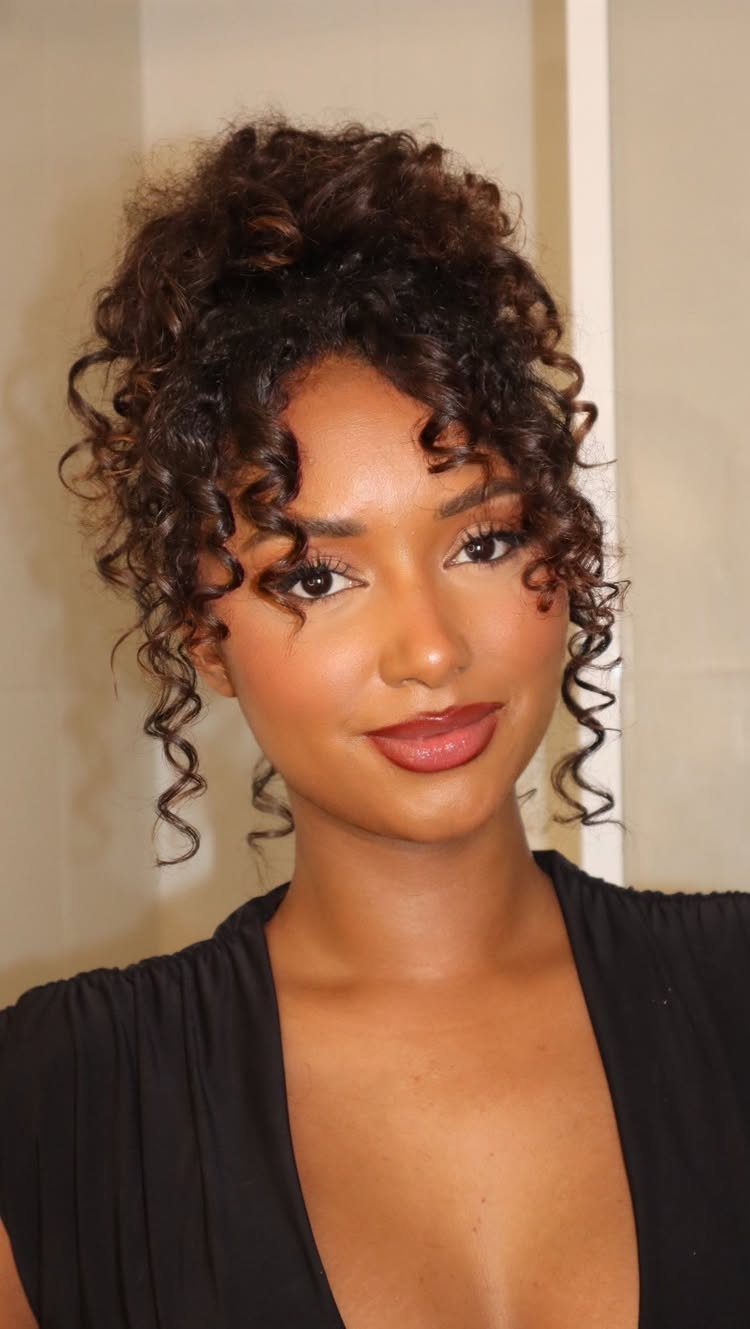
Curls do half the work in this bun, since their natural spring and volume give it shape without any teasing. Gather the hair high, twist it loosely and pin it, then pull a few ringlets free around the face.
Finger-comb instead of brushing, because a brush breaks curl clumps into frizz. Day-2 curls hold the bun better than freshly washed ones.
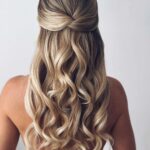
2. Half-Up Messy Bun
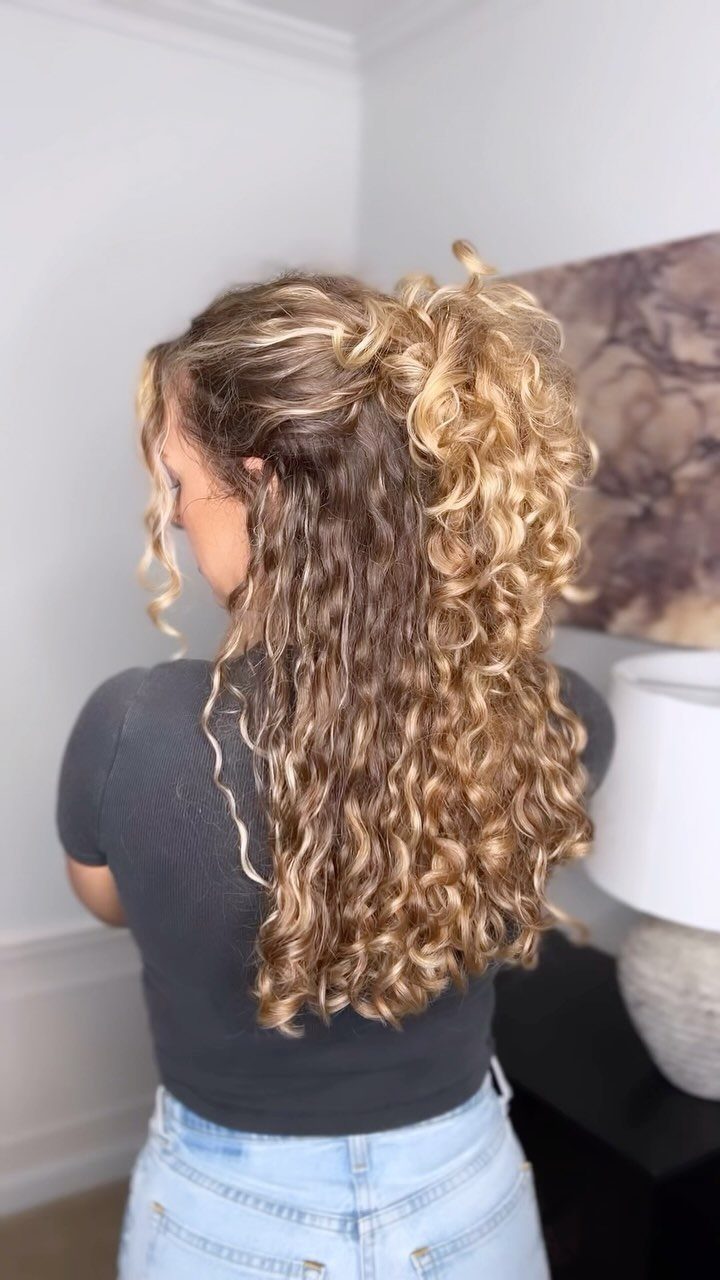
The top section goes up into a bun while the rest stays down, so you get the hair off your face without losing the length.
Gather the hair from the temples back to the crown, twist it loosely and wrap it into a small bun. Pin it in place and leave the ends loose.
Works best when the bottom half has some wave or curl already, because straight hair underneath can make the bun look disconnected. Takes under 2 minutes and holds through most of the day without needing a second pin.
3. Low Messy Bun
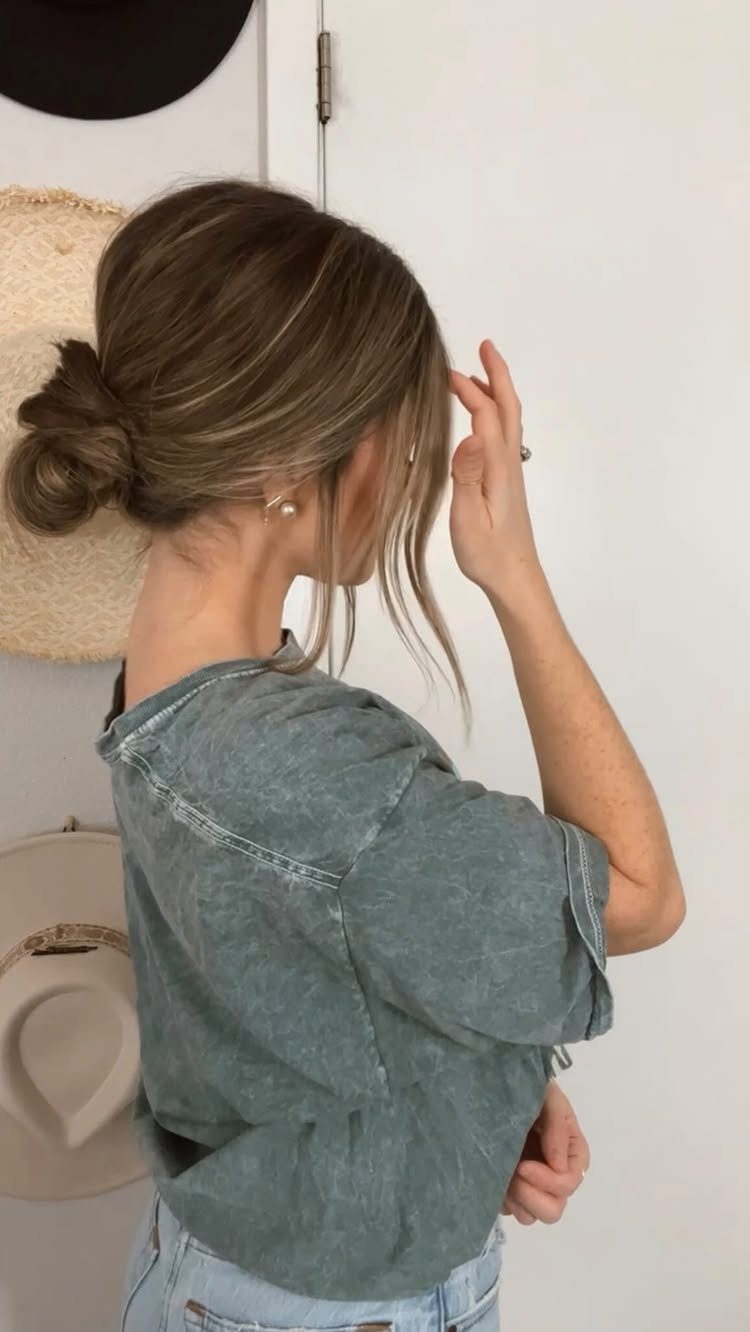
A bun at the nape sits low and soft, and it suits anyone who wants hair off the shoulders without a lifted, ponytail-style look.
Gather the hair at the back of the head, twist it once or twice and coil it into a loose knot. Pin it, then tug out a few strands near the face.
Low placement is also the easiest version to wear under a hat or a helmet, and it holds well with loose, unfussy pinning.
4. High Messy Bun
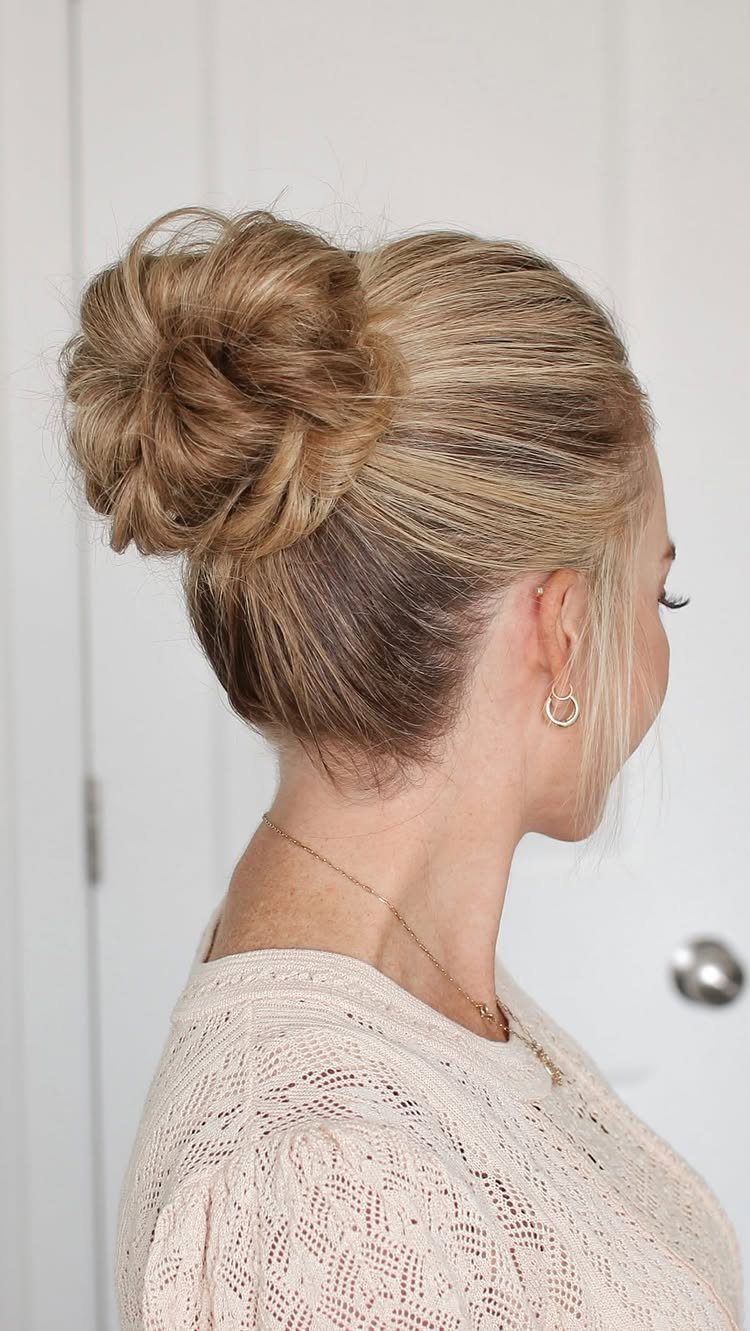
Placed at the crown or higher, this bun takes everything off the neck, which makes it my pick for a warm day or a workout.
Start with a ponytail near the crown, give the tail a loose twist, and wind it around its own base. Pin it and loosen the loops with your fingers.
Blonde and other light hair shows texture well, but a quick spritz of dry shampoo on clean hair gives the bun more grip so it does not slide.
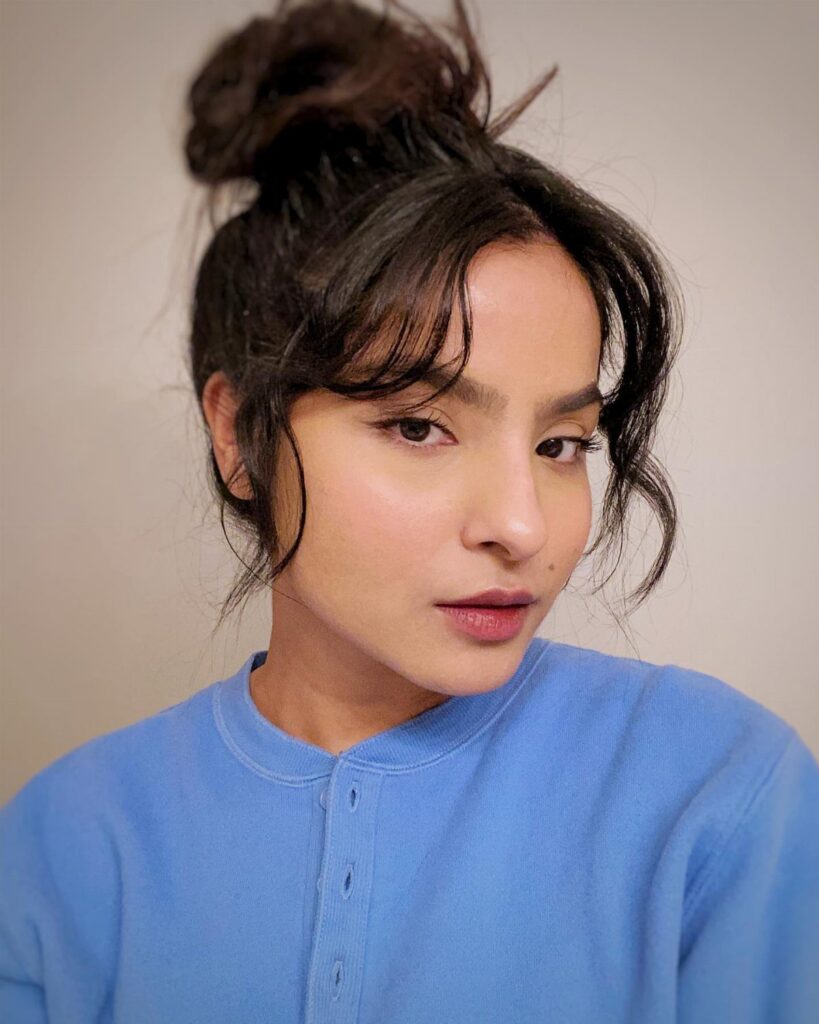
5. Messy Bun with Bangs
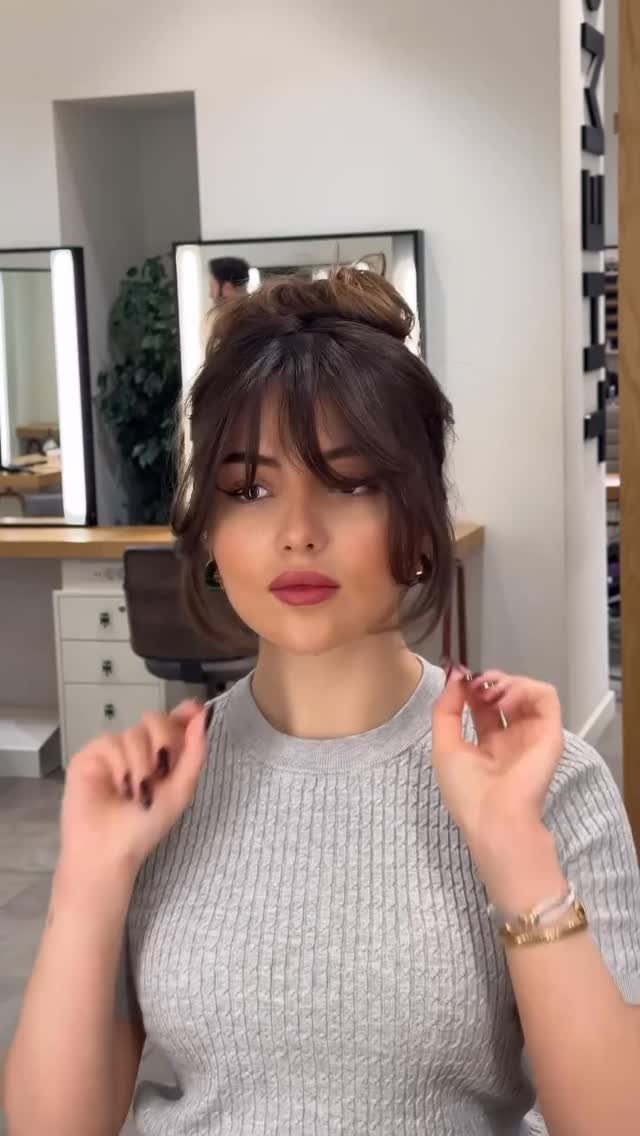
Bangs left loose around the face turn a basic bun into something softer, and the wisps frame the cheekbones.
Bangs get set aside first so they stay out of the ponytail; after that, the rest follows the same twist-and-pin routine as the high version. Release the bangs so they fall naturally.
This works best if your bangs already reach about brow length. Very short ones tend to stick up when the rest of the hair is pulled back.
6. Textured Messy Bun
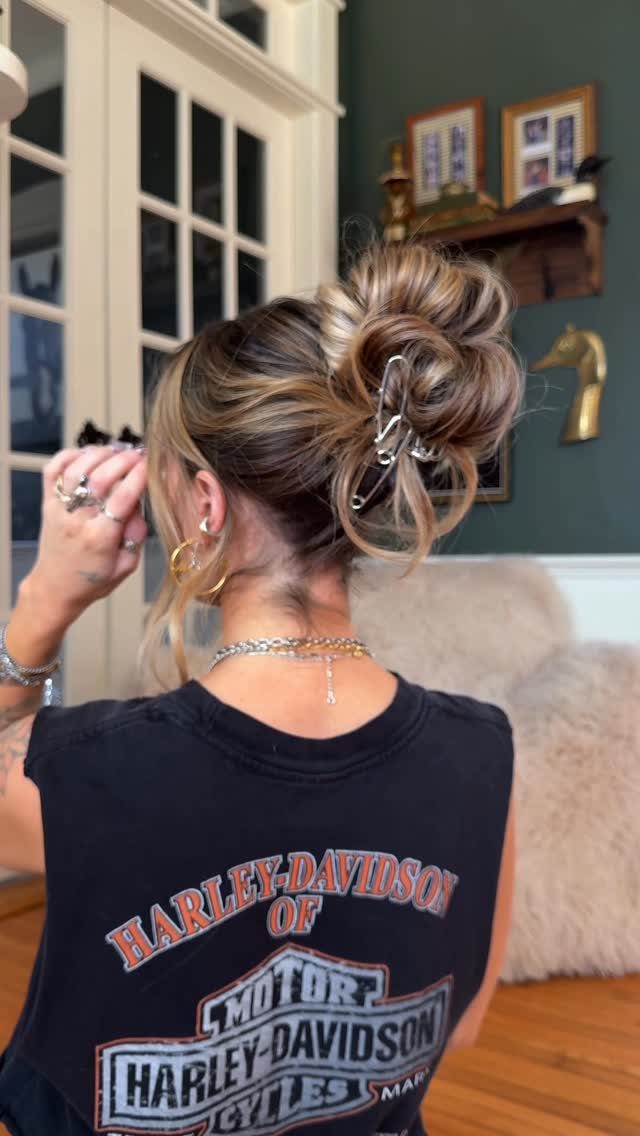
Fine hair looks flat in a bun unless something gives it body, and texture is what does that job here.
Spray texturizing spray or dry shampoo through the roots and lengths before you gather the hair. Twist it loosely, wrap it and fasten it with a claw clip.
A claw clip is faster than pins and keeps the bun lifted. Pull a few small sections outward afterward so the bun looks fuller than your hair really is.
7. High Voluminous Bun
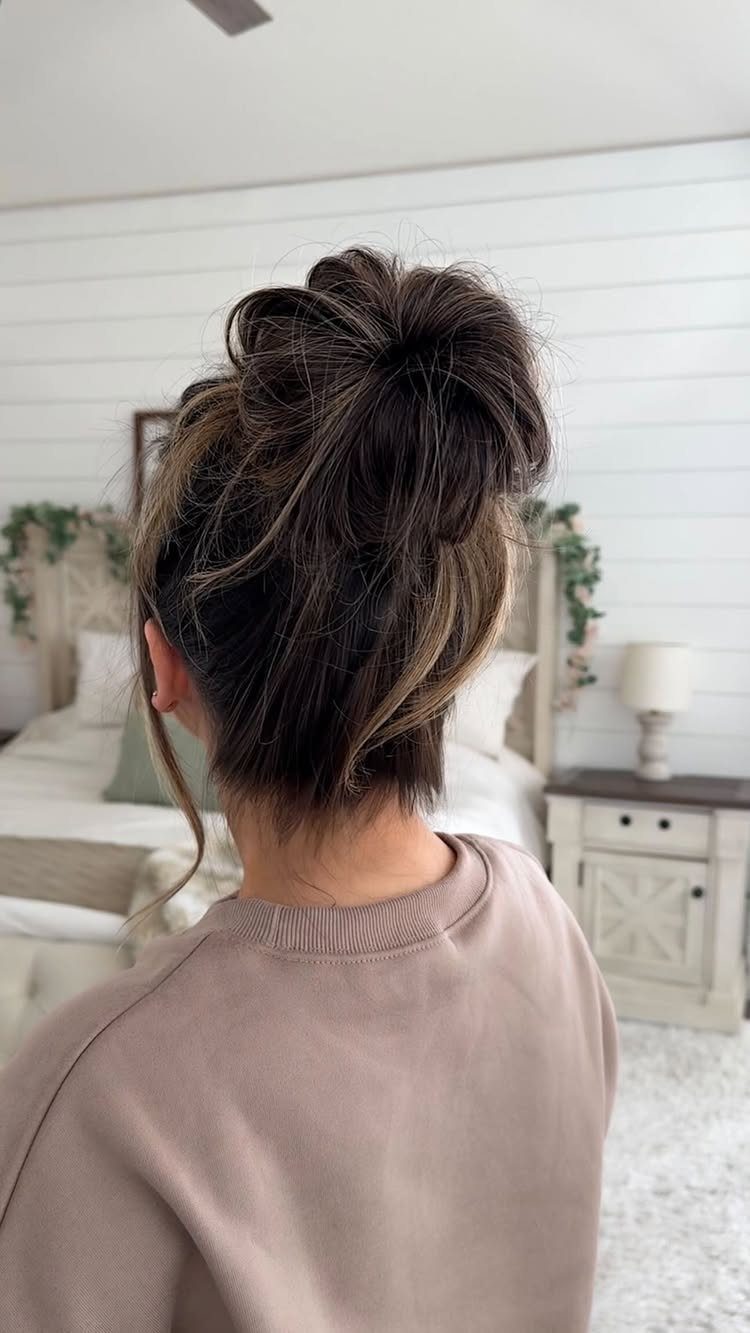
The goal here is to get height and width at the same time, without making it look stiff.
Gather the hair at the crown, twist loosely and wrap it around itself while pulling sections outward to loosen the coil. Pin in place but leave the outer loops intact so the bun looks full from every angle.
If your hair is thin, tease the length before you twist it. Thick hair gets the opposite problem: it can look too heavy, so stop at medium height or the weight pulls it flat.
8. Messy Bun with Scarf
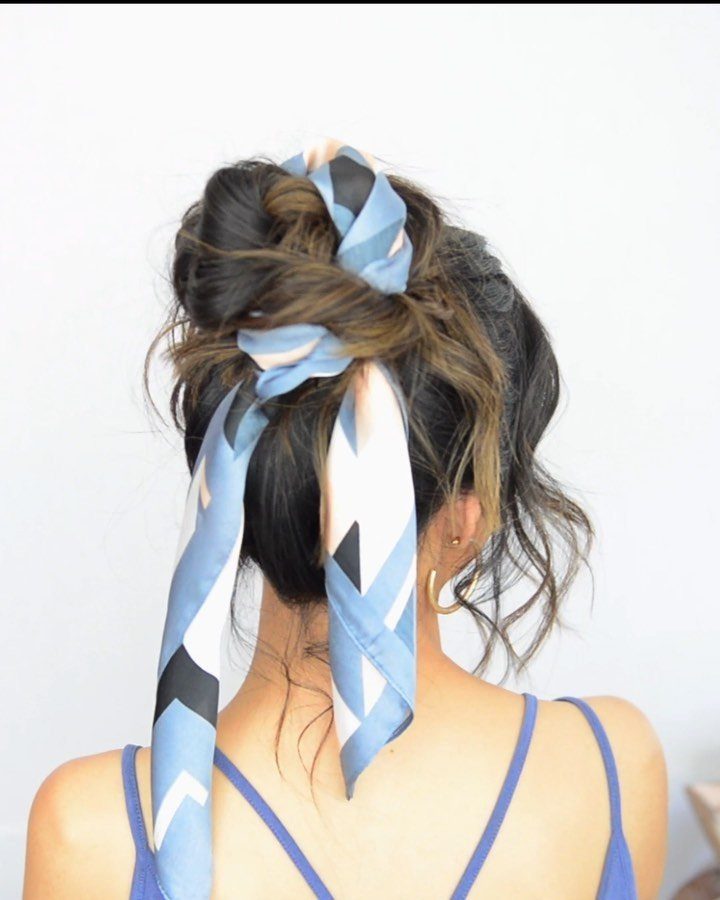
Tying a scarf around the base or through the bun adds color and holds flyaways in place at the same time.
Fold a square scarf into a long strip or use a narrow rectangle, wrap it around the finished bun and tie the ends where they look balanced.
Cotton or silk both work.
Silk slips less on fine hair, cotton grips better if the bun is looser. The scarf also hides a hair tie if the elastic shows.
9. Classic Undone Messy Bun
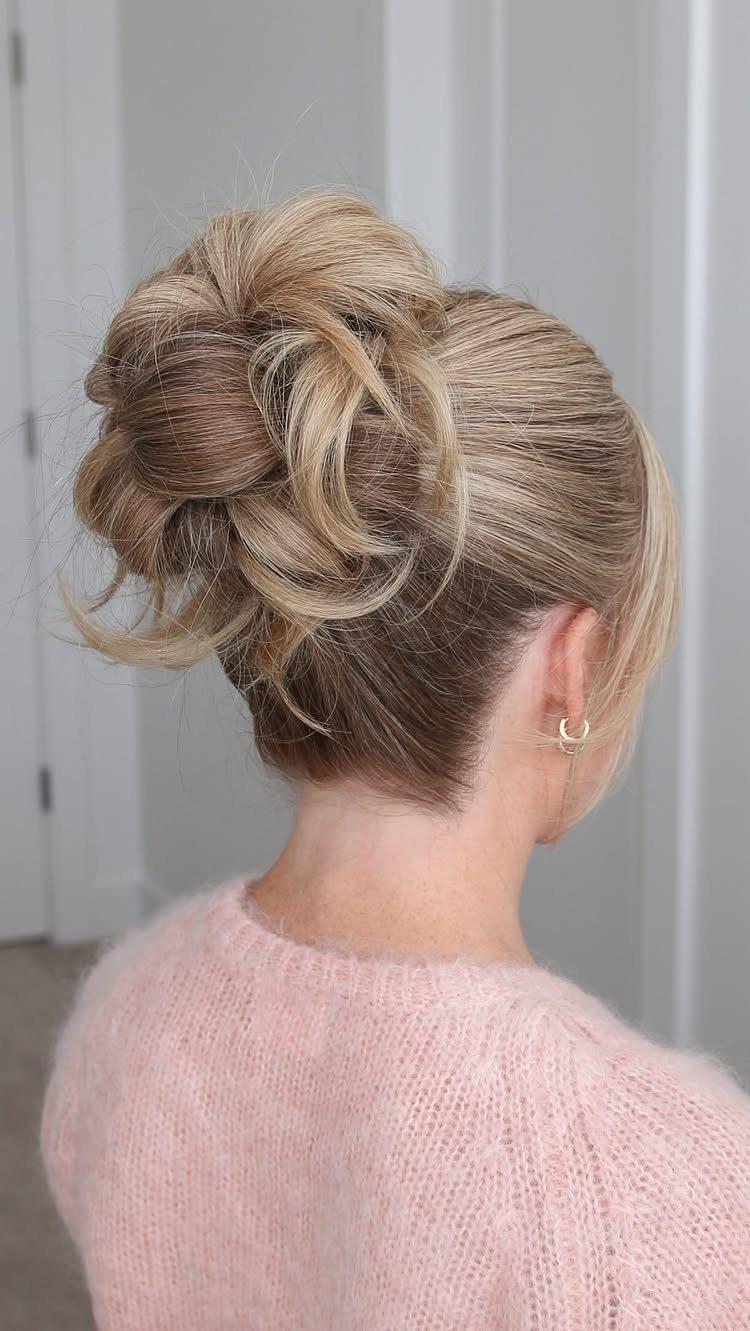
This is the bun that happens when you stop trying to make it perfect.
Gather the hair loosely at the back of the head, twist once or twice and fold it over itself without pulling everything tight. Pin just enough to hold it, and let the ends stick out however they fall.
The strands that escape are the point, so skip the smoothing spray. Works best on second-day hair when there is already some texture to start with.
10. Side Messy Bun
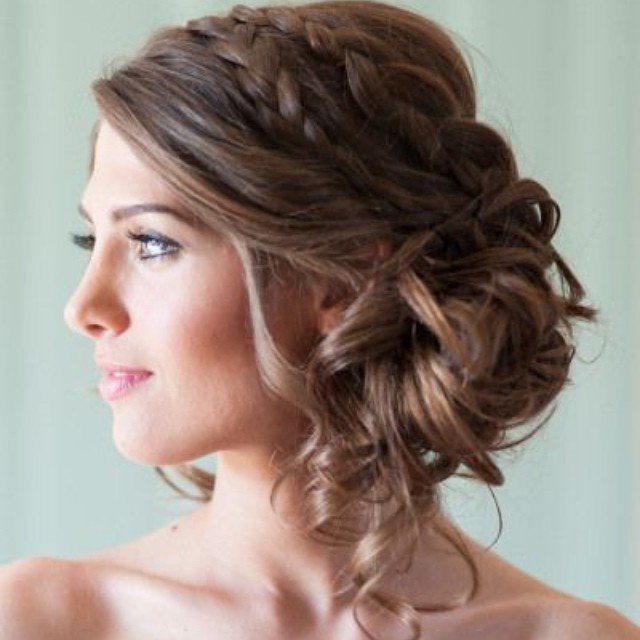
Moving the bun to one side gives you more neck to show and changes the balance of the whole shape.
Gather the hair at ear level on whichever side you prefer, twist and pin it there. The side bun sits lower than a high one almost every time, so the finished look is softer.
A braid across the crown, like the one visible here, adds structure if the bun itself is loose.
11. Sleek-to-Messy Bun
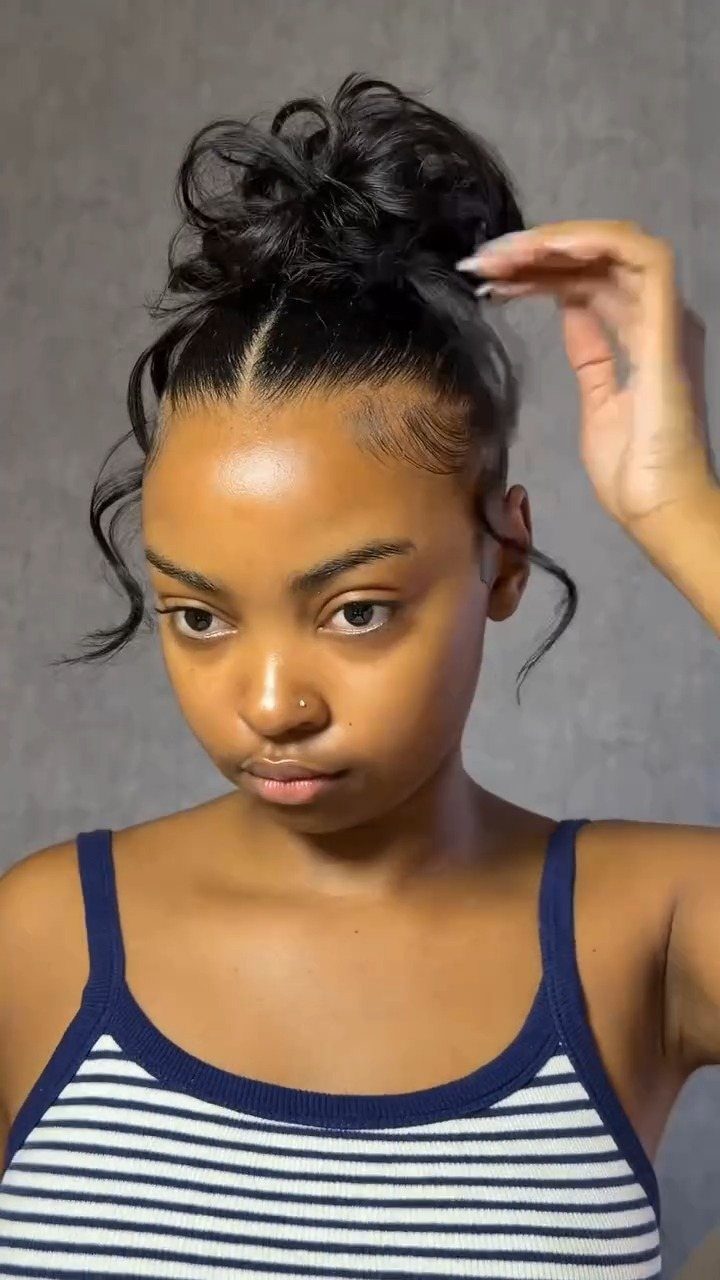
The front is smooth and the bun is loose, so you get two opposite textures in one style.
Brush or gel the hair from the hairline back to the crown, then gather it into a high ponytail. From there, twist the length loosely and wrap it around the base without pulling it tight.
Use edge control or a light gel on the front section only. The contrast between sleek roots and a soft bun makes both parts look intentional instead of unfinished.
12. Messy Space Buns
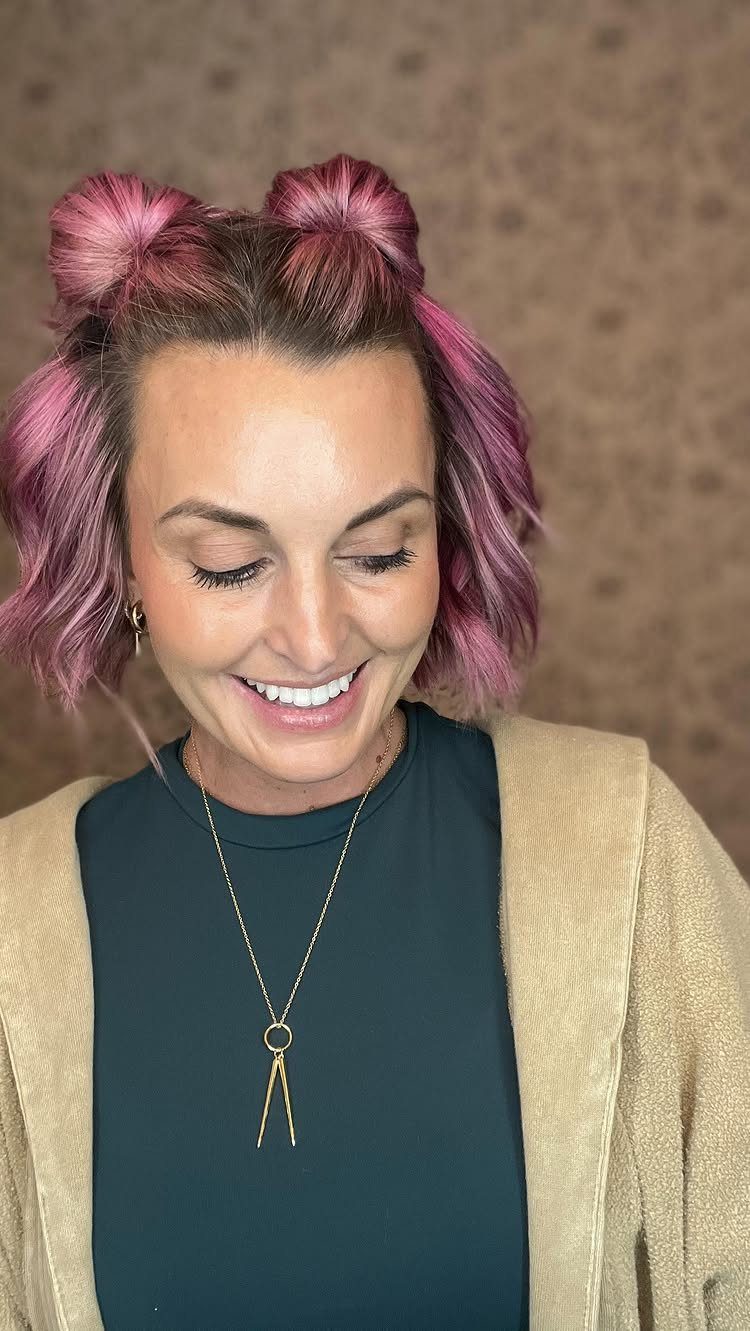
Two buns instead of one, each placed high on either side of a center part.
Section the hair in half from forehead to nape, gather each side into a ponytail at the crown, then twist and wrap each one into a bun. Pin each separately.
Space buns look best when the part is straight and the 2 sides match in height.
If your hair is short, the buns will be smaller, and that reads as a different style entirely, so this works better with shoulder length or longer.
13. Fringed Donut Style
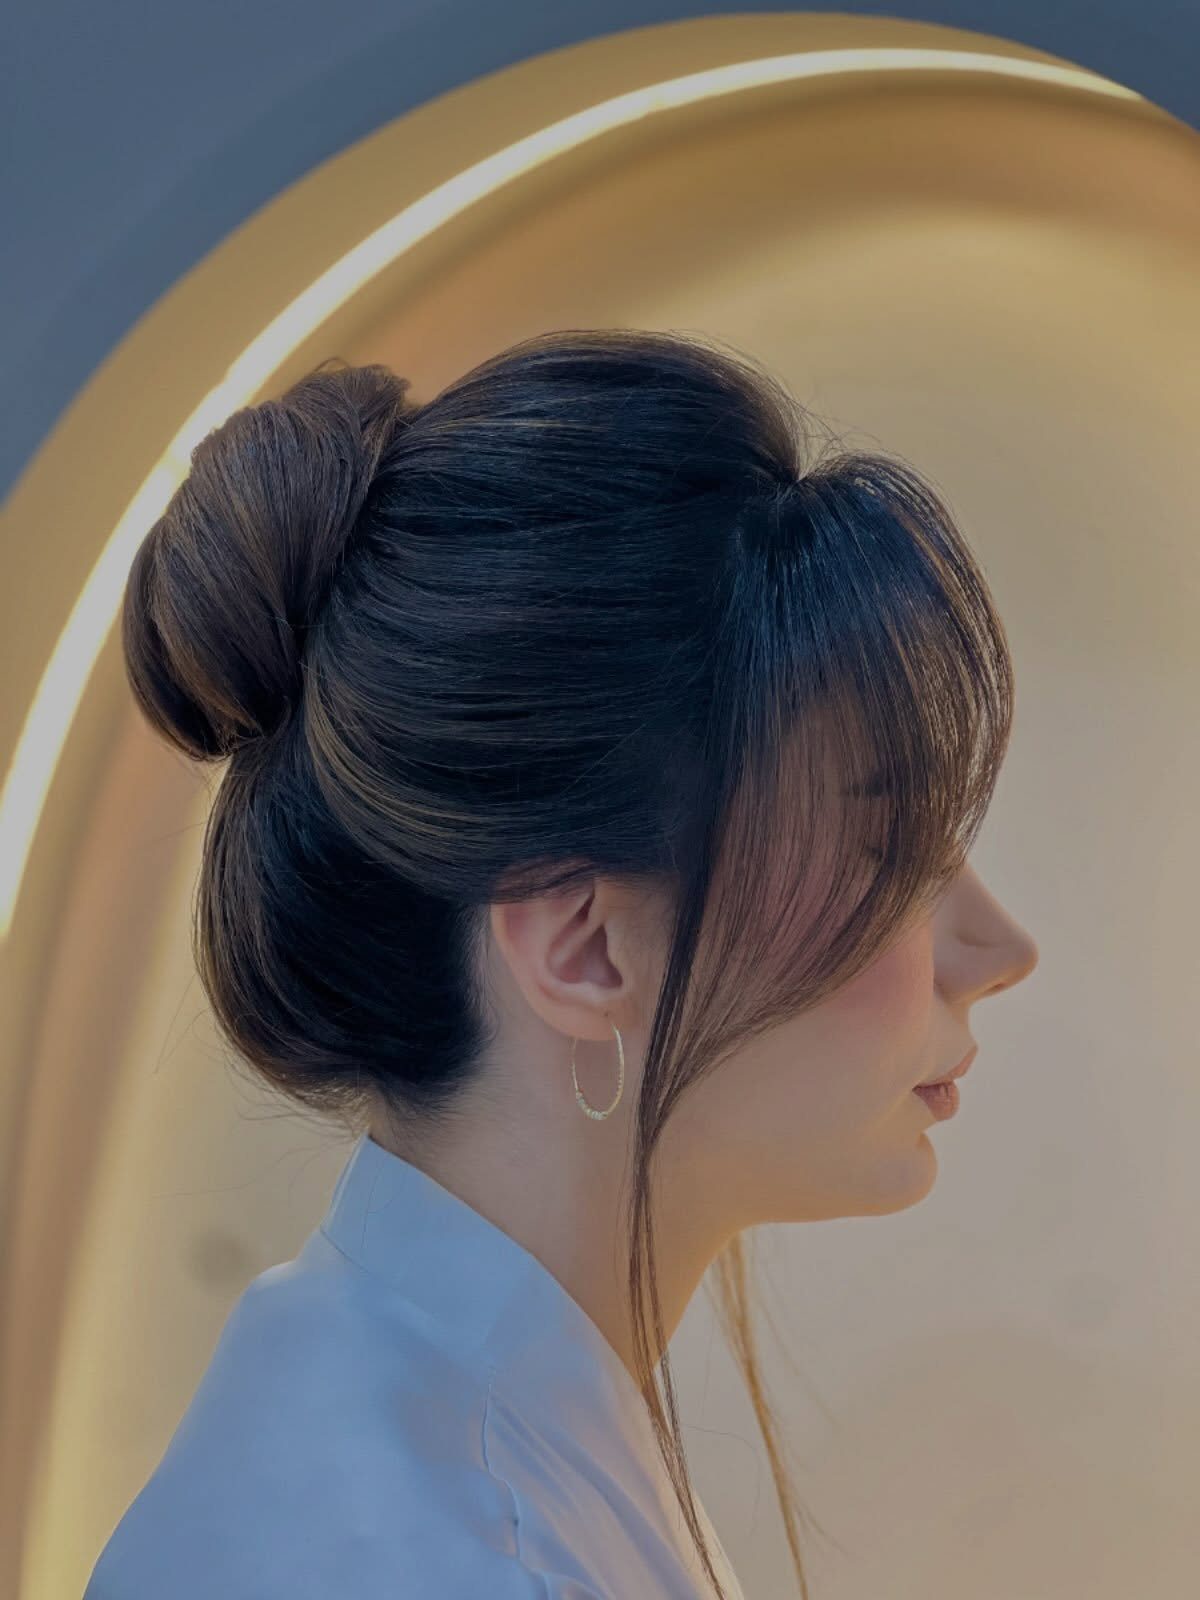
A donut-shaped bun sits at the crown with bangs or face-framing pieces left out in front. The bun itself is smooth and round, while the fringe softens the hairline and keeps the whole look from reading too formal.
If you already have bangs, this is the fastest version.
Without them, pull a few thin sections forward before gathering the rest into a high ponytail, then wrap the length around a donut form or twist it into a round bun and pin it flat.
14. Peony Blossom Updo
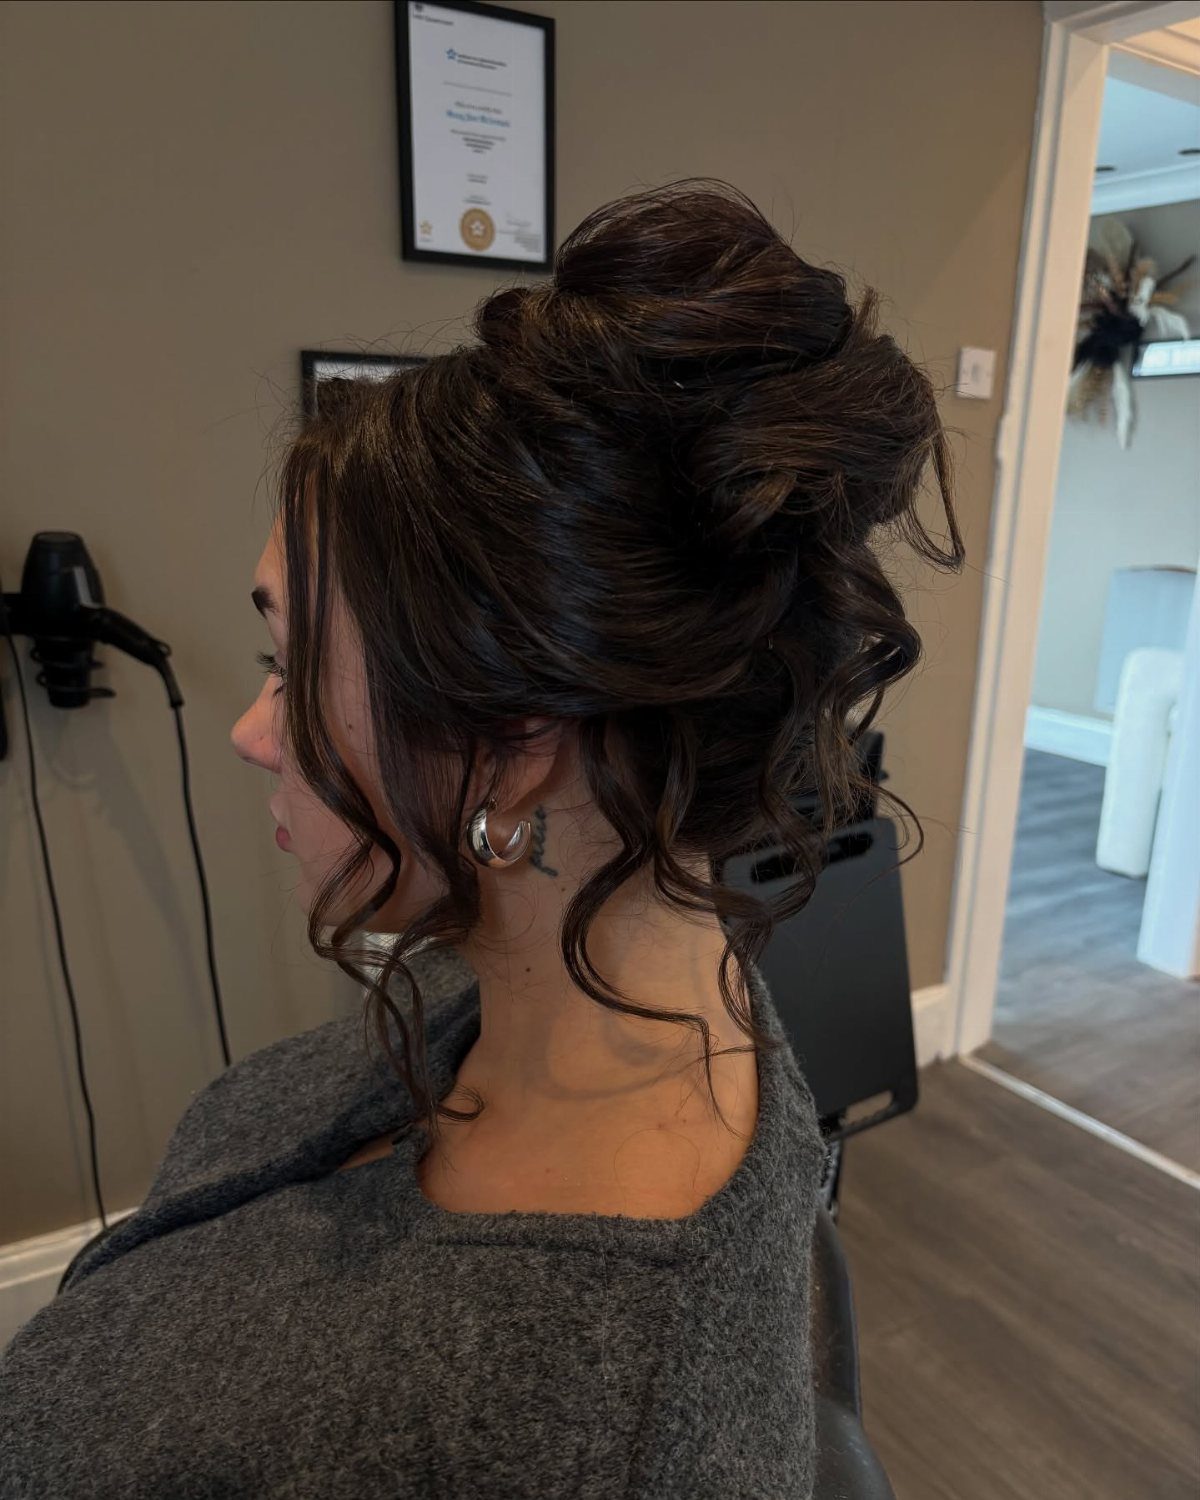
Sections of hair are twisted and looped back on themselves to build a soft, petal-like shape at the back of the head. Each loop stays loose so the finished bun has dimension instead of sitting flat.
Start with a low ponytail, divide the length into 3 or 4 sections, twist each one loosely and pin the end back toward the base in a loop.
The loops overlap slightly, and the wispy ends that stick out give the blossom effect. Takes longer than a standard messy bun but holds better because each section is pinned separately.
15. Fluffy Colored Bun
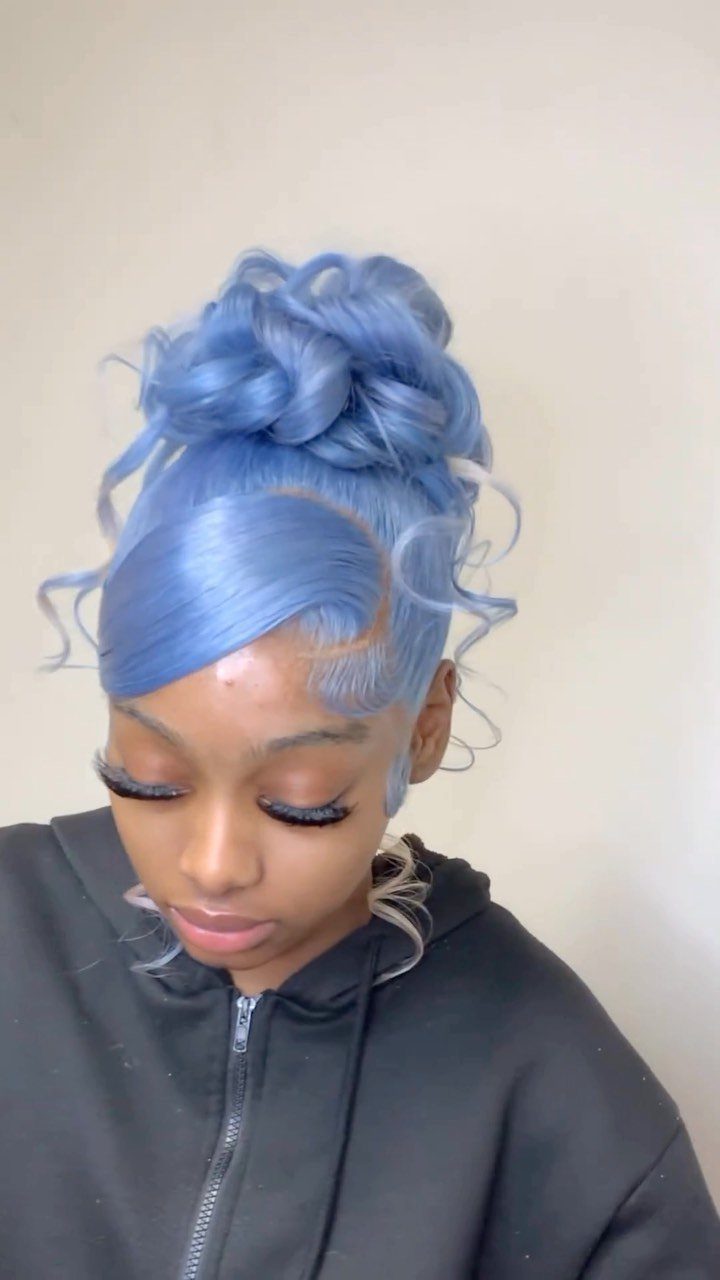
Vivid color shows through a high, loosely gathered bun while natural roots stay visible at the scalp. The bun itself is fluffy and textured, with strands pulled outward to add width.
Gather the hair at the crown into a high ponytail, twist the length loosely and wrap it around the base without pulling it tight.
Pull small sections out of the bun to make it look fuller. The contrast between natural roots and bright ends makes the color the focal point without committing to an all-over dye job.
Preparing Hair for Texture
Hair that is not quite clean grips better than hair fresh out of the shower.
Hair that’s a day or 2 past its wash gives a messy bun the loose, grabby texture it needs; freshly washed hair is slick and tends to slide right out of the elastic.
If your roots run oily, work in a little dry shampoo, and choose a volumizing formula for extra body.
Work a brush through from roots to ends once the product is on, since some formulas leave a faint white film if they just sit on the surface.
Freshly washed hair needs help. On dry hair, a few spritzes of sea-salt or texturizing spray add the grit that keeps a bun from slumping.
Stop there: brushing out all the texture afterward removes the grip you just built.
Securing and Maintaining Buns
Match the tie to your hair. Silk-lined scrunchies or thinner ties help avoid dents and stretched curls, while thick hair may need a durable coiled plastic tie.
Thick hair will pull right through a skinny elastic, while a chunky one on fine hair leaves lumps and bumps in the bun.
Short hair is a different case, since bulky elastics sit awkwardly.
Secure the bun with bobby pins in a shade that matches your hair, not metallic ones, so they blend in. A foam donut close to your hair color also builds volume without needing extension-level length.
Tension at the hairline, repeated daily, can contribute to breakage and thinning near the temples, so rotate between high, low and side placements.
High buns may loosen by midday, so add a few extra pins and a light mist of hairspray.
Oftentimes with thick hair, hair ties can break or sag in traditional messy bun hairstyles since there’s so much hair to hold. To forestall this problem, consider using a coiled plastic hair tie rather than a traditional elastic.
Frequently Asked Questions
What is the easiest way to do a messy bun?
Gather the hair into a loose ponytail, twist it once or twice, wrap it around its own base and pin it with just enough pins to hold.
Loosen the loops with your fingers and tug a few strands free near the face, because that last step is what makes the bun look messy instead of tidy.
Hair that is a day or 2 past its wash grips better than freshly washed hair, which tends to slide out of the elastic.
Which haircut is best for a messy bun?
No single cut wins, but hair at shoulder length or longer is the easiest, since there is enough length to wrap and secure the bun.
Shorter hair needs bobby pins in a shade that matches your color, plus a foam donut or clip-in pieces for fullness.
Curly hair holds a bun with very little product. Fine hair needs dry shampoo or backcombing at the crown, and thick hair is best sectioned before twisting so the bun does not turn heavy and lopsided.