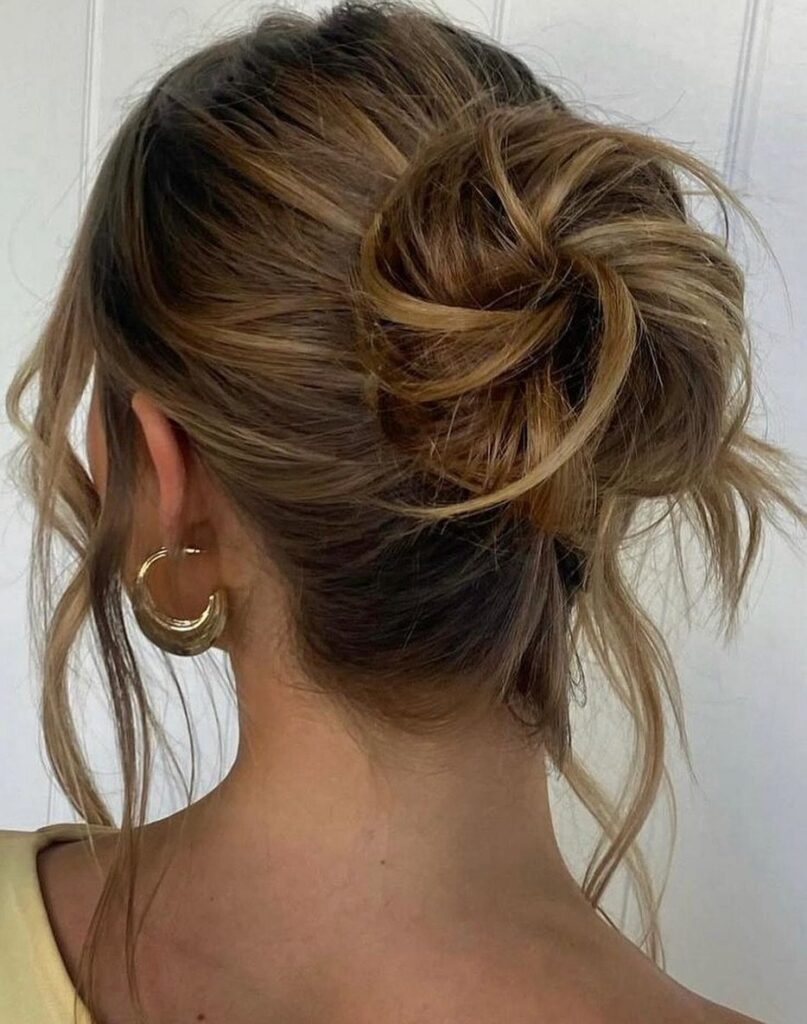
These styles run from a low chignon that needs almost no effort to a braided updo I’d save for events, and the length of your shortest layers decides which end suits you.
A loose, pinned style such as the curled tendril updo hides layers that stop short of the pins, but a sleek high bun leaves every layer exposed and usually needs product to hold through the day.
Face shape matters less at this length than layers do, since medium hair flatters nearly everyone.
1. Classic Chignon
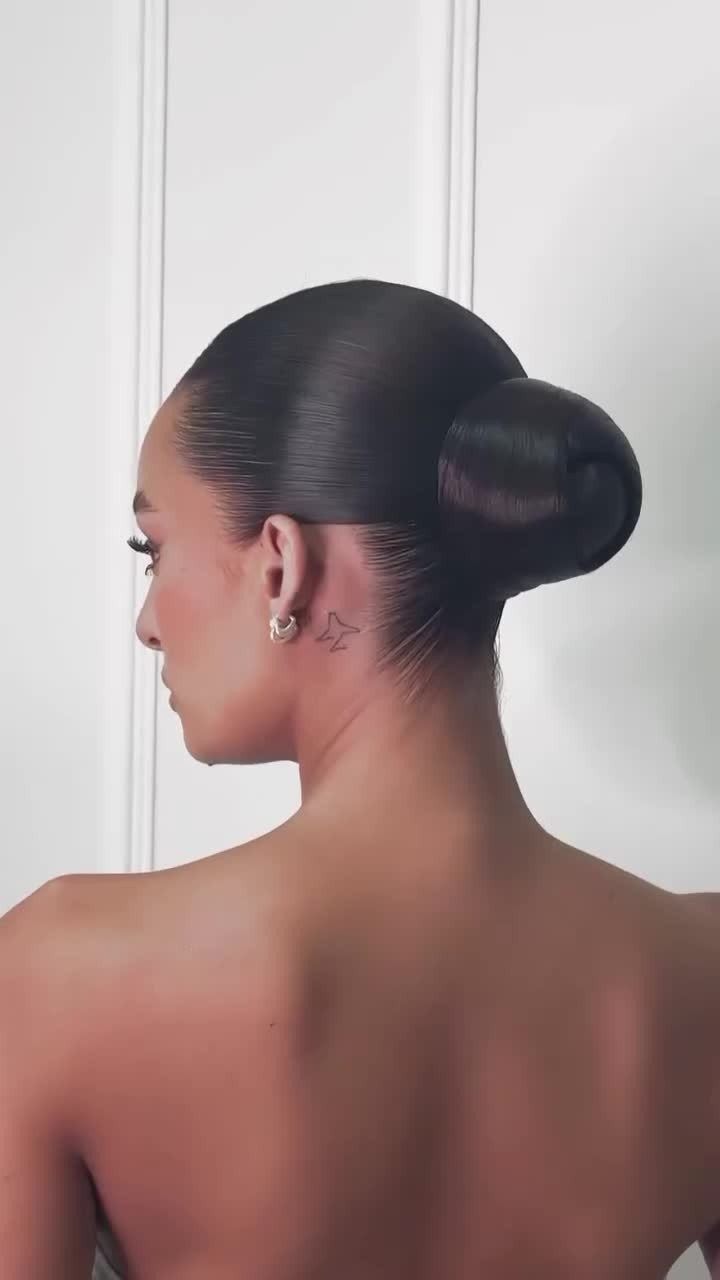
A low bun at the nape is the version of an updo I trust most for medium hair, because it needs no height or volume to look finished.
Smooth the hair back, gather it low, twist, and pin the coil flat against the neck. Sleek hair like this reads polished with almost no extras, so a touch of smoothing product along the hairline does most of the work.
It suits anything from a work day to a formal event, and it sits well under a hat or scarf.
2. Messy Bun
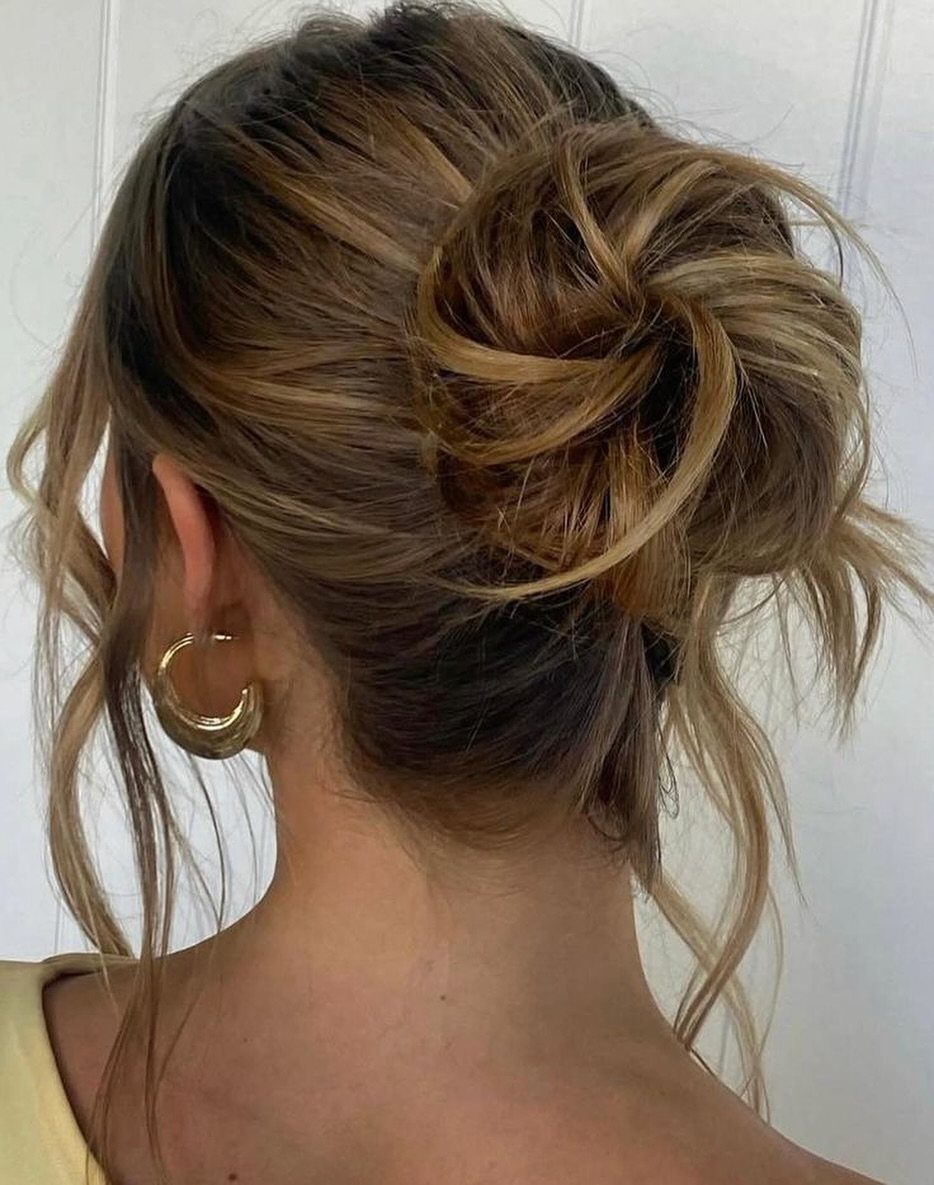
A messy bun works because it looks undone, so a few loose strands around the face and a soft, slightly lopsided shape are what you want.
A messy bun works best when the elastic goes in without much care and a few strands are left to fall, so the shape looks lived in rather than arranged.
On medium hair, I like pulling the bun slightly off-center and tugging the sections outward with my fingers once it is secured.
Day-old hair holds this better than freshly washed hair, since a little grip keeps the escaped pieces from sliding out. It takes about as long as finding an elastic.
3. Messy Top Knot
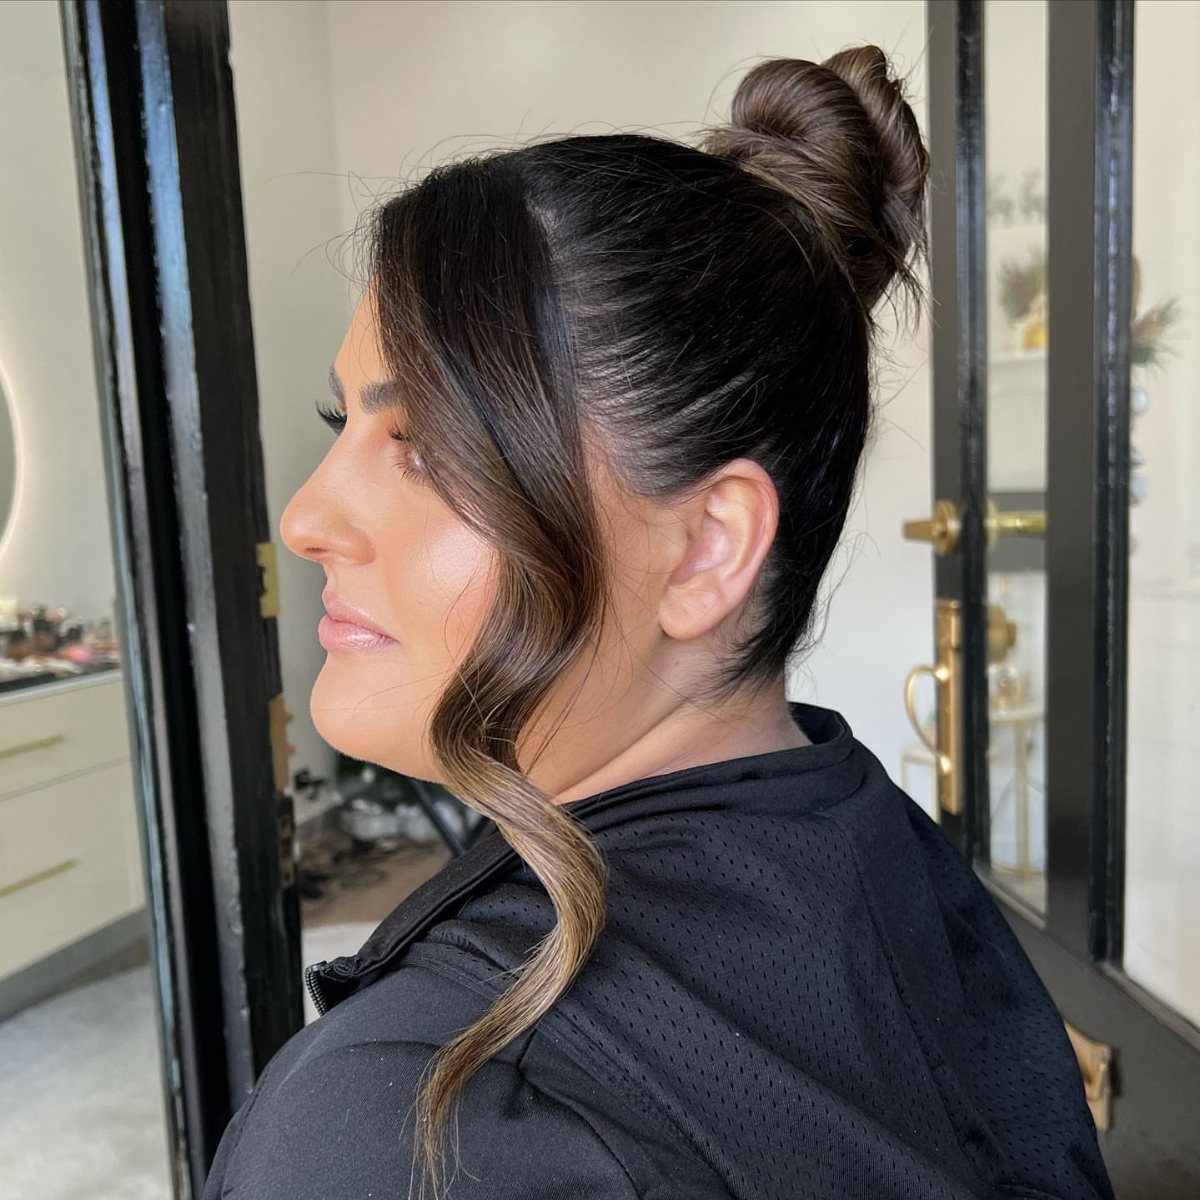
Height changes the mood of a bun, and this one sits well up on the head with texture running through it.
Curl a few strands near the face before you gather the rest, then leave them out so they soften the cheekbones.
Pile the hair high, wrap it loosely, and pin it where it lands instead of smoothing it down. I prefer this to a tidy knot for medium lengths, because the rough texture hides the fact that the ends are short.
4. Half-Up Top Knot
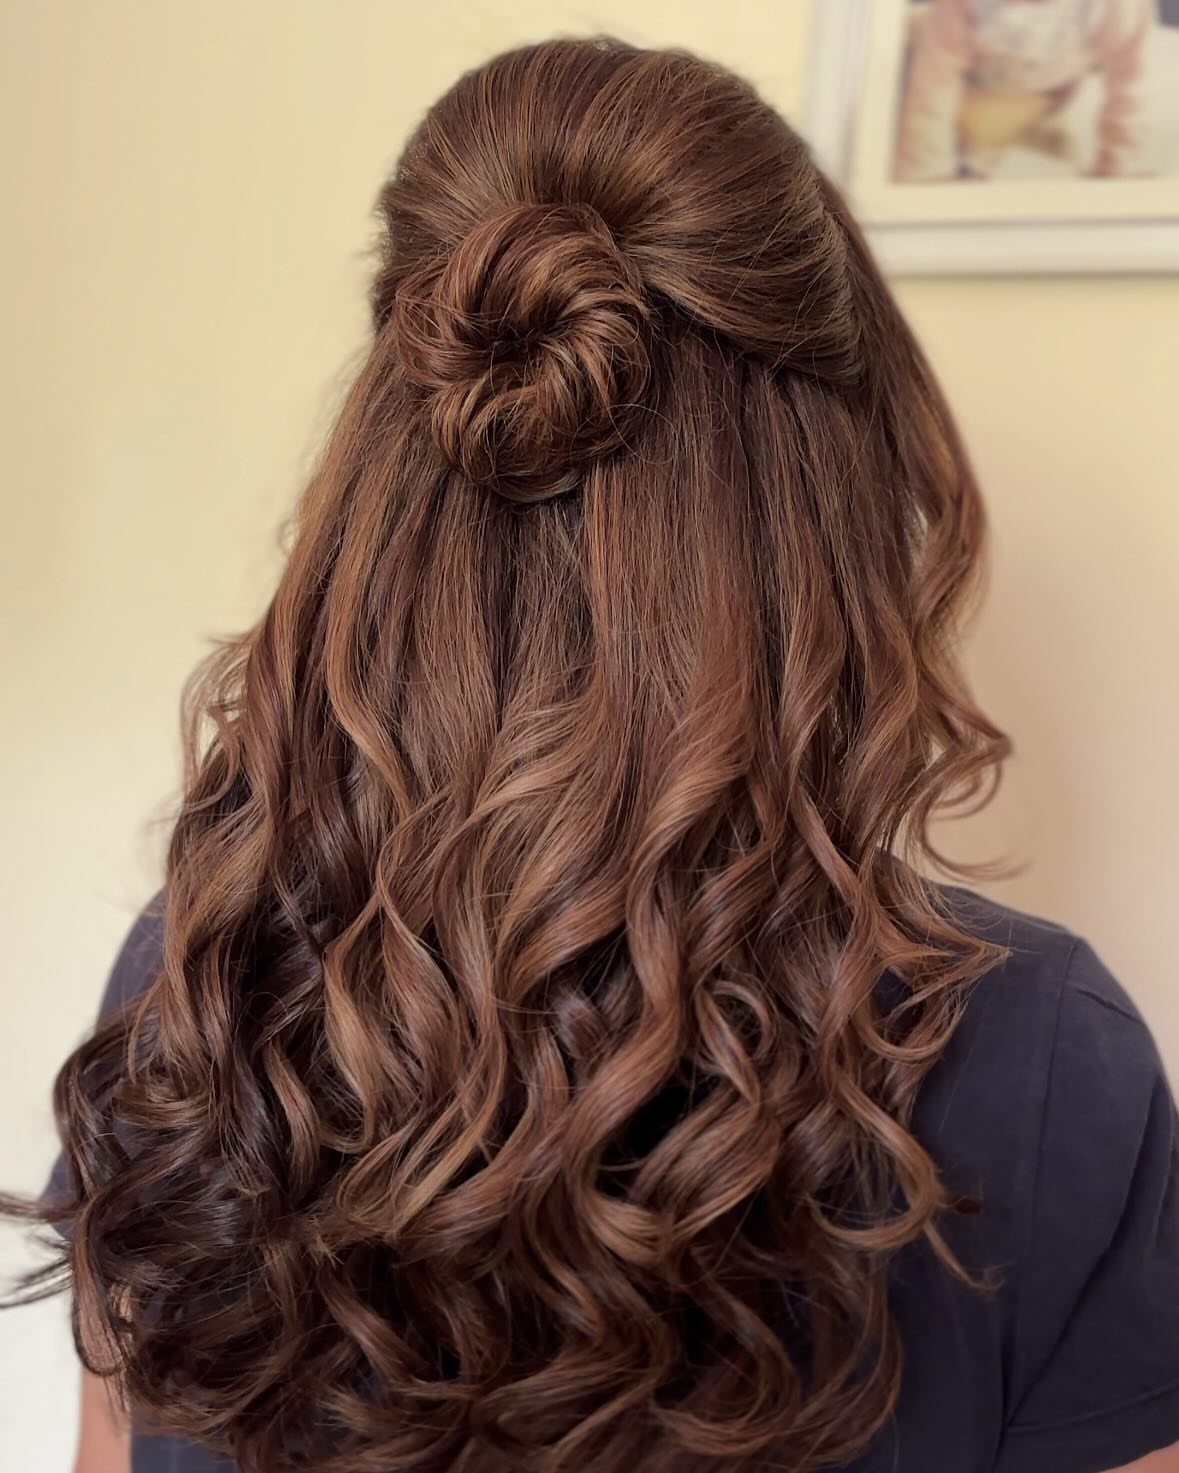
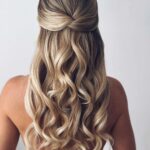
Only the top section gets gathered here, which makes this the easiest way to wear a knot when you still want your length showing.
For a half-up top knot, gather the hair at your crown, wind it into a knot, and pin it or snap an elastic around it while the rest hangs free.
It works best on waves or curls, since the loose hair gives the small bun something to balance against.
On straight hair, add a loose curl or two first so the bottom half does not look flat next to the knot.
5. Sleek Top Knot
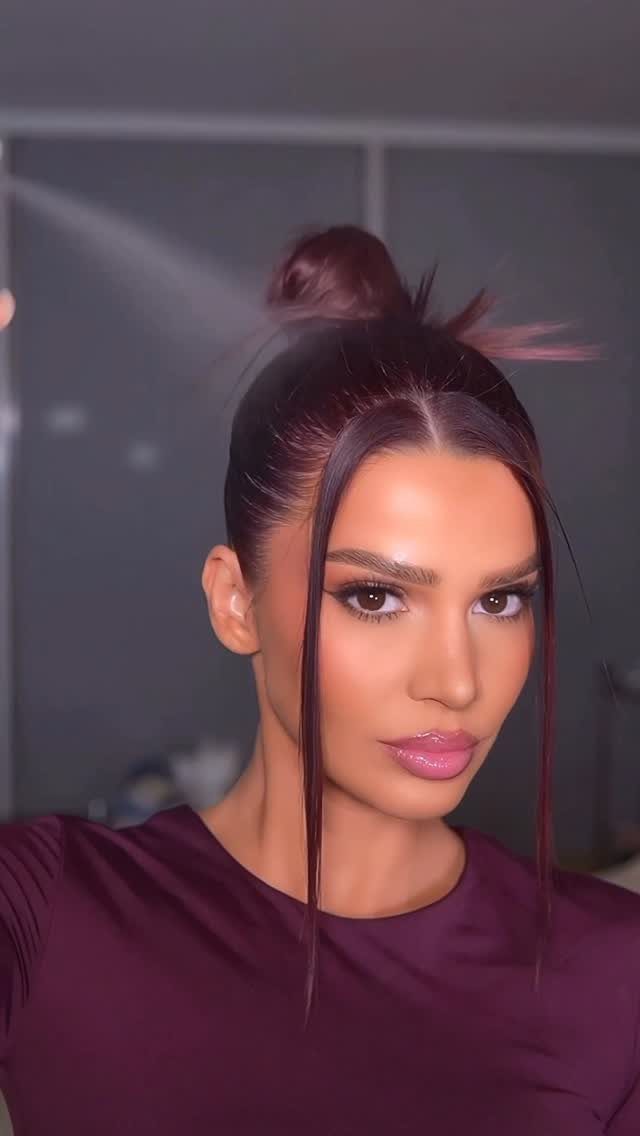
Smooth is what separates this from the messier knots. Brush the hair high and tight, add a bit of smoothing product to catch flyaways, and wrap the length into a compact bun that stays put.
Pulling out 2 strands at the front keeps the style from feeling severe, and I think those pieces are what make it wearable rather than strict.
This is the one I reach for when I want hair completely off my face for a workout, a meeting, or a long day.
6. Classic Refined Pony
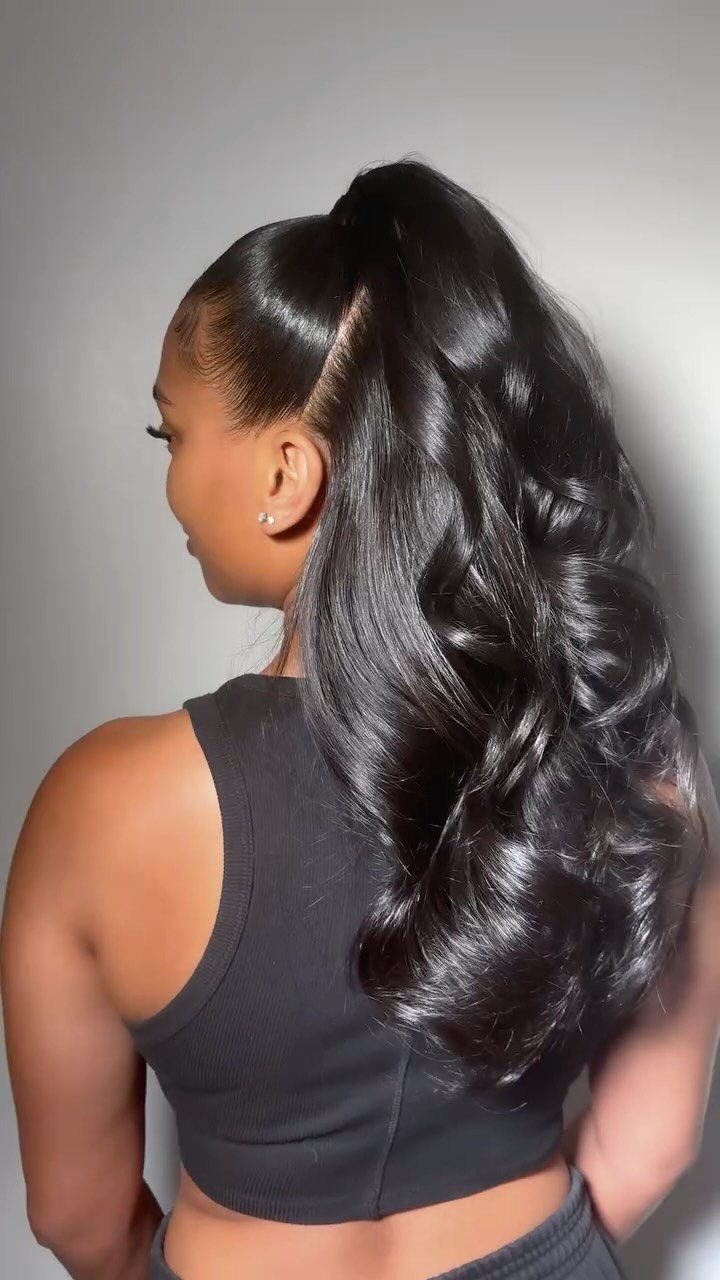
A ponytail looks expensive once the ends curl and the top stays glossy. Set the pony high, brush it smooth, then wrap a small section of hair over the elastic to hide it.
Curl the ends with a loose, soft wave rather than tight ringlets; the look is polished, not prom.
Medium hair is a good length for this since the curls don’t drag the pony down. Finish with a light shine spray, and skip heavy wax, which flattens the curl.
7. Voluminous High Pony
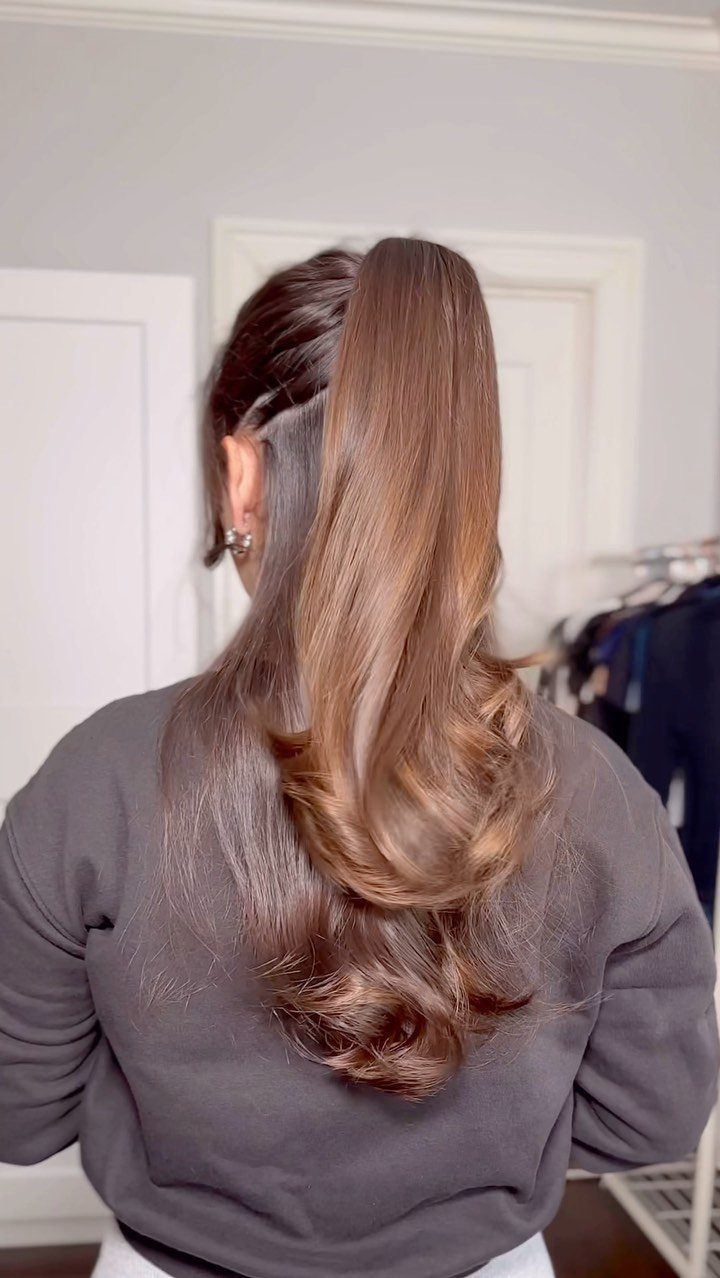
Lift at the crown and curl at the ends: those 2 spots give a high pony its volume and its movement. Smooth the hair up and gather it high, but leave the top slightly raised instead of pressed flat.
A thin braid at each side, as in this one, keeps the face clear and adds detail for almost no extra time. I’d curl the ends last, with a loose wave, so the length swings when you move.
8. Bubble Pony
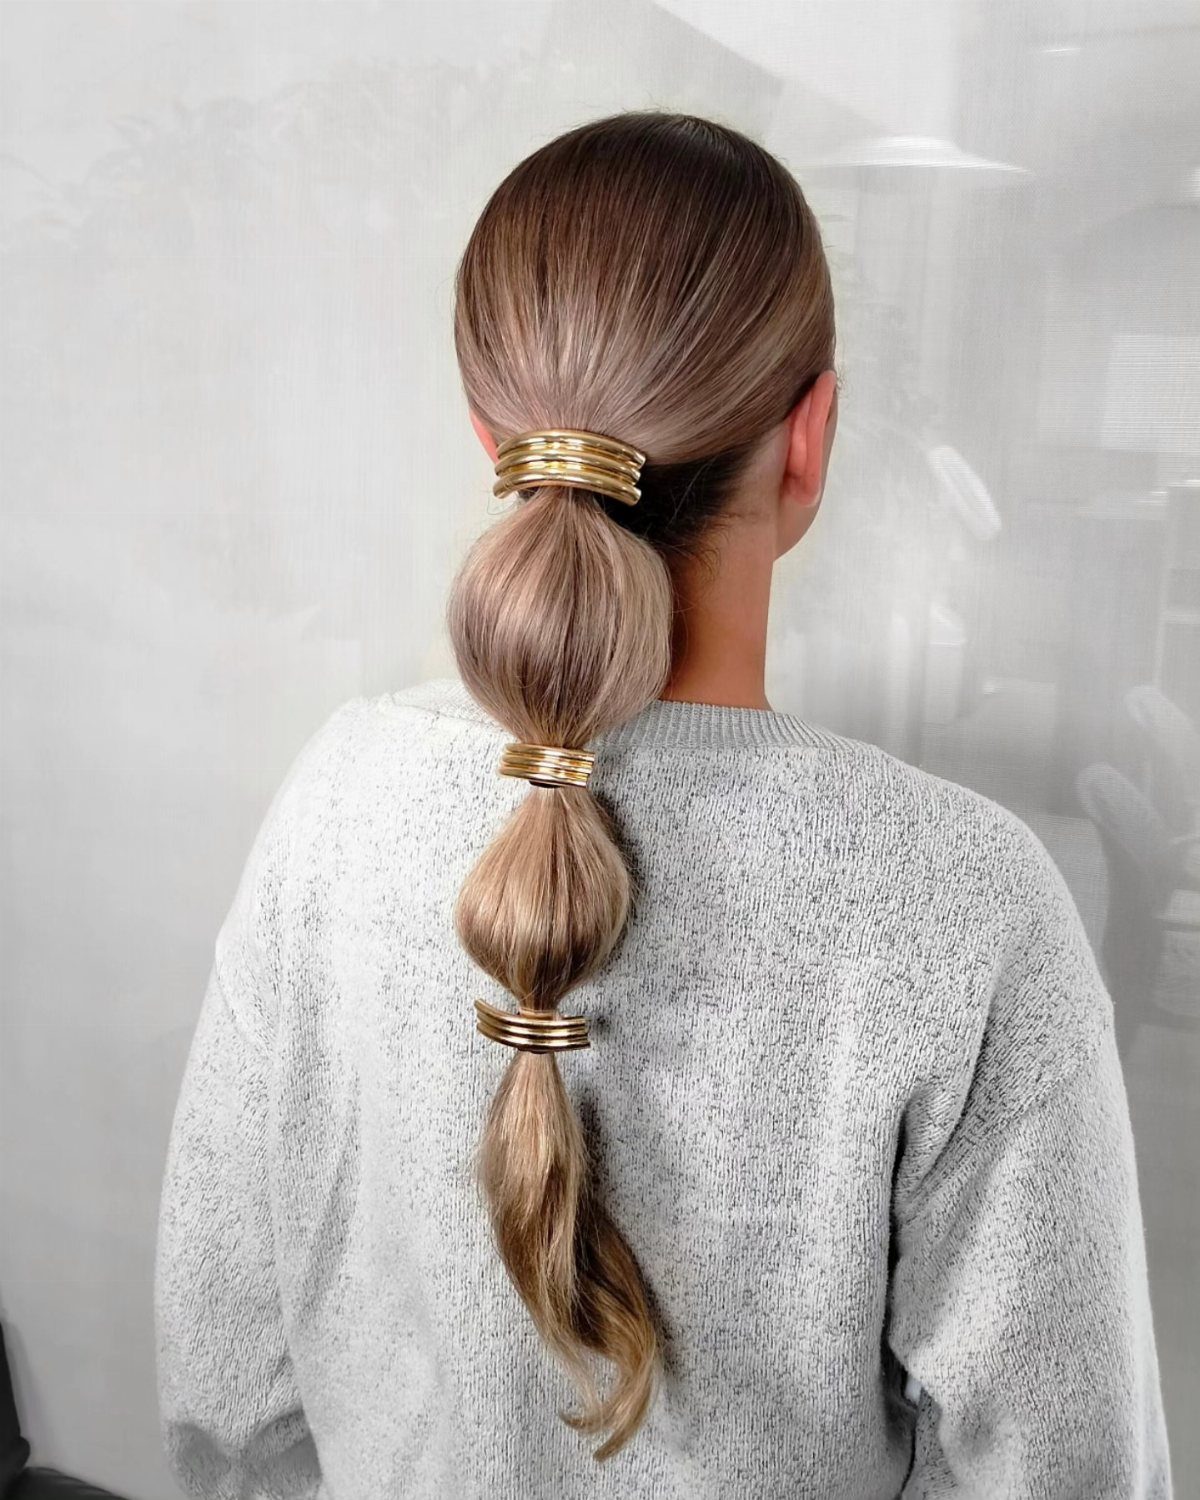
Rounded sections are the whole look: a ponytail tied off at intervals, then pulled outward between each tie until it puffs. Start with a regular pony, add an elastic a little way down, and repeat toward the ends.
Medium hair gives fewer bubbles than long hair, so I’d space the ties closer together to keep each one full. Gold cuffs like these cover the elastics, though plain elastics work too.
9. Side Updo
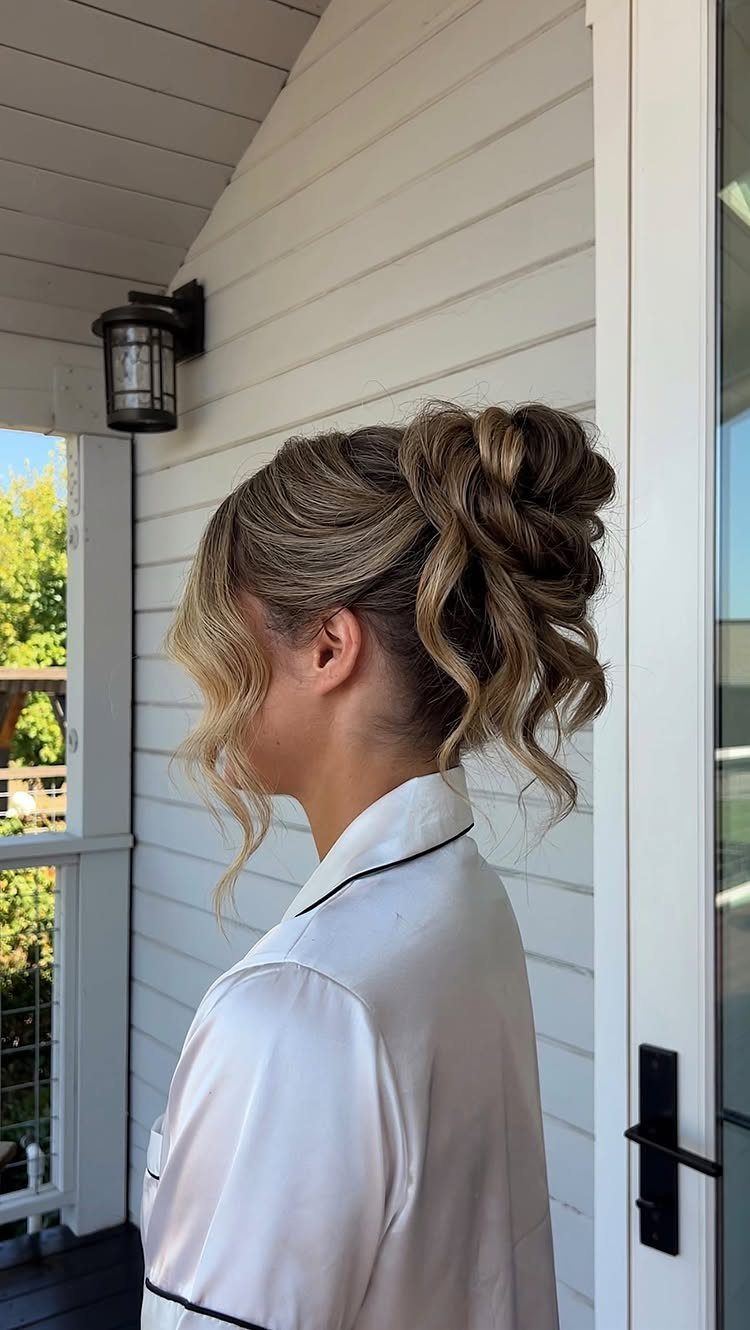
Sweeping everything to one side gives an updo a shape a center bun can’t match. Curl the hair first, gather it low on the side you part toward, and pin the twist loosely so the curls stay visible.
For a neater result, wrap tighter and pin the knot flat. I prefer the loose version on medium hair, since the curls hide the pins and any short ends.
10. Braided Low Bun
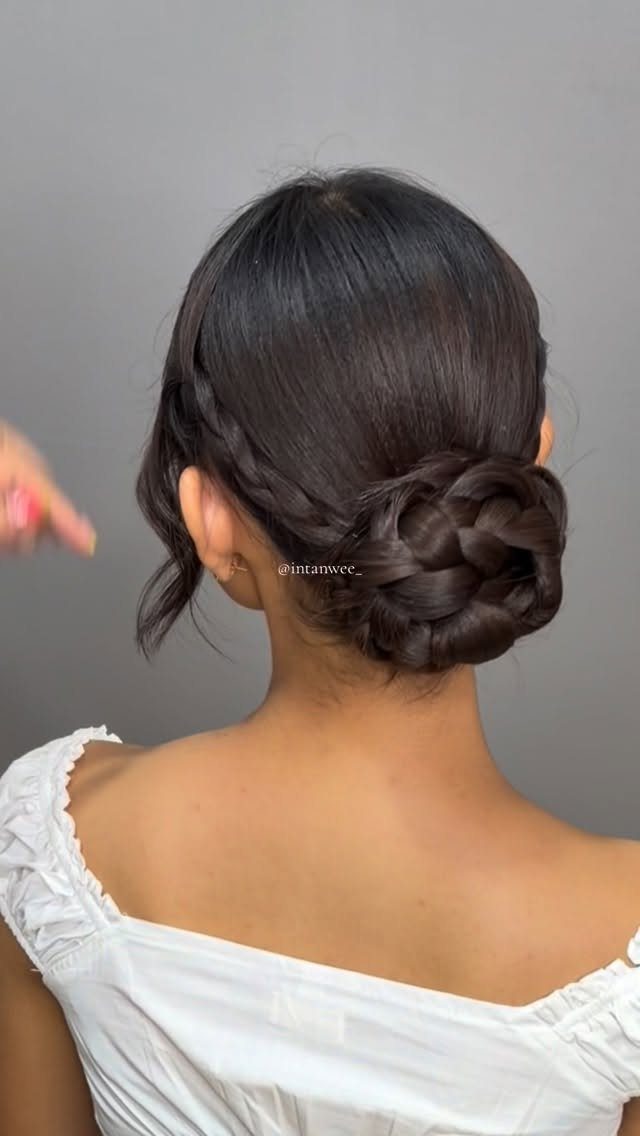
On dark hair, a thick braid reads clearly from behind, which makes this bun more interesting than a plain twist.
Gather the hair low, braid it loosely so the plait stays full, then coil it against the nape and pin the end under.
I like it on medium hair because the braid is short enough to coil into one tidy loop.
11. Braided Updo
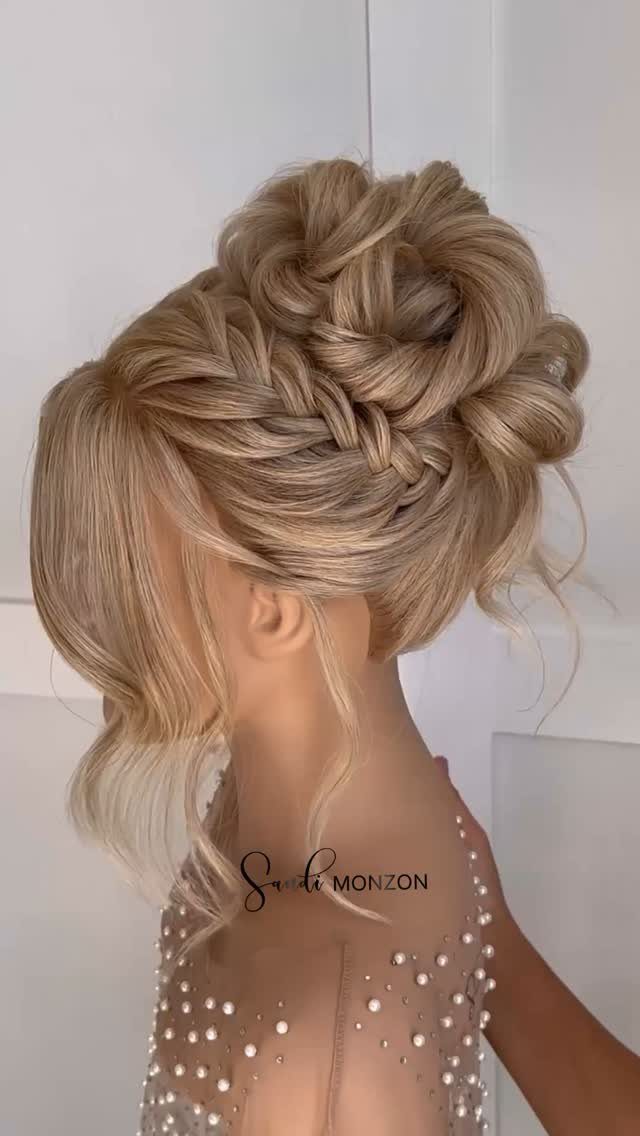
Several small braids, rather than one large one, give this updo its detail.
Braid sections from the front back toward the crown, then gather the braid ends with the loose hair and pin everything into a soft shape at the nape or crown.
Leave strands out around the face before the final pins; they soften all that structure. I’d save this one for events, since it takes longer than a bun and rewards patience.
12. Braided High Bun
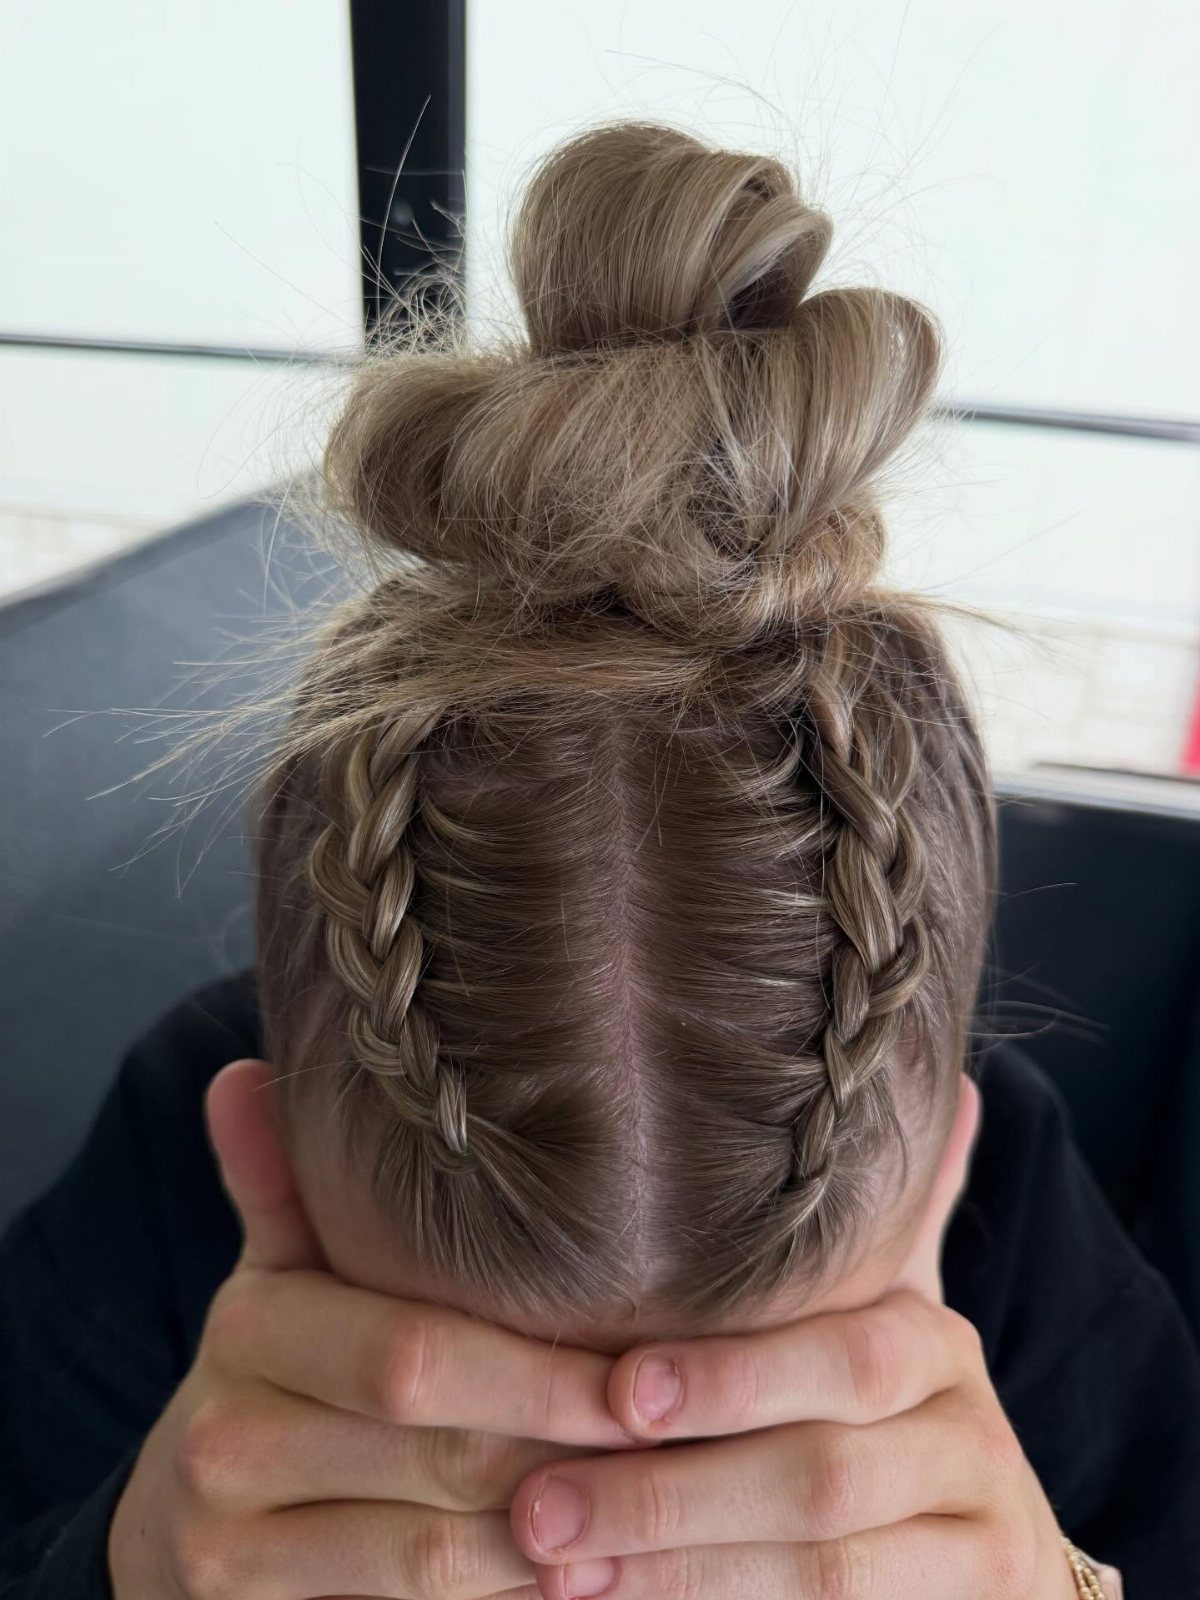
Braiding from the hairline back, one Dutch braid per side, builds the runway for this bun. Gather both braids with the loose hair into a high pony, wrap it around the elastic, and pin it in place.
Tug the wrapped hair outward afterward to get the full, rounded shape. It keeps hair off the face without the flat look of a tight pony.
13. Curled Tendril Updo
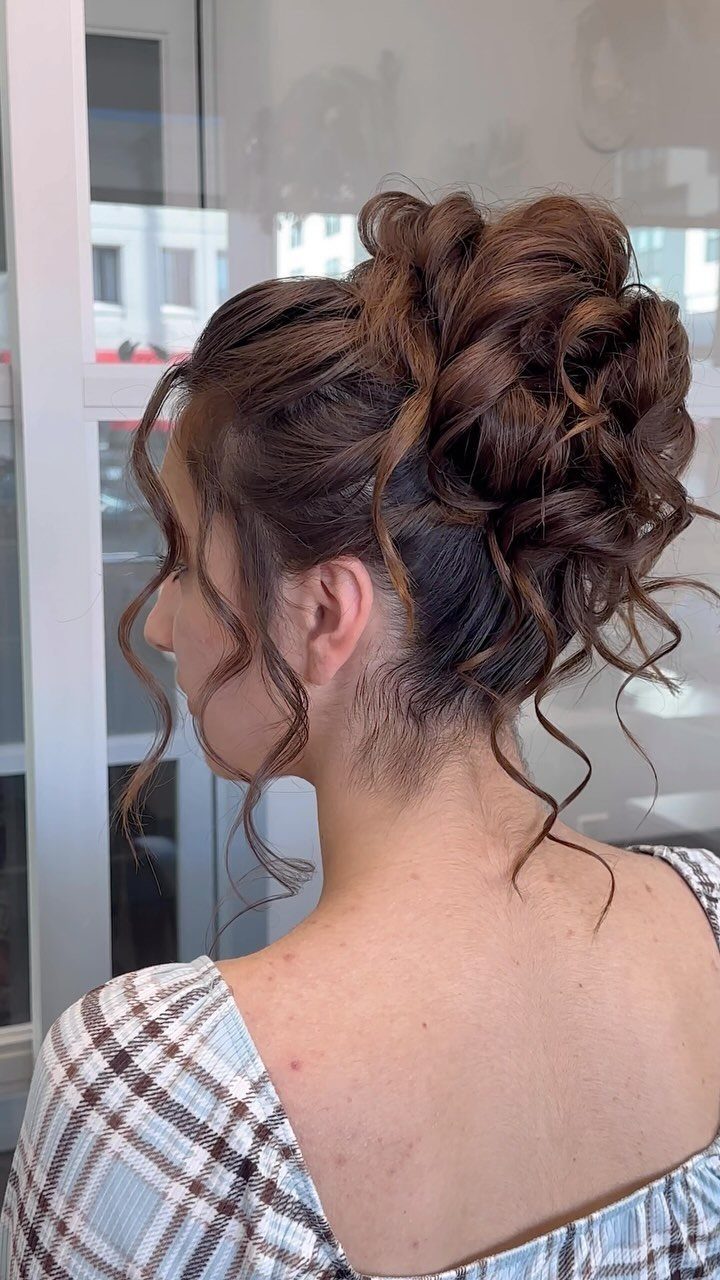
Loose curls pinned up with a few tendrils left hanging make an updo that looks soft instead of structured.
Curl all the hair first, then gather it at the back and pin each curl where it falls, so the shape stays rounded and a little uneven.
Pull out a few pieces near the ears and neck, and leave them as curls rather than brushing them smooth. Medium hair suits this well, since the curls pin up easily and the loose pieces are easy to place.
14. Looped Curled Updo
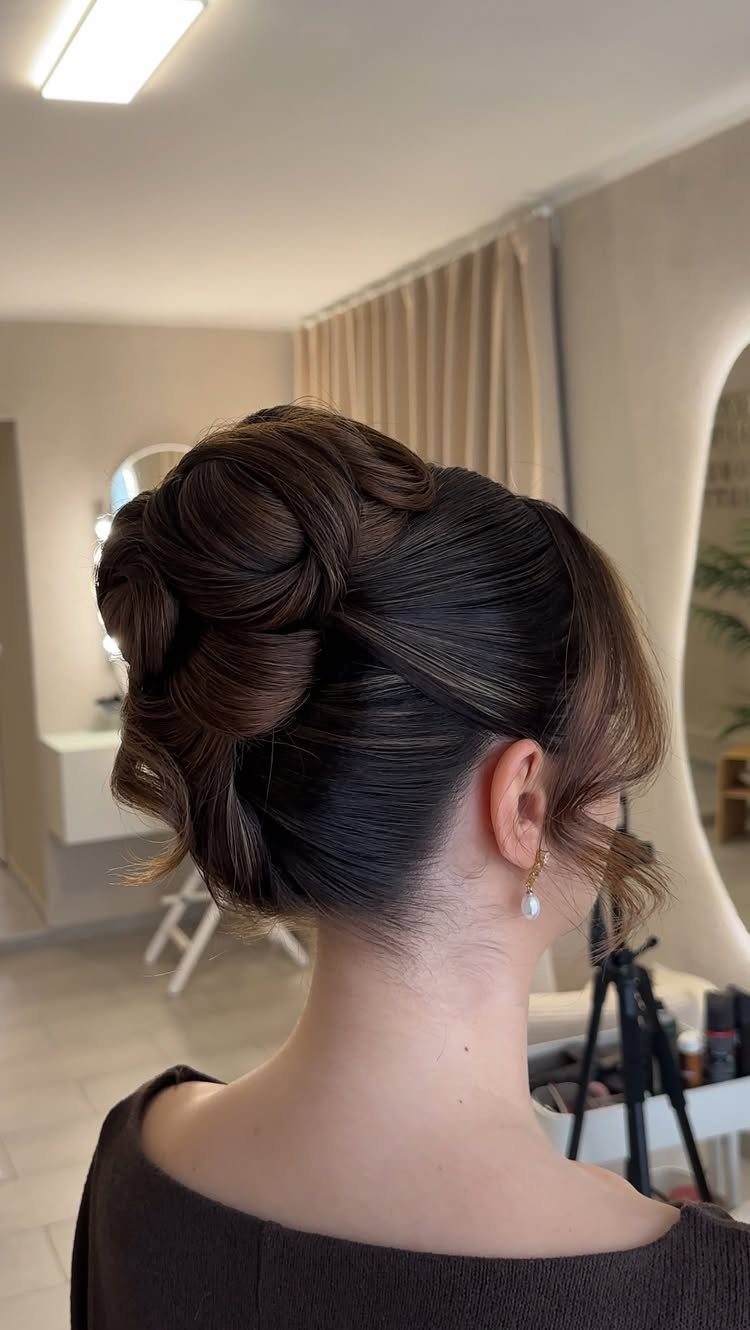
Big looped sections give this updo its volume, and from behind the shape reads as a row of rolled curls.
Curl the hair, then roll each large section into a loop and pin it against the head, working upward so the loops overlap.
A few curls left loose keep the polish from turning stiff. On medium hair, I’d keep the loops large and few; small ones look busy and use up the length quickly.
15. Low Twisted Updo
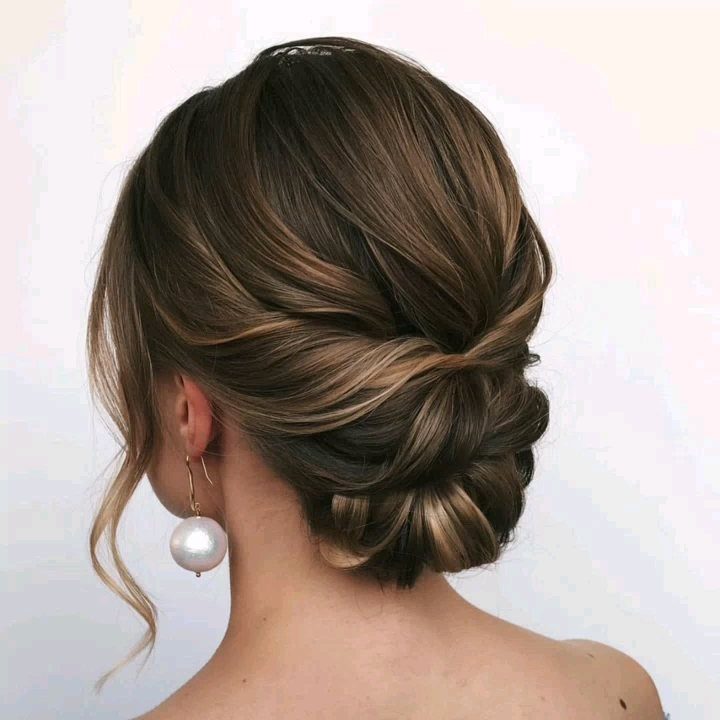
Twisting the hair low and pinning it flat is a quieter cousin of the chignon. Sweep everything back and to one side, twist it down the length, and pin the twist along the nape.
One curl left out by the ear is the detail that matters here.
Curl that piece with an iron, then let it fall so it frames the jaw. Medium hair twists easily at this length, and I like the look with simple earrings, since the hair is doing the work.
16. Sleek Side-Swept Updo
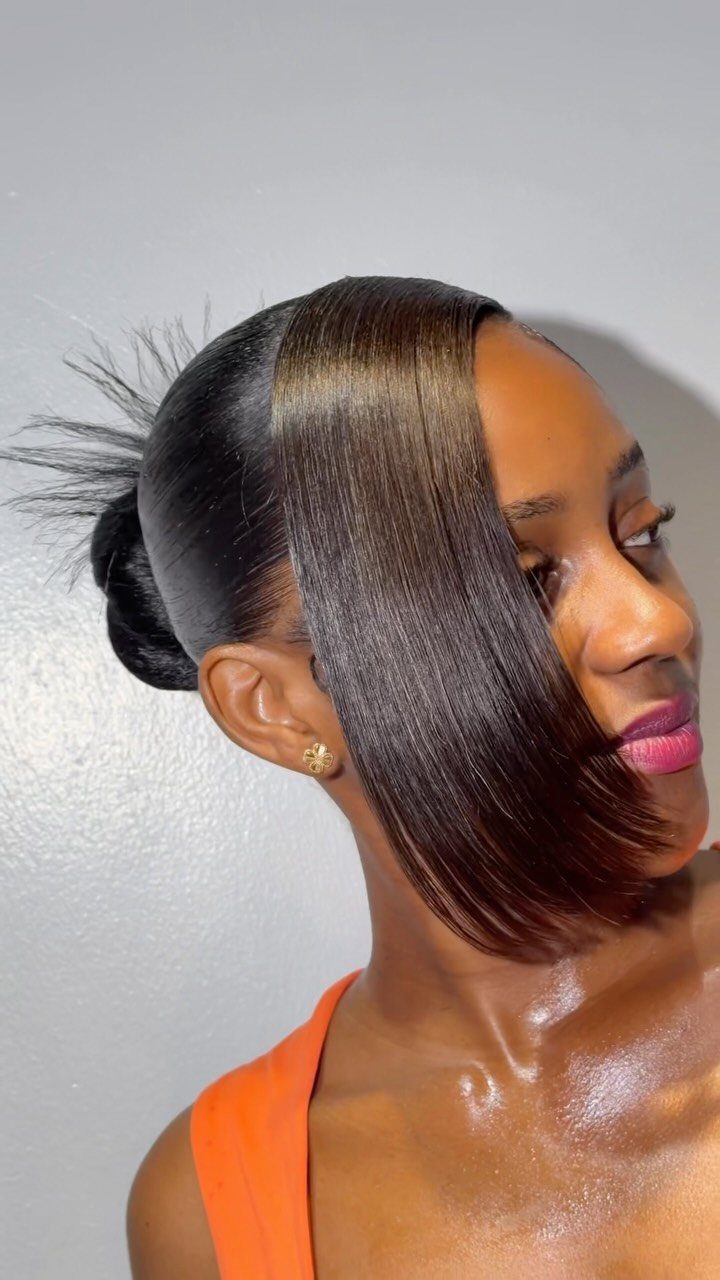
Drama here comes from one long section swept across the face while everything else is pinned tight. Smooth the hair up with a brush and a little smoothing product, then leave a deep side section free and comb it across.
Part deep on the side you want the sweep to fall.
I’d keep the pinned part flat and glossy so the swept piece is the only thing moving. It does hide part of the face, so it suits people who like that.
17. Pinned Occasion Updo
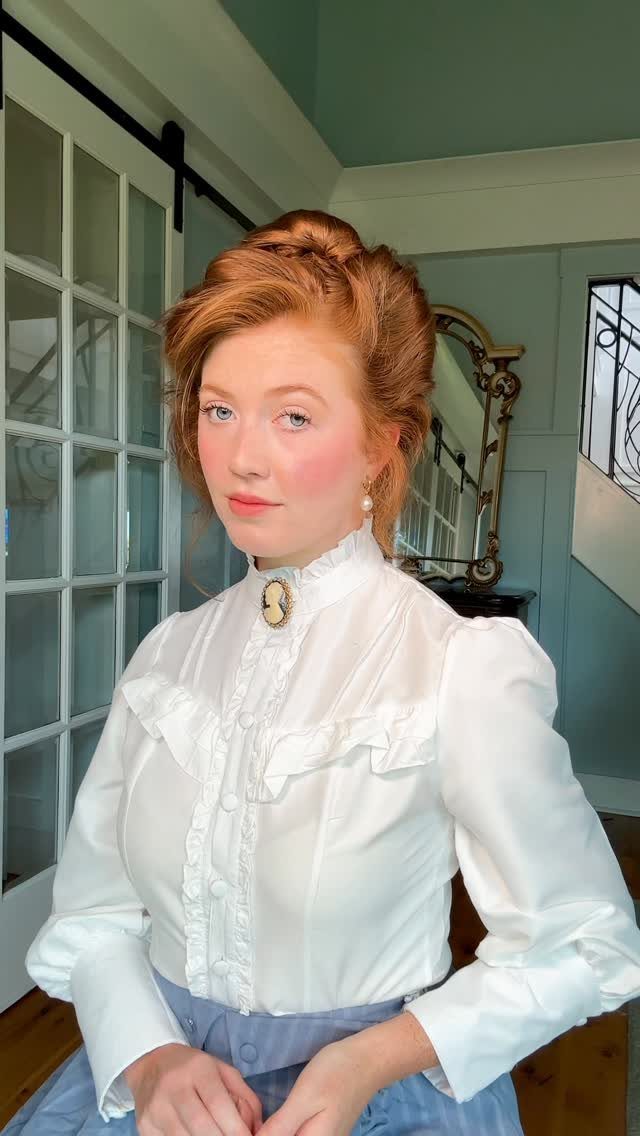
Neat pins and a tidy shape make this the updo to wear with a ruffled blouse or any dressed-up outfit. Smooth the hair back, gather it, and secure it with pins that match your hair color so they disappear.
Keep the shape close to the head and check from the side to make sure no pin shows. I’d choose this over a loose style when the outfit already has detail, since a clean updo lets the ruffles stand out.
Medium-hair Styling Advantages
Medium hair works with every face shape, so you can choose a style for the look you want instead of planning around your jaw or cheekbones.
It also weighs less than long hair, so an updo is less likely to drag or slip by afternoon.
Drying time is shorter and the styling takes less product, which helps on mornings when the hair has to go up fast. Half-up or fully up are both on the table at this length.
If you want something outside the usual buns, try a French twist. Rolling the hair under works well at medium length because the ends disappear into the roll, so a ragged trim never shows.
Shorter layers are the one thing to watch. Loose, pinned looks hide layers that are too short to reach every section; a high bun is less forgiving and usually needs a little styling product to last through the day.
Frequently Asked Questions
What are the different types of updos?
For medium hair, the main types are buns (low chignons, messy buns and top knots), ponytails (sleek, high and bubble), braided updos, curled updos with loose tendrils, and twisted or side-swept styles.
They mostly differ in how polished or loose they look. Sleek versions read formal, while loose ones look relaxed and cover short ends.
What are some easy and cute updos for medium hair?
A messy bun, a half-up top knot and a low chignon are the easiest.
Of the three, the messy bun is the fastest, the half-up knot only involves the crown, and the chignon looks fine without any lift. Loose styles also hide short ends, which helps at this length.
How do you do a quick bun with medium hair?
Brush everything back, tie a ponytail, work a little product through the length, then twist it around the base and pin it in place.
Finish with hairspray and shine spray. A low bun follows the same steps: tie at the nape, coil, and tuck the pins in flat against the neck for a neat finish that needs nothing else.
How do you do a messy updo as a beginner?
Clip the front sections away, gather a high ponytail, curl the front pieces and the ponytail, and add texture spray.
Then twist the length into a loose knot, pin the ends, and pin the front pieces back in. Loose strands and a slightly lopsided shape are the goal, so small mistakes read as part of the look.
How do I make an updo work with medium-length hair?
Work in smaller sections and leave a few curled or wispy pieces out. With a few loose pieces left out, no single strand has to behave.
A low or mid-height bun sits steadiest on medium hair, and a small elastic underneath gives the pins a solid base. Forcing techniques meant for much longer hair is the usual mistake.
Who is a half-up top knot good for?
Thick hair gets relief from this one, since only the top section is lifted and the rest hangs free instead of piling up on the head.
Only the crown section is gathered, wound into a knot and pinned, so the length stays down.
Waves and curls show this knot off best; on straight hair, curl a section or two first so the lower half has some body.
Which updo is best if I’ll be dancing all night?
For a night of dancing, a half-up rope braid is my pick because it barely budges, whether the event is a wedding or a prom.
Split off a section from the top on each side, twist each one into a rope braid, and bring both around to the back.
Do these updos work for all hair types?
Yes, most adapt to straight, wavy or curly hair with small changes to the technique.
Texture matters for some styles, though. Mostly yes, with small adjustments: waves and curls need no help, while straight hair usually wants a few curled pieces under a top knot.