The styles here run from a low ponytail gathered at the nape to a black-and-platinum split color that falls apart if the part shifts even slightly.
Your natural texture and length decide which one is yours: straight lengths suit the sleek and blunt cuts, waves and curls suit the loose, full looks, and a bob shows every bit of regrowth.
I’d pick by texture first, then by how much upkeep you’ll actually keep up with.
1. Low Ponytail
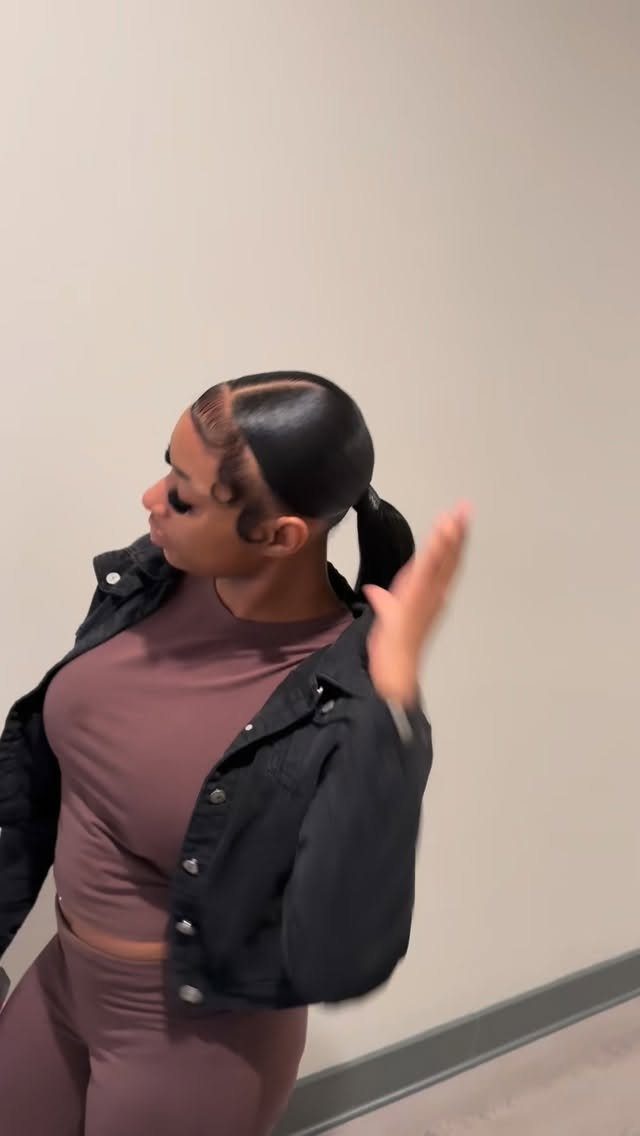
A center part leads straight into a ponytail gathered low at the nape. The clean line down the middle gives the whole style a polished, symmetrical frame that holds up through a full day.
If your hair tends to slip out of a high pony, this sits lower and stays put longer. For extra hold, smooth the top sections with a light paste or pomade before securing the elastic.
2. Beach Waves
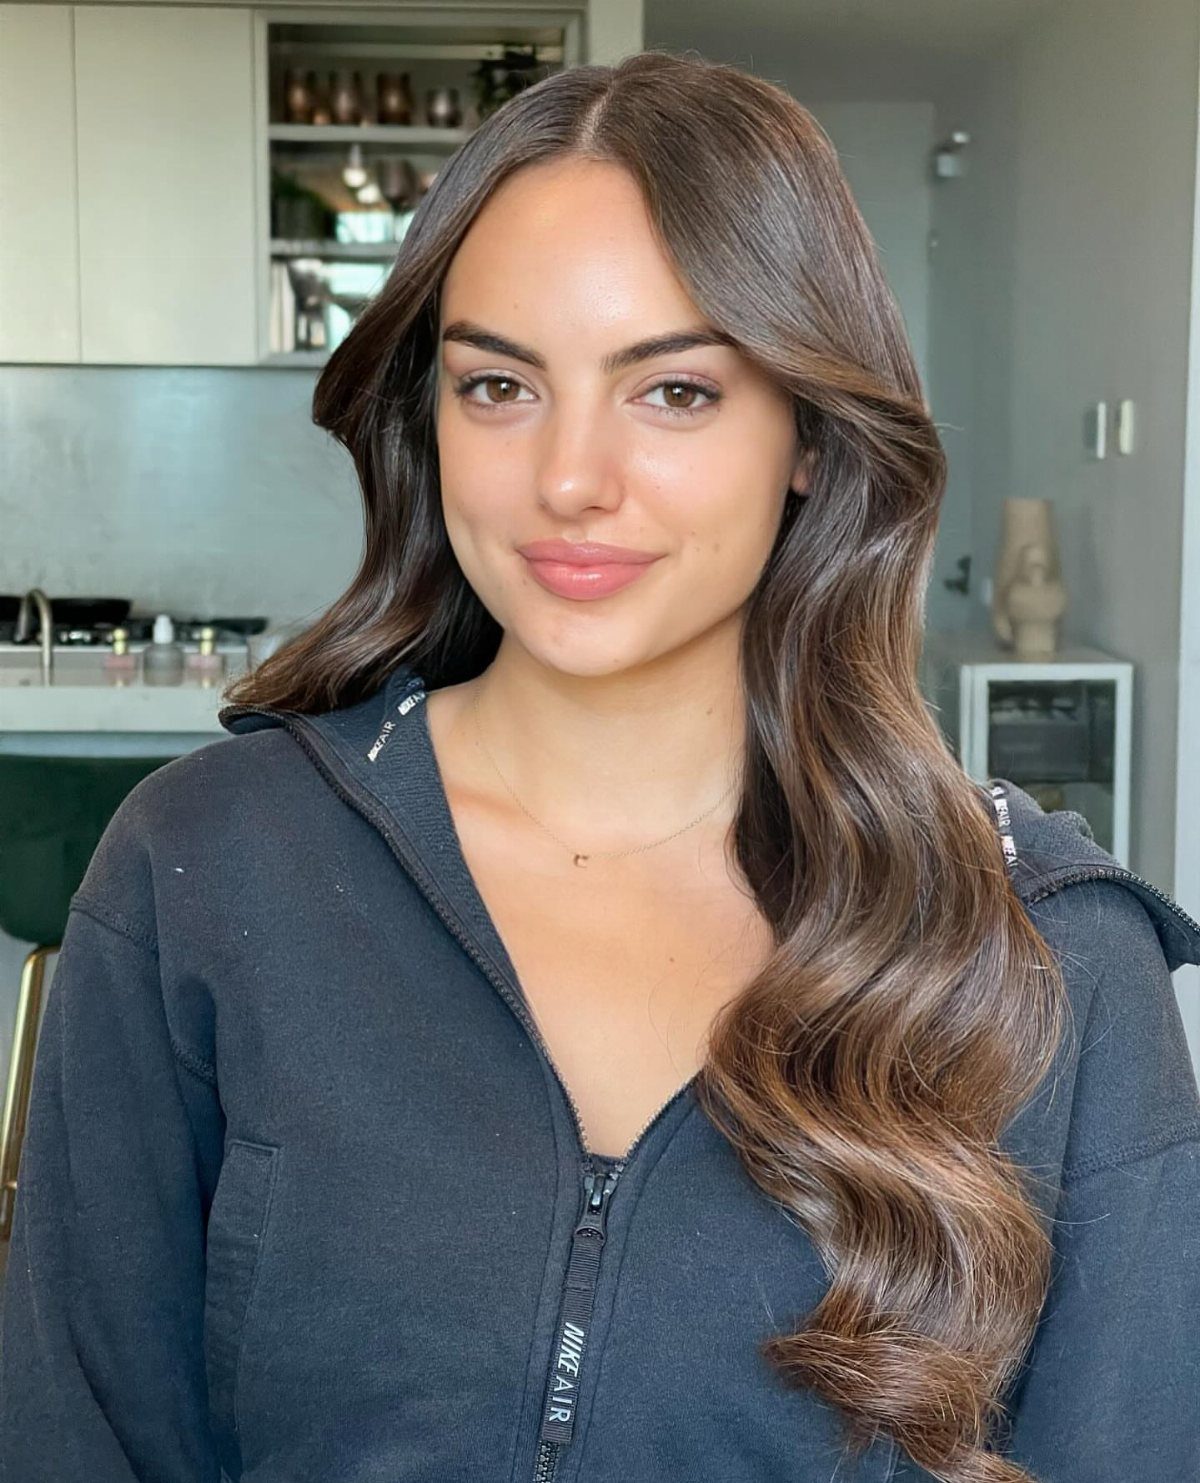
Loose, tousled waves give a middle part a relaxed, textured finish. The center line stays visible while the lengths bend and separate in different directions, so the overall shape reads soft rather than severe.
This works on lengths past the shoulders and takes well to air-drying with a texturizing spray.
If you’re starting with straight hair, a 1-inch curling iron run through random sections and then brushed out will get you close in under 10 minutes.
3. Wet Strands
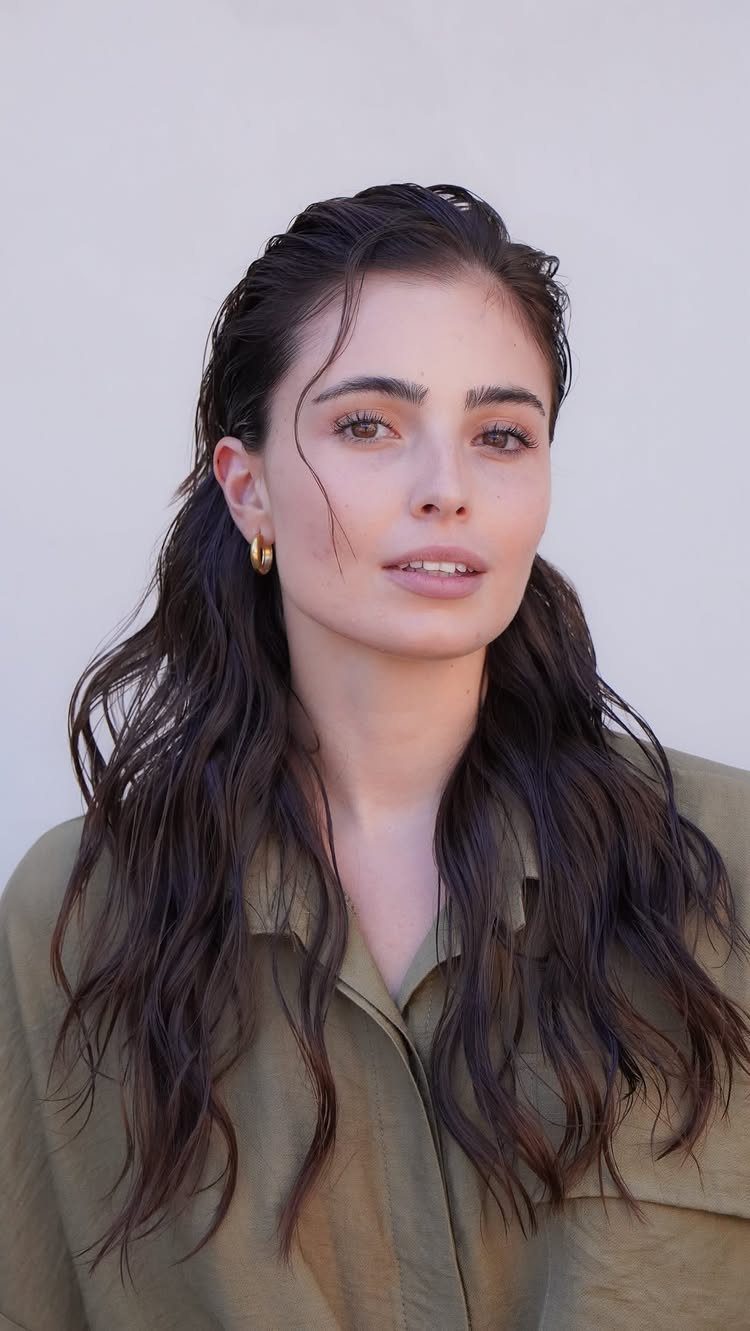
Tight waves are styled to look wet around the face. The glossy, piece-y texture keeps the center part crisp while the rest of the hair holds a damp finish that photographs well and feels deliberate.
A gel or wet-look cream combed through damp hair does most of the work. Let it dry naturally or diffuse on low heat to hold the wave pattern without frizz.
4. Sleek Straight Hair
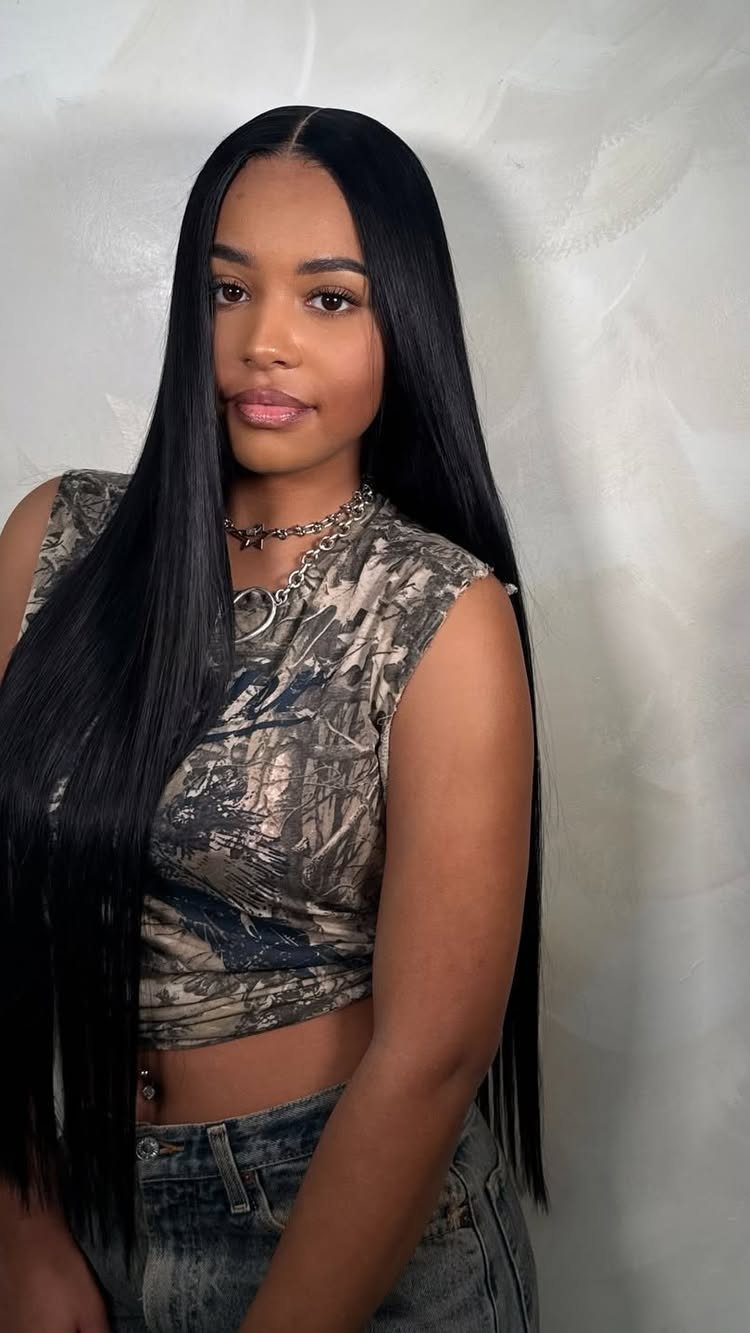
Smooth, straight lengths make the clean center line and polished outline the focus. The part itself becomes the detail, and the blunt, even ends frame the face without competing for attention.
A flat iron and a finishing serum will get the surface flat and reflective.
For fine hair, this style shows every bit of thickness you have. For thick hair, it reads sleek and intentional without extra volume at the crown.
5. Long Layers
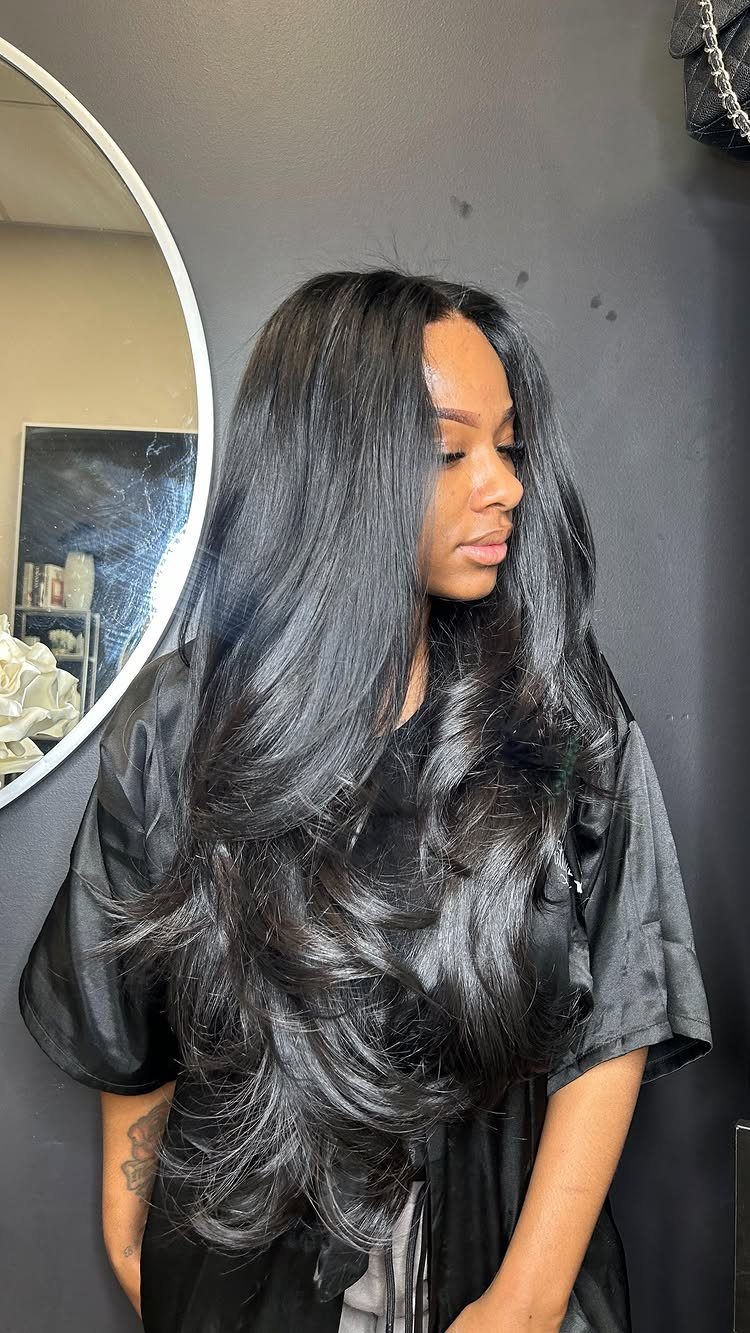
Long, face-framing layers add movement around a center part. The shortest pieces fall near the chin or collarbone, and the rest cascades down in staggered lengths that curl or wave differently depending on how you style them.
Ask for layers that start a few inches below the part and graduate down. This cut grows out gracefully and suits most face shapes because the layers can be adjusted to sit where you need the most softening or structure.
6. Blunt Bob
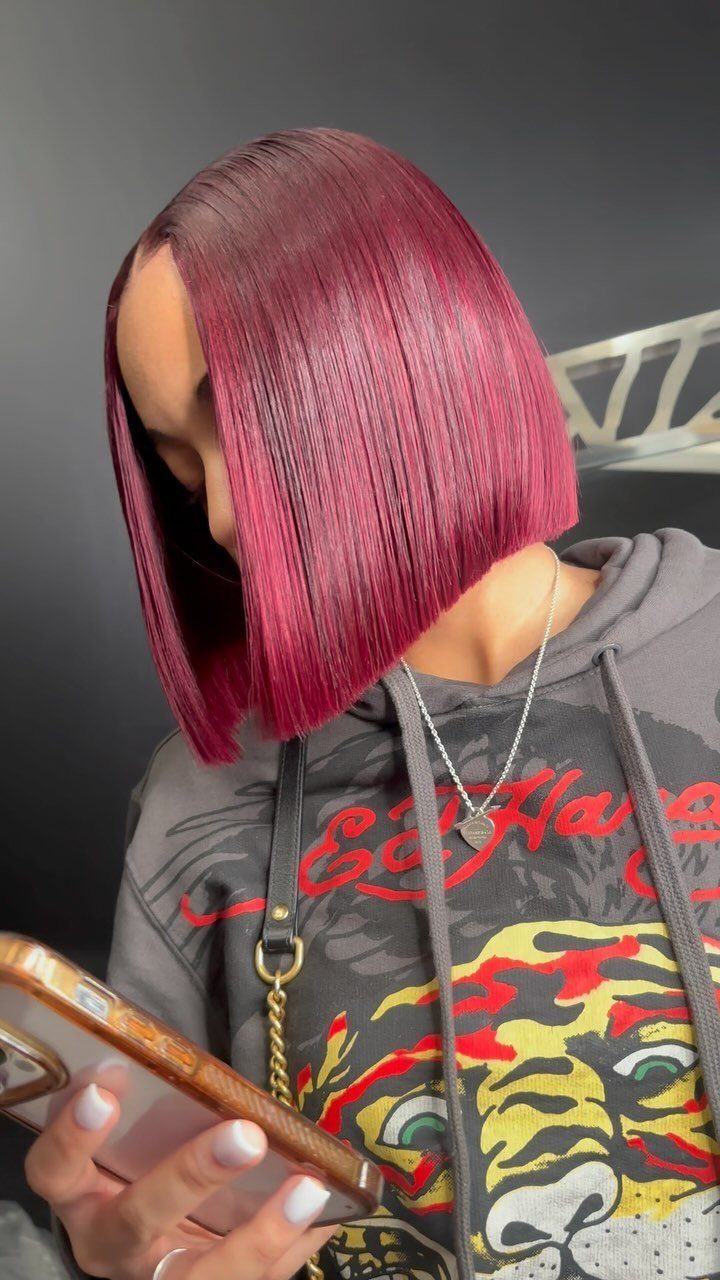
A clean, even bob paired with a center part emphasizes the jawline and facial symmetry. The blunt cut sits at or just above chin length, and the middle part divides the weight evenly on both sides.
This cut requires a trim every 5 to 6 weeks to keep the line sharp.
If your hair is naturally wavy, a round brush and blow-dryer will straighten the ends enough to hold the blunt edge. The shorter length makes styling faster, but the precision means every quarter-inch of growth shows.
7. Middle Part Braids
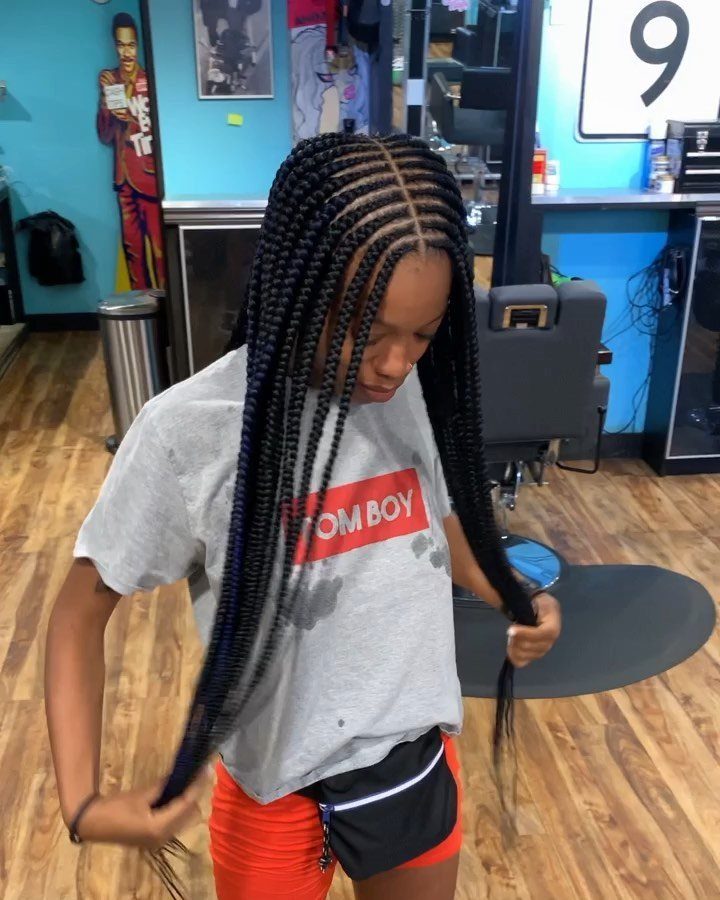
The center part divides the braids into 2 equal sections that fall symmetrically on each side. The clean line down the middle anchors the whole style and keeps the braids organized from the scalp down.
This works with box braids, micro braids, or cornrows that start at the part and run back or down.
The part itself needs to be precise before the braiding starts, so section it with a rattail comb and secure each side while you work through the other.
8. Curtain Bangs
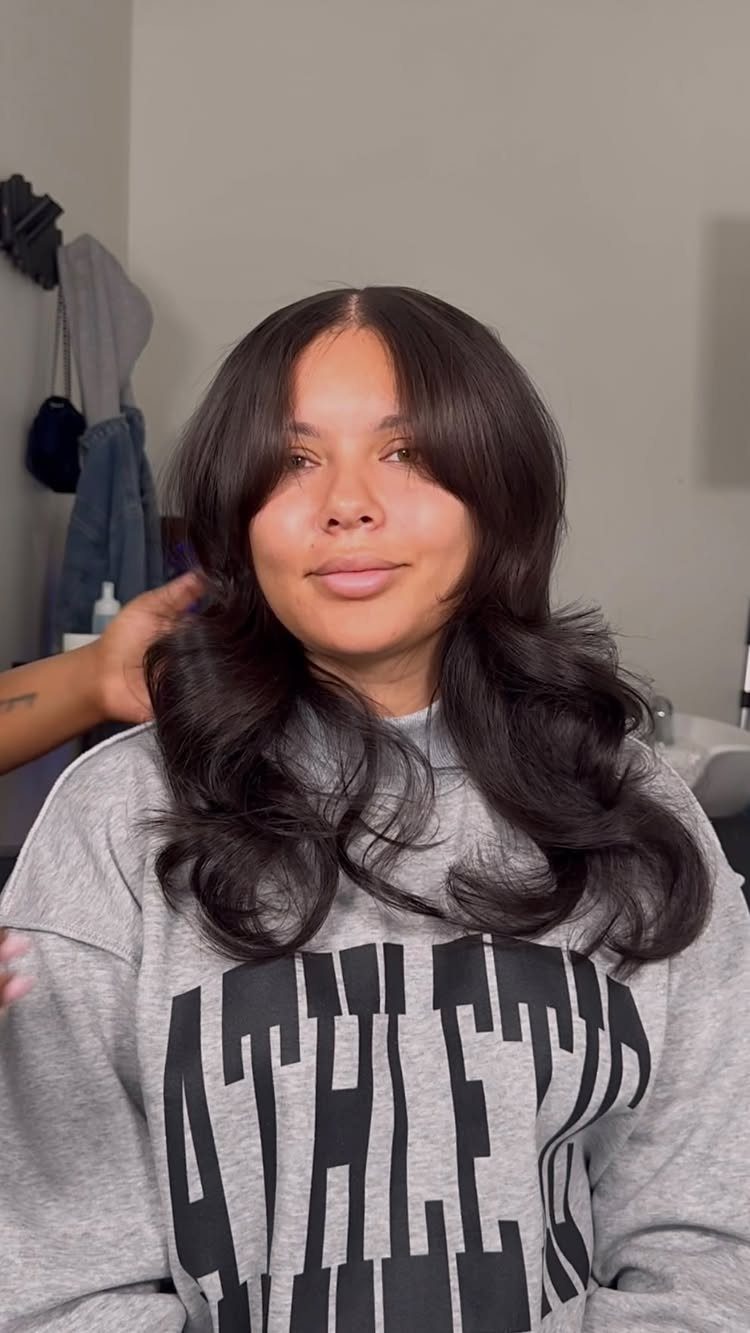
Bangs that open right where your hair parts and sweep toward each ear give a center part its own built-in frame. They blend into the longer lengths instead of sitting as a separate fringe.
Ask your stylist to cut them so they split at your natural part, not a hair to the side.
Over curled lengths, curtain bangs look best, since the curl direction follows the sweep of the bangs and the whole front reads as one shape.
9. Long Curls
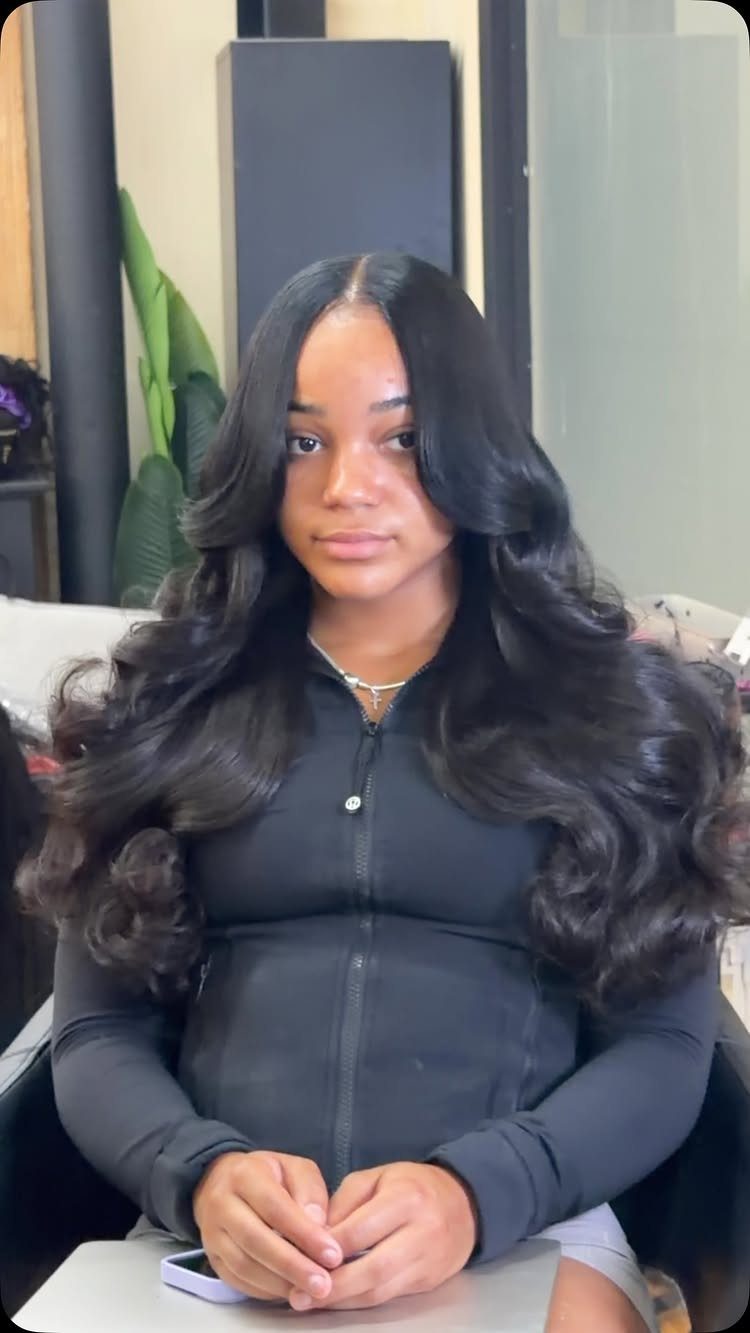
Soft, full curls turn the center part into a thin line between 2 big shapes. The volume sits at the sides, so the part stays visible but never looks severe.
I’d skip the brush once the curls are set. Separating them with your fingers keeps the fullness, while brushing breaks the curls into frizz and shrinks the volume.
Long curls also take a bit of room, so expect the style to read bigger than a smooth finish on the same length.
10. Face-Framing Shag
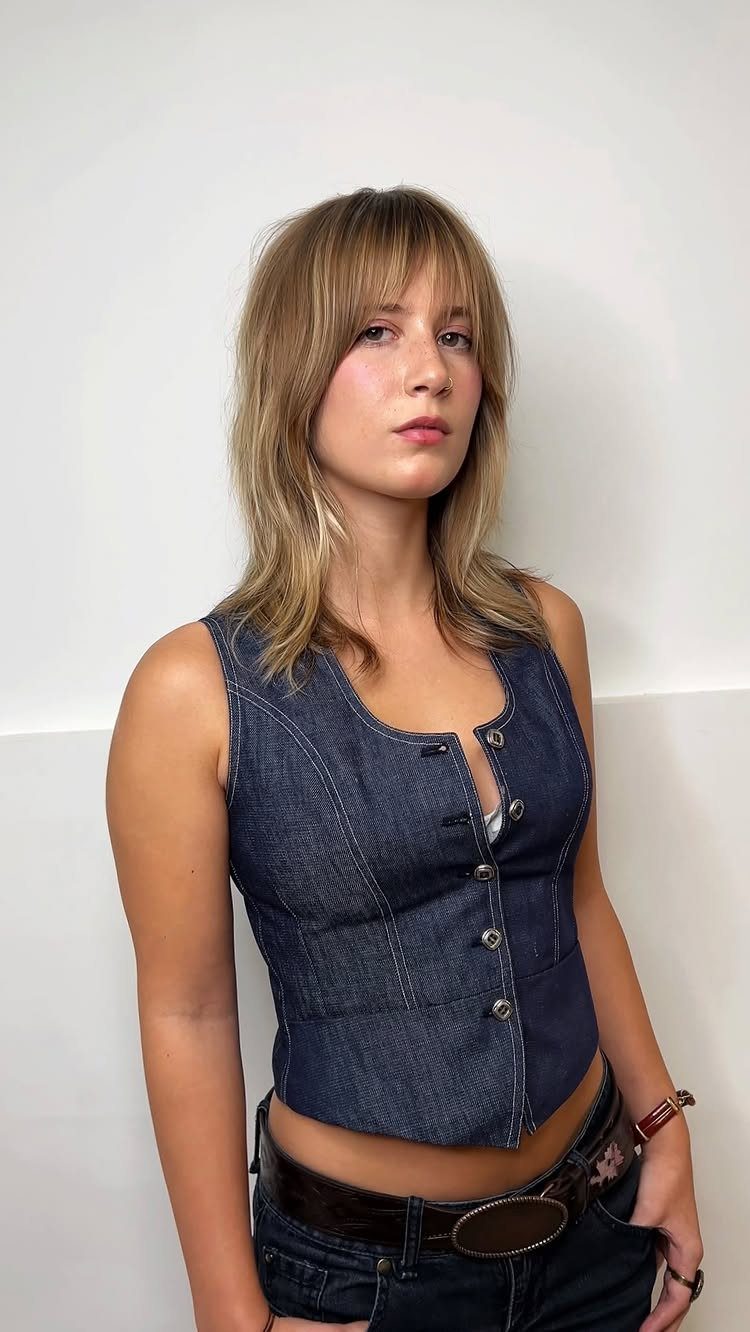
Choppy layers cut short around the face, with bangs that blend into them, make a shag look lived-in from the first morning. The ragged ends are part of the design, so your natural texture does the work.
Bring a photo and ask for a face-framing shag by name, and be clear about wanting bangs that merge with the layers, not a blunt fringe. Air-dried texture suits this cut better than heavy smoothing, which flattens the piece-y shape.
11. Colorful Face Frame
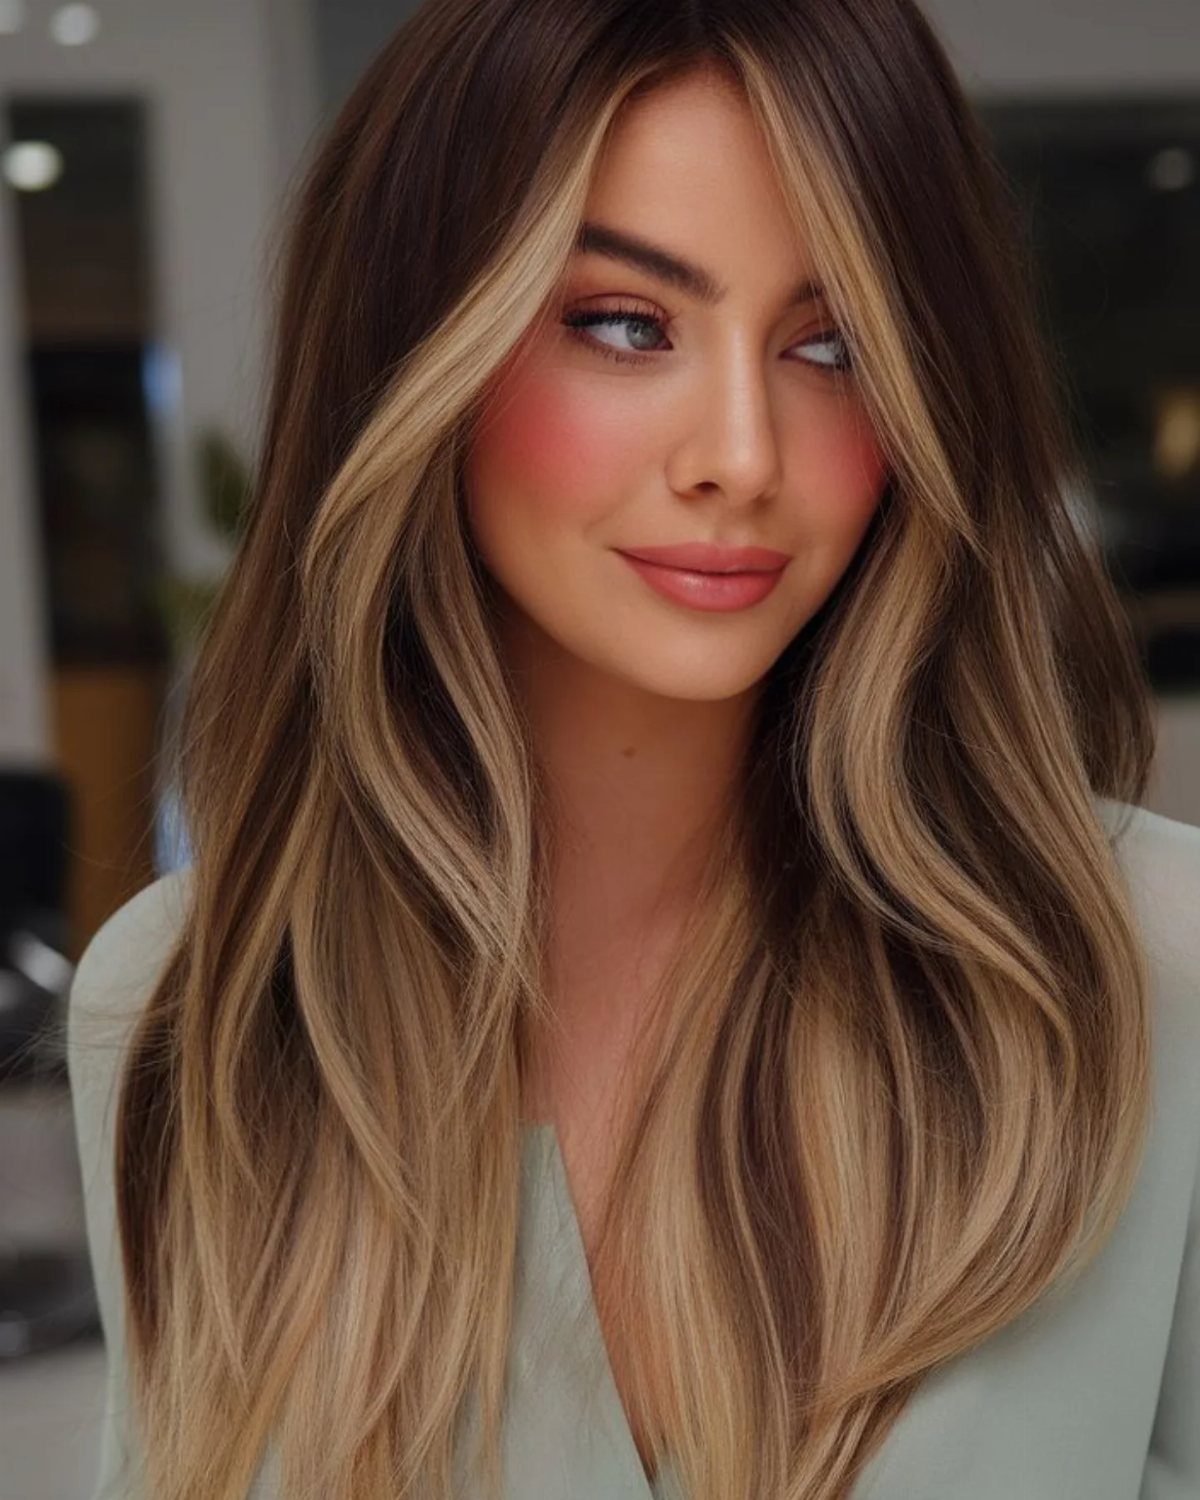
Color gathered in the strands at the front lightens only the pieces nearest your face and leaves the rest of the hair alone. Placed on both sides of a middle part, the blonde acts like a spotlight.
That makes it a lower commitment than coloring everything.
Ask your colorist for face-framing highlights and point to where you want them to start. I like it best over waves, as here, since the movement lets the lighter pieces catch the eye.
12. Half-and-Half Color
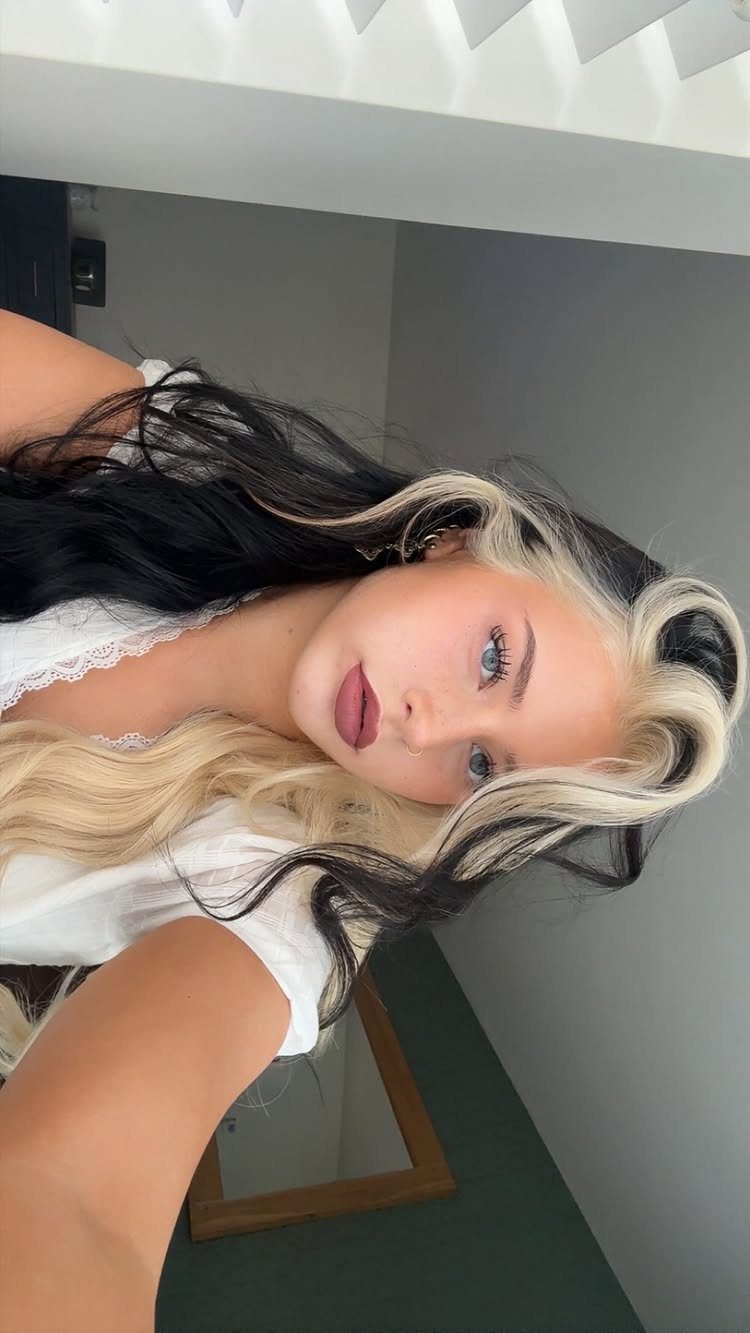
Two shades, one on each side of the part, make the center line the main feature of the look. Black on one side and platinum blonde on the other leaves nothing subtle about where the split falls.
Your part has to stay put for this to work.
Shifting it even slightly pulls one color across to the wrong side and muddies the contrast. Tell your colorist you part in the middle every day, and keep the line crisp before each wash day.
Switching to a Middle Part
Make the new part right after you shower. Wet hair is still pliable, so it dries into the line you set and stays there.
Blot out the water with a soft towel or an old T-shirt, detangle, and brush everything straight back.
Next, run a comb down from the center of your forehead to split the hair into 2 even halves. If a knot is in the way, work it loose first instead of dragging the comb through it.
Dry the roots first, pulling them toward the new direction. If a cowlick sits along the line, train the roots to lean the right way first and worry about the lengths afterward.
If a bump won’t lie flat, use heat protectant and a comfortable temperature, and keep the nozzle off the hair. Wait until each section has cooled completely before you move it again.
With waves or curls, settle the clumps on both sides of the part while the hair is still damp, then dry with a diffuser on low airflow or just let it air-dry.
Once the part is set, stay light with the brush, since going over the crown again and again can blur the line. It may feel odd for a few days, then familiar.
Face Shape and Middle Parts
Face shape matters more for the cut around the part than for the part itself. Round faces do well with a middle part, because the straight vertical line adds the look of length and balance.
Oblong faces get a softer frame from it, and the face reads a little shorter. Oval faces can wear almost any part, so the middle is an easy pick.
With a square face, tucking the hair behind your ears shows off your cheekbones.
Face shape doesn’t lock you into one part, and a stylist can tailor the cut around yours.
Adjusting the Part Line
A middle part doesn’t have to be ruler-straight or dead center.
Sketch a test line from your hairline back toward the crown, let the hair settle, and check the result from the front and both sides rather than trusting the line you see on your scalp.
When one side holds more volume, from the way it grows or from years of parting it the opposite way, nudge the line a little to even things out.
A slight move keeps the look centered without turning it into a deep side part.
Over curls, a softer line made with your fingertips often sits better than a combed one, because it blends into the curl pattern.
Before blaming the cut, I’d run through these adjustments first.
Frequently Asked Questions
What are the best haircuts for women with medium-length hair?
A layered shoulder-length cut is the one I’d pick for a middle part.
Parting down the center divides the weight evenly, and layers stop the length from piling up and looking heavy. Upkeep stays light, and the cut looks good air-dried with curls or flat-ironed straight.
Why does Gen Z like middle parts?
Mostly because of TikTok. A sound went viral during quarantine asking whether people felt a deep spiritual shift after changing their part, and the #middlepartchallenge followed with before and after shots of side parts becoming middle parts.
Social media turned it into a generational argument, with Gen Z defending the center part and Millennials sticking with the side part.
What haircut should I get for a middle part?
Long layers, a blunt bob and curtain bangs all sit well on a center part. Layers that begin a few inches under the part and step down from there grow out softly and flatter most face shapes.
A blunt bob landing at or slightly above the chin frames the jaw well, though it wants a trim every 5–6 weeks. For bangs, ask for curtain bangs cut to split right at your natural part.
What face shapes look good with a middle part?
Most face shapes can wear one, including round.
Square faces look good with hair tucked behind the ears, which puts the cheekbones on display. Face shape doesn’t lock you into one part, so a stylist can tailor the cut around yours.
How do you switch to a middle part?
Make the new part right after you shower, while your hair is damp and pliable enough to dry into the new line.
Start with towel-blotted, detangled hair, brush it straight back, and draw a comb from the center of your forehead down to make 2 even halves.
Can you wear a middle part with curly hair?
Yes.
Once dry, lift underneath any flat areas. Making the line with your fingertips instead of a comb often looks better, since it melts into the curl pattern.
Is a middle part better than a side part?
Neither wins across the board.
A center part reads as balanced, while shifting it changes where the hair falls and the shape of the cut’s outline. Before changing the cut, I’d wear both parts for a while and see which one your hair prefers.