You can have 10 buns, and the fastest takes 1 minute and one elastic; the knotted version adds a $45.25 tong.
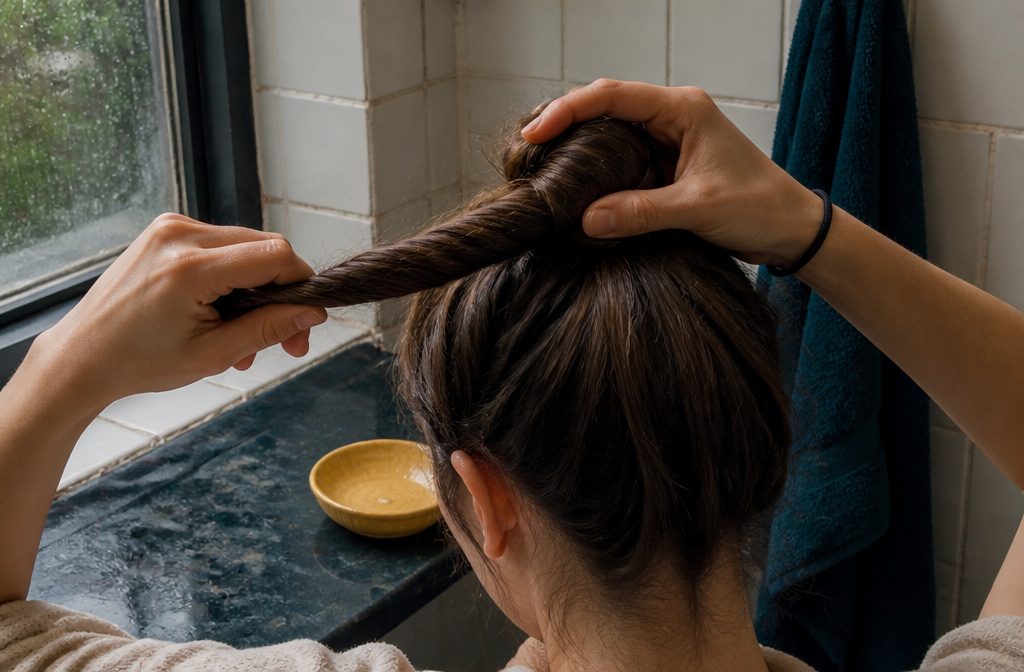
Most people go wrong at the twist. In the classic bun, a loose twist gives a droopy bun, so twist the ponytail as tight as you can hold it before wrapping.
1. Messy Bun Two Ways
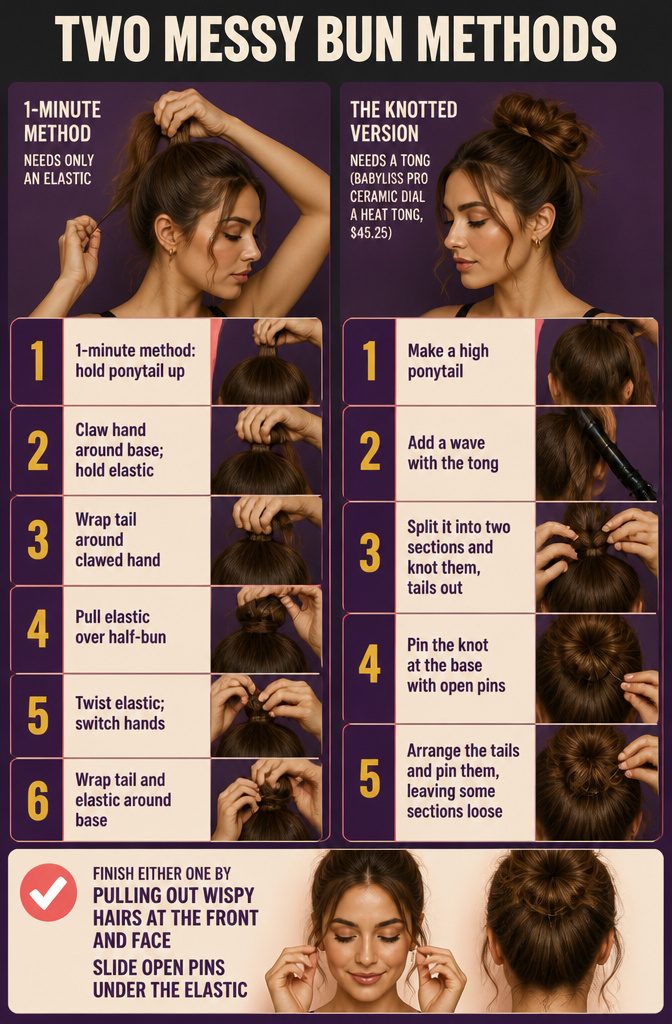
The 1-minute method needs only an elastic.
- Hold a ponytail up.
- Claw your other hand around the base, elastic in hand.
- Wrap the tail around that hand.
- Pull the elastic over the half-bun, fingers still clawed.
- Twist the elastic and switch hands.
- Wrap the tail and elastic around the base.
The knotted version needs a tong (Babyliss PRO Ceramic Dial A Heat Tong, $45.25).
- Make a high ponytail.
- Add a wave with the tong.
- Split it into two sections and knot them, tails out.
- Pin the knot at the base with open pins.
- Arrange the tails and pin them, leaving some sections loose.
Finish either one by pulling out wispy hairs at the front and face, and slide open pins under the elastic.
2. Ballerina Bun
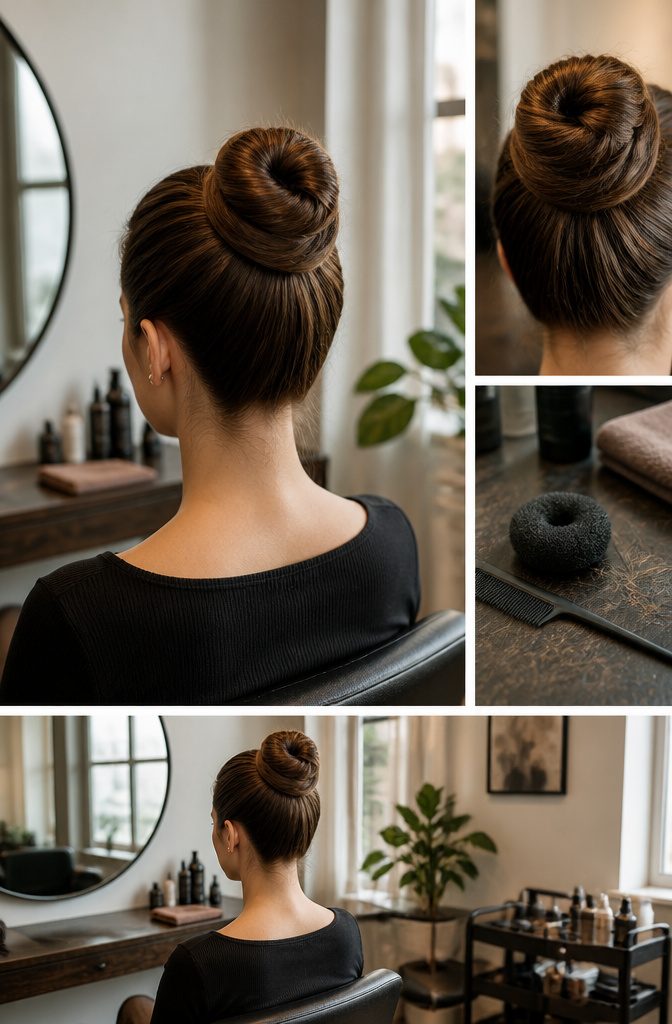
Ballerina Bun
Two ways to get there.
- Pull your hair into a high ponytail and twist the tail.
- Wrap the twist around itself, forming a coil.
- Secure with an elastic.
The other path starts the same but adds volume: secure the ponytail, hold it from the tip, then back-brush from the end with a pin-tail comb (the So Eco Tail Comb runs $4.25) to tease the hair.
Wrap the full ponytail around itself and pin in place.
If you have fine hair and want a larger bun, slip a bun filler or donut into the ponytail before wrapping.
A similar Primark US donut costs $1.50. The filler gives you the size without needing thicker hair to build it.
3. Inside-Out Bun
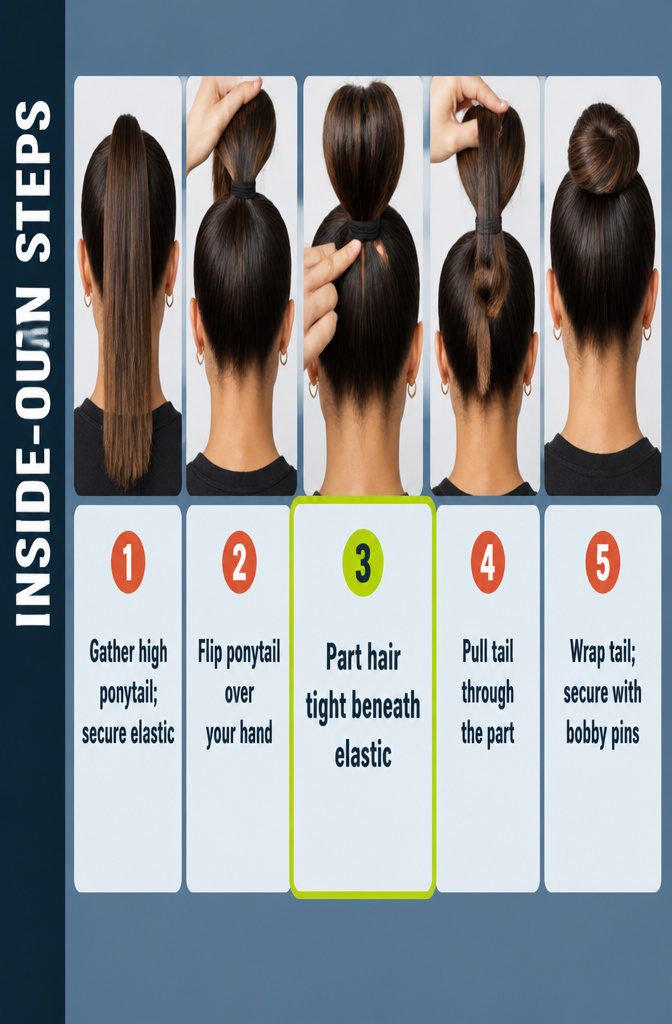
- Gather your hair into a high ponytail and secure it with an elastic.
- Flip the ponytail upward so it forms a loop over your hand.
- Use two fingers to make a part in the hair right under the elastic, at the base of the ponytail.
- Grab the tail and pull it through that part.
- Wrap the remaining tail around the elastic and secure it with bobby pins.
A standard wrapped bun coils the tail around the base and pins it. This one sends the tail through a part under the elastic first, so the hair loops through itself before the wrap.
Step 3 is the one to watch: keep the part tight against the elastic, because a part set lower changes where the loop sits.
4. Easy Messy Half-Bun
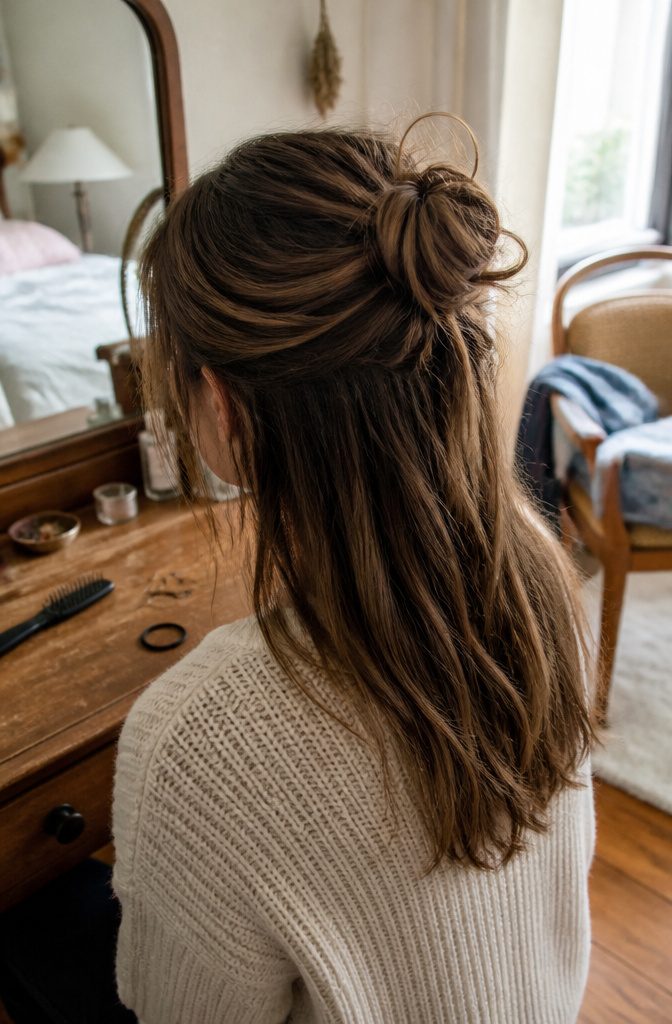
- Part off the top section of hair, running the part from one temple around the back of the head to the other.
- Tease that section with a comb, working from the tips up toward the roots to build volume.
- Twist the teased hair into a bun and secure it with an elastic.
- Pull out a few face-framing pieces and loosen strands from the bun for the messy look, then add bobby pins to hold it.
Because the lower hair stays down, this suits anyone who wants length left loose and hair off the face at the same time.
I’d choose it over a full bun on days when you still want your hair to frame your shoulders. Pin last, after the loosening, so the pins hold the finished shape.
5. Top Knot
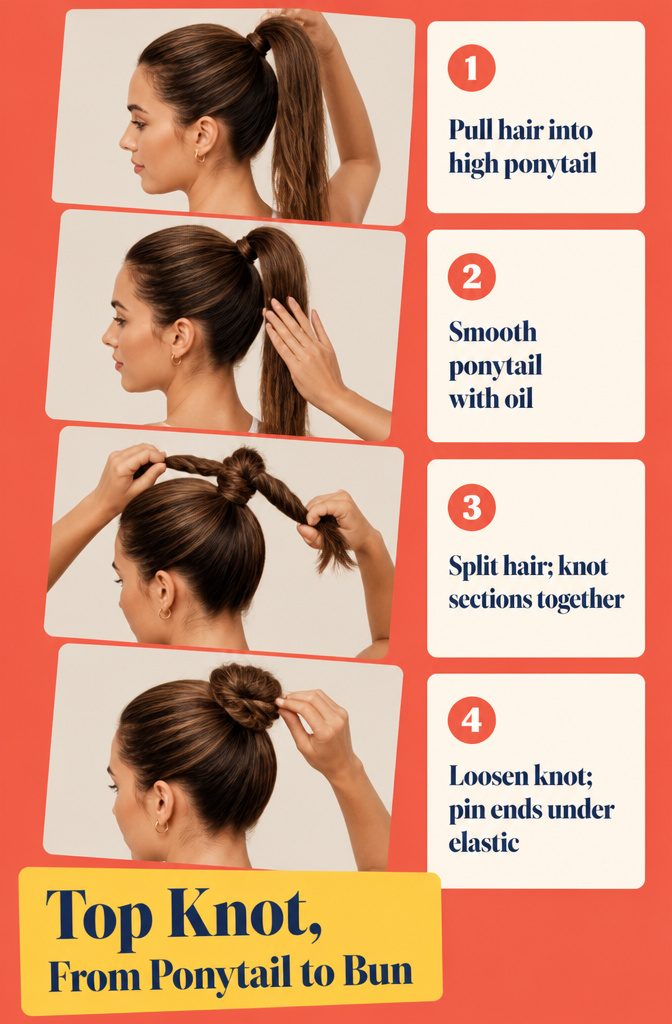
- Pull your hair into a high ponytail.
- Smooth it with oil. Living Proof No Frizz Vanishing Oil ($33) works.
- Split the ponytail in two and knot the sections together. Loosen the knot with your fingers for fullness.
- Pin the loose ends under the elastic.
This style works best on medium-length hair, since short hair runs out of length after the ponytail. Very long hair needs a second or third knot before it reads as a top knot.
For the clip-in weft version, follow this separate sequence:
- Section above your ears and clip the top half up. Clip a weft in upside down, then add a downward-facing three-clip weft just above it.
- Brush everything into a sleek ponytail so the hair covers the wefts.
- Twist the ponytail tightly and coil it around the base.
- Secure with an elastic and bobby pins.
6. Messy Bun for Curly Hair
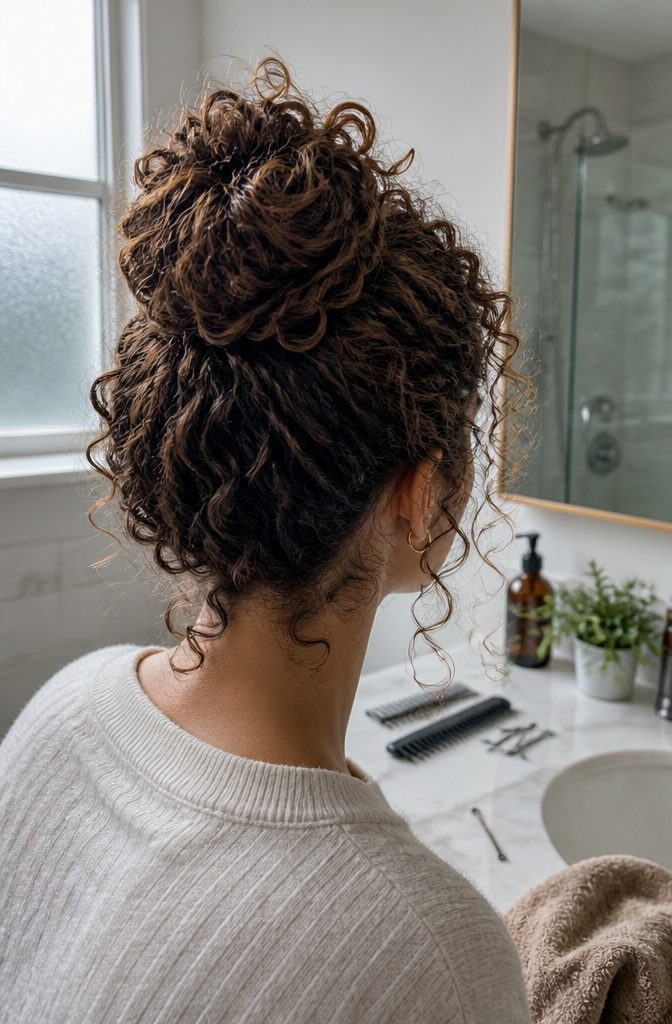
- Gather your hair into a loose ponytail at the height you want the bun, anywhere from the crown to the nape.
- Optional: spray a little hairspray on your hand and go over your head lightly to tame flyaways.
- Twist a 2– to 2½-inch section of the ponytail.
- Hold the twist, grab one or two hairs at the tip, and pull the rest of the section toward your head.
- Pin it with bobby pins, then repeat with fresh sections until all your hair is up.
Small sections suit curls because each one keeps its own spring instead of being crushed into one heavy knot. The loose tip hairs read as deliberate texture, not frizz.
7. Classic Bun
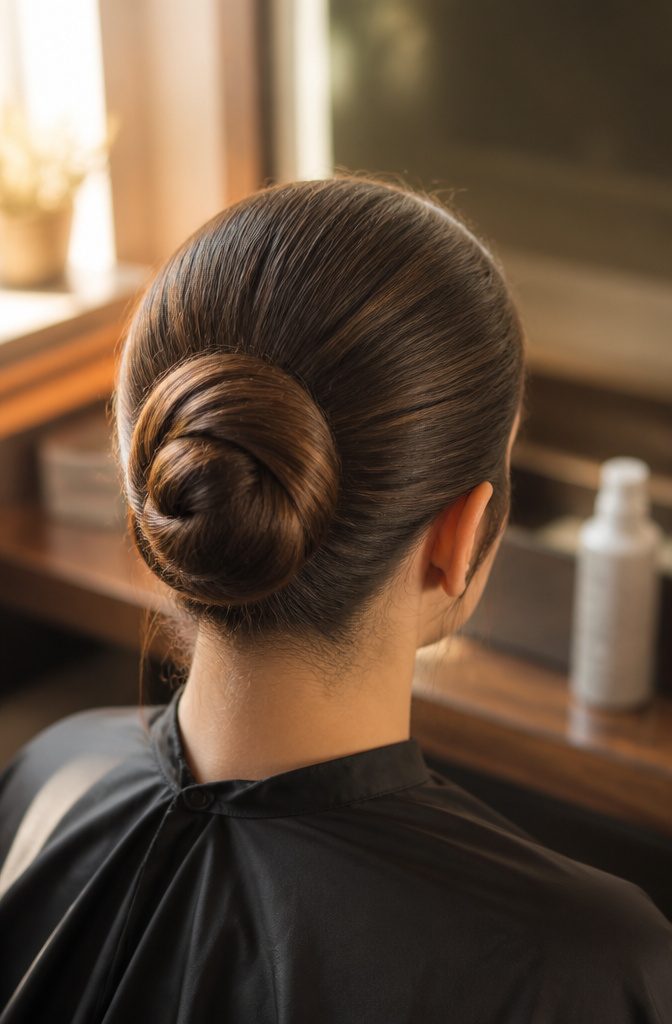
- Tie a ponytail exactly where you want the bun to sit. Kitsch No-Snag Elastics ($6) work well for this.
- Twist the ponytail from the hair tie down to the ends, as tight as you can hold it. A loose twist gives a loose, droopy bun.
- Wrap the twist around the base of the ponytail, turning in the same direction you twisted, until it coils into a bun.
- Push bobby pins through the coil and into the base to lock it in place.
- Mist on a lightweight hairspray to calm flyaways. I reach for Percy & Reed Hold It Right There ($21.48) because it holds without leaving hair crusty or stiff.
8. Plaited Bun
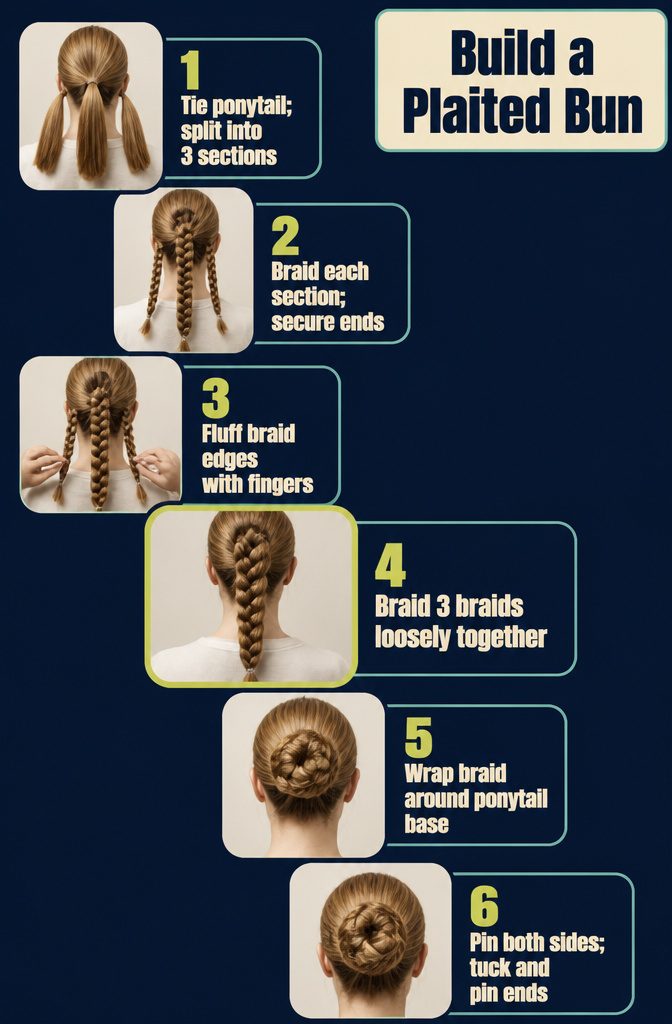
- Tie your hair into a ponytail and split it into 3 sections.
- Braid each section and secure the end with a clear elastic.
- Pull gently at the edges of each braid with your fingers to fluff them. Fuller braids make a fuller bun.
- Braid the 3 braids together, keeping this last braid loose, and secure the end with another clear elastic. A loose braid bends around the base more easily, and I’d choose that over a tight, neat one.
- Wrap the large braid around the base of the ponytail, laying the braids around each other as you go.
- Pin the bun at both sides.
- Tuck the loose ends under the ponytail’s elastic and pin them there.
9. Low Bun
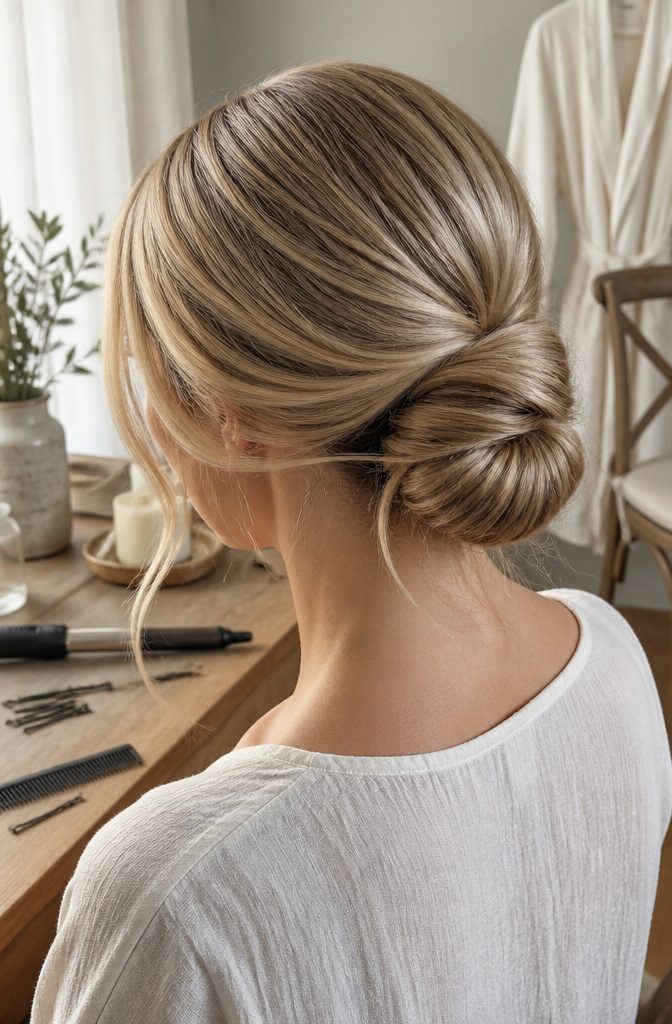
- Section out a veil of hair along the front hairline and leave it loose until the last step.
- Tie everything behind the veil into a low side ponytail.
- Split the ponytail into two pieces and twist them around each other. Pin the twist in place; Tappers and Pointers Waved Hair Pins ($2.50) are what I’d use here.
- Bend the veil with a tong. A soft bend looks better than a tight curl, since these pieces are meant to drape.
- Tuck the veil’s pieces around the bun and pin them only where it looks pretty. Skip any spot that looks forced.
10. Clip-In Extensions for Volume
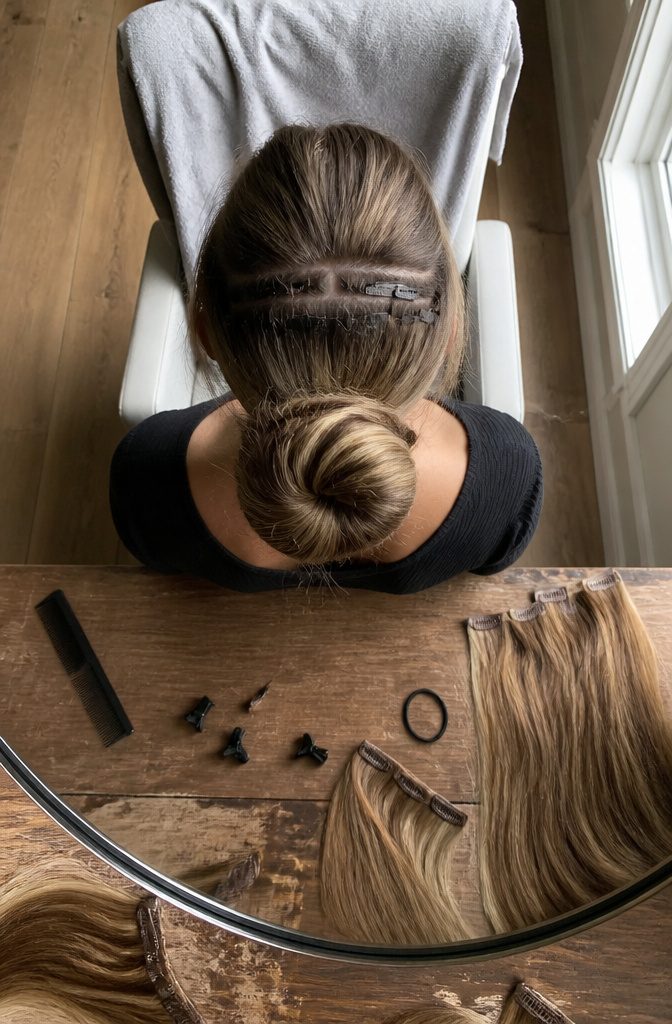
Wefts add what a thin ponytail can’t, and the Application Kit is $7.50.
- Messy bun: Tie up all but a layer above the nape. Clip a two-clip weft in upside down above the part. Repin, leaving a thicker layer down, then clip a three-clip weft unflipped below the part. Gather a ponytail, coil it, secure.
- Voluminous bun: Stack a one-clip and a two-clip weft at the part, add 2–3 single wefts above, then another two-clip weft. Pull the last tie only halfway through for a loop, then twist the rest around the base and tuck.
- Truly messy bun: Low ponytail, one loop.
- High-up messy bun: Flip your head over and twist from the ends.
The same wefts also thicken an ordinary messy bun.
Prep for Your Hair Type
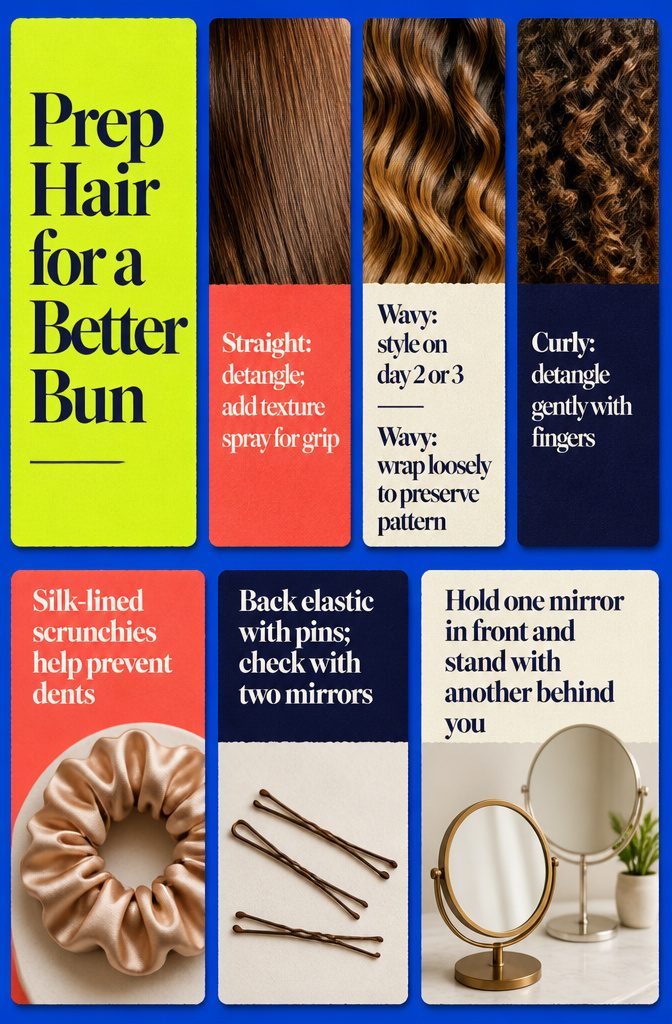
Your texture sets the prep, so start here.
- Straight hair: detangle first. If the bun looks small or flat, a texturizing spray gives it grip and body.
- Wavy hair: style on day 2 or 3 without washing. Dry shampoo or dryer sheets soak up greasy roots, and you should wrap loosely so the wave pattern survives.
- Curly hair: Luxy Hair says it best.
If you have curly hair, we suggest staying away from any kind of detangling tool. Use your fingers to gently brush out any knots.
- Pair finger detangling with silk-lined scrunchies or thinner ties, which prevent dents and stretched curls.
- Back up the elastic with bobby pins.
- Hold one mirror in front and stand with another behind you, so you can see the back of your head.
Frequently Asked Questions
How do you make a classic, old-fashioned hair bun?
Tie a ponytail right where you want the bun to sit, then twist it tightly from the elastic to the ends.
Coil the twist around the base in the same direction you twisted, then push bobby pins through the coil into the base.
A loose twist makes a droopy bun, so keep it as tight as you can hold it. Finish with a light mist of hairspray to settle flyaways.
What is a good bun tool for hair?
A pin-tail comb is a good pick for volume: you back-brush the ponytail from the end before wrapping it.
The So Eco Tail Comb runs $4.25. If you have fine hair and want a bigger bun, a bun filler or donut adds size, and a similar Primark US donut costs $1.50.
How do I do a top knot bun?
Pull your hair into a high ponytail and smooth it with a little oil, such as Living Proof No Frizz Vanishing Oil ($33).
Split the ponytail in two, knot the halves together, loosen the knot with your fingers for fullness, and pin the loose ends under the elastic.
Medium-length hair works best, while very long hair needs a second or third knot to read as a top knot.
How do I do a bun with curly hair?
Gather your hair into a loose ponytail at the height you want the bun, then twist a 2–2½ inch section. Hold the twist, grab 1 or 2 hairs at the tip, pull the rest of the section toward your head, and pin it.
Repeat with fresh sections until all your hair is up. Skip detangling tools and use your fingers on knots, and pick silk-lined scrunchies or thinner ties to avoid dents and stretched curls.