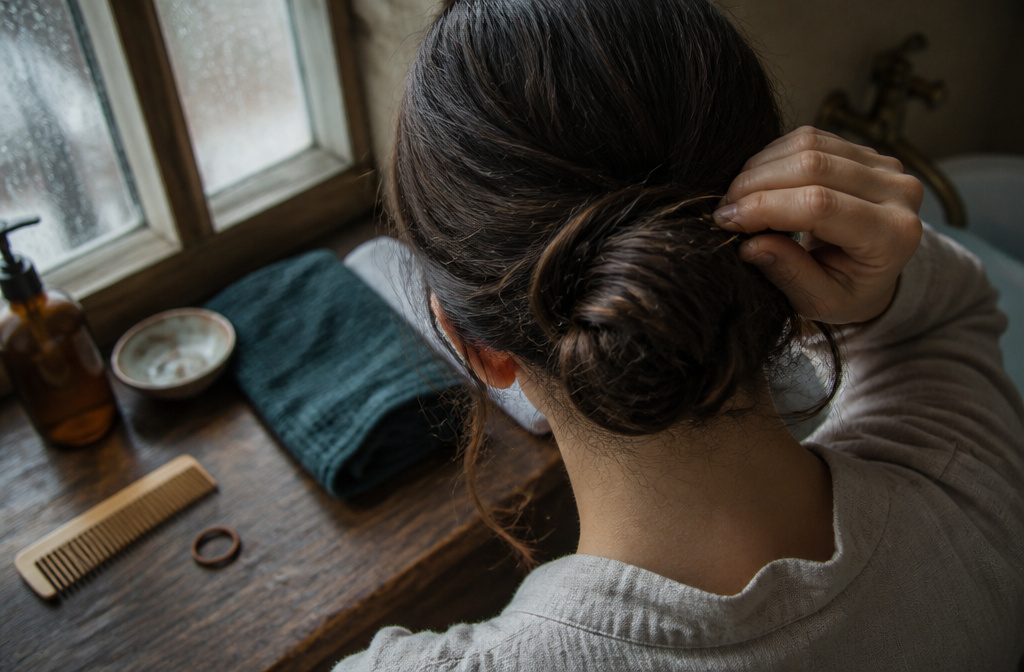
Most of these 12 buns take a few minutes, a hair tie and some pins.
The ponytail is where people go wrong: wherever you tie it is where the bun lands. A few cost more time, like the waterfall-braid ponytail, which needs 3 braids per side and a morning you can spare.
1. Polished Donut Bun
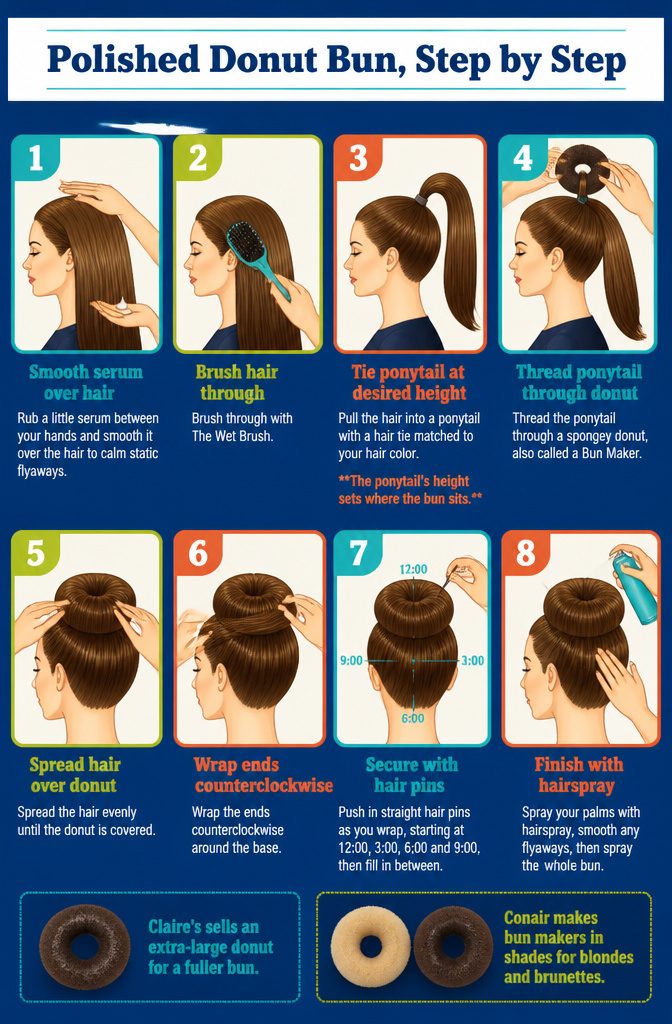
- Rub a little serum between your hands and smooth it over the hair to calm static flyaways.
- Brush through with The Wet Brush.
- Pull the hair into a ponytail with a hair tie matched to your hair color. The ponytail’s height sets where the bun sits.
- Thread the ponytail through a spongey donut, also called a Bun Maker.
- Spread the hair evenly until the donut is covered.
- Wrap the ends counterclockwise around the base.
- Push in straight hair pins as you wrap, starting at 12:00, 3:00, 6:00 and 9:00, then fill in between.
- Spray your palms with hairspray, smooth any flyaways, then spray the whole bun.
Claire’s sells an extra-large donut for a fuller bun. Conair makes bun makers in shades for blondes and brunettes.
2. Dutch Braid
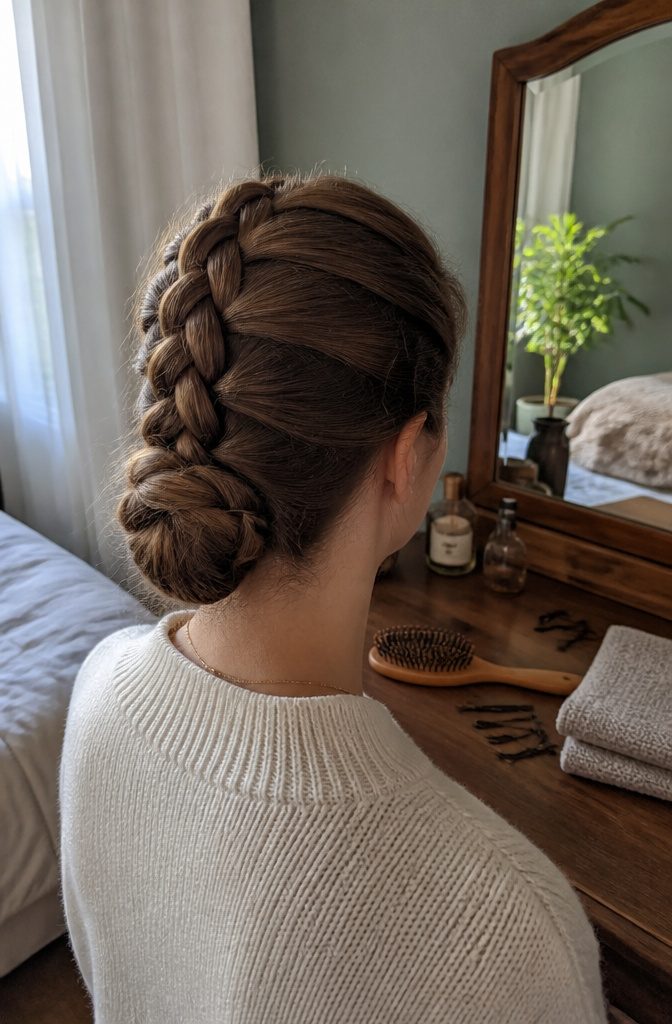
A Dutch braid starts at the roots, usually along the hairline, and works back toward the crown.
When it reaches the length you want, clip the end underneath the hair so the braid reads as a subtle detail instead of a statement. It keeps strands off your face without a headband or a tight pull.
I think it’s the fastest way to add structure to a bun. Gather the rest of the hair into a topknot or low bun, and the braid gives the look a defined edge.
On a down style, the same braid holds the front back while the length stays loose. I’d pick it over flattening flyaways with spray every time.
3. Messy Bun
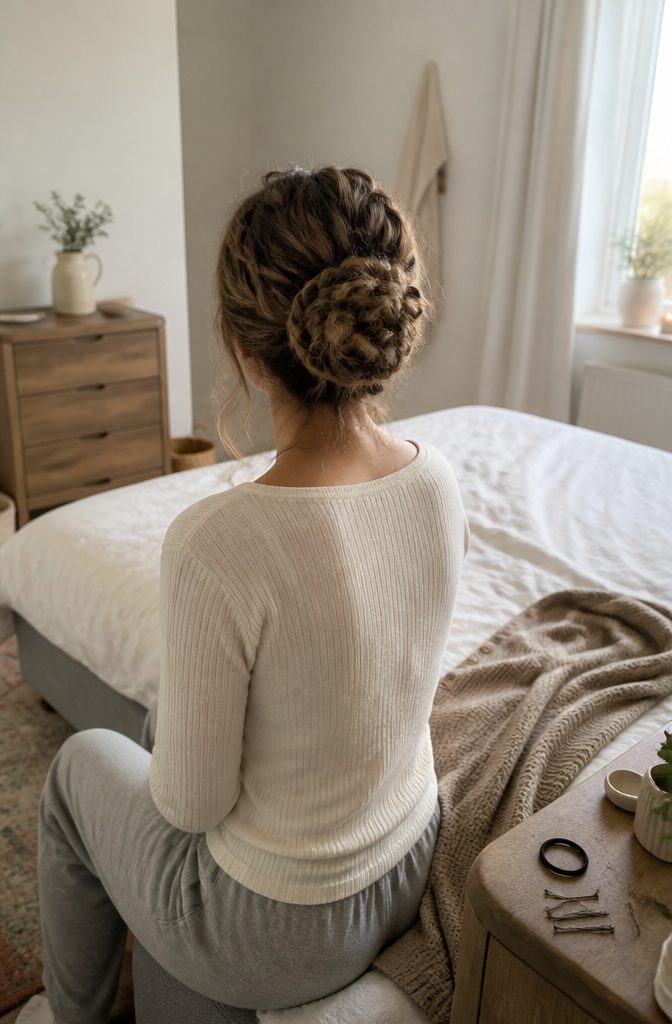
Start with a simple low ponytail, then divide the length into a few loose braids.
Tie the braids together, wrap the bundle around the base, and secure it into a bun. The braids give the bun built-in texture, so it looks full without much effort.
Tug small strands out of the braids and along the edge for a piece-y finish, and stop while it still looks deliberate.
Pull too far and the bun slumps and reads as an accident. The whole thing takes only minutes, which makes it my pick for mornings when hair should look done but not fussed over.
4. Natural-Hair Topknot
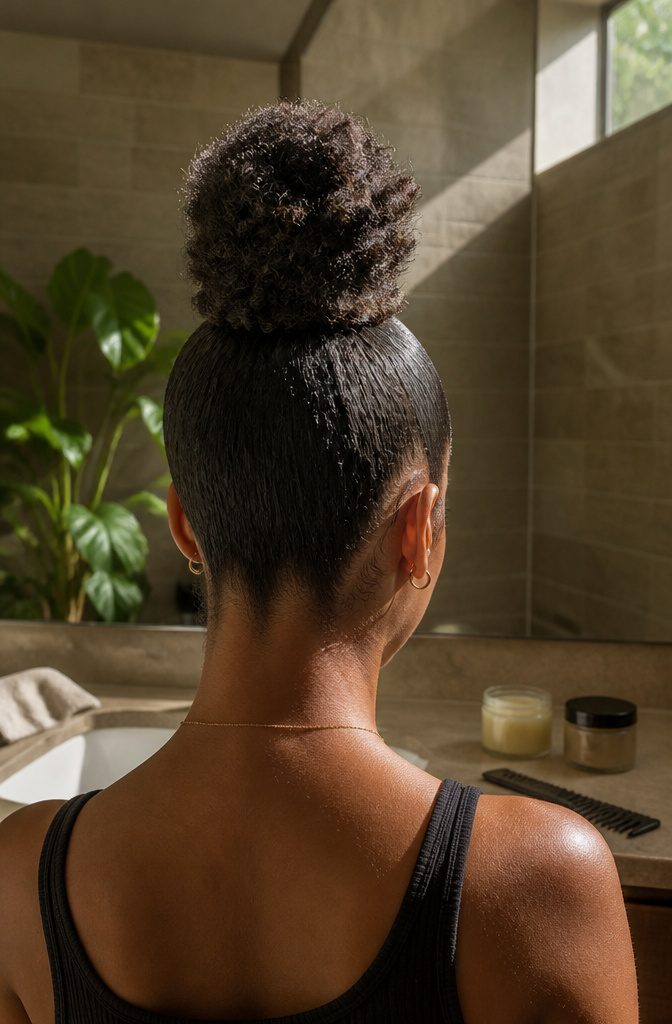
This topknot depends on contrast: a smooth, sleek base under a tall, textured top. The gel and balm do the work here, and no pin or elastic trick makes up for skipping them.
Gel goes on the hair you gather toward the crown, smoothed flat until the base looks polished. Balm goes into the section that stands up, which keeps your natural texture soft and defined.
I’d keep gel off the top. It flattens the very texture you’re showing off, and the look loses its point when the base and the knot both turn slick.
Set the knot high, too. The height is what reads as volume.
5. Twisted Bun
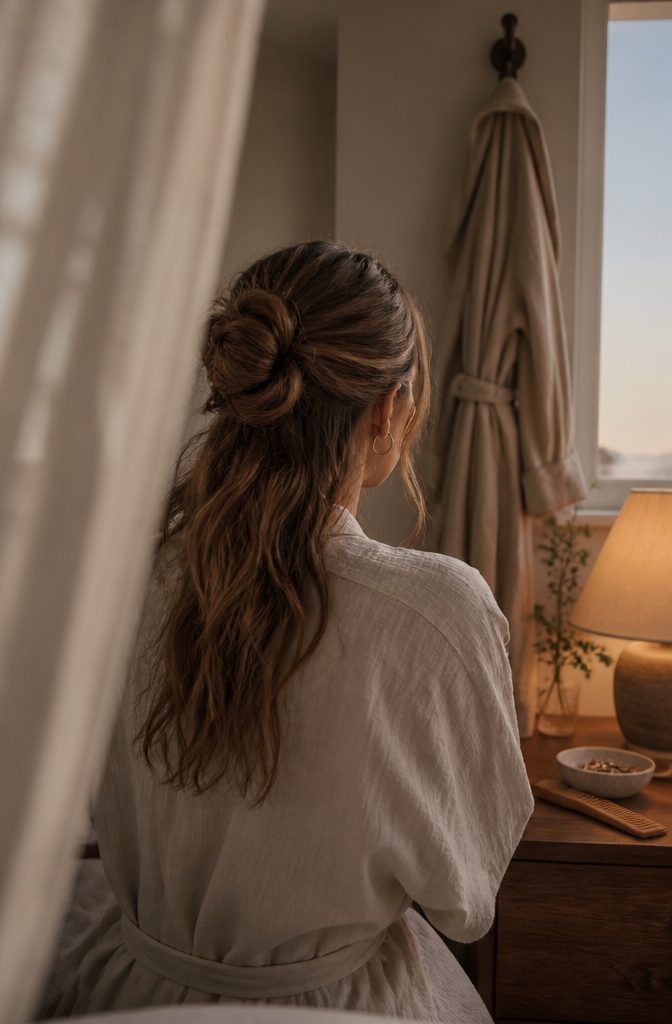
The twisted bun sits between a half-up and a full bun, which is why I reach for it when a topknot feels too severe but loose hair feels too casual.
Start by pulling the top of your hair back into a half updo, then section off the hair underneath. Gather that lower section into a ponytail and twist pieces of it around the base.
Form the twisted pieces into a bun and clip it in place. The twisting is what gives the shape its elegant, finished look, and it takes the same few minutes as any basic bun.
6. Half-Updo Bun
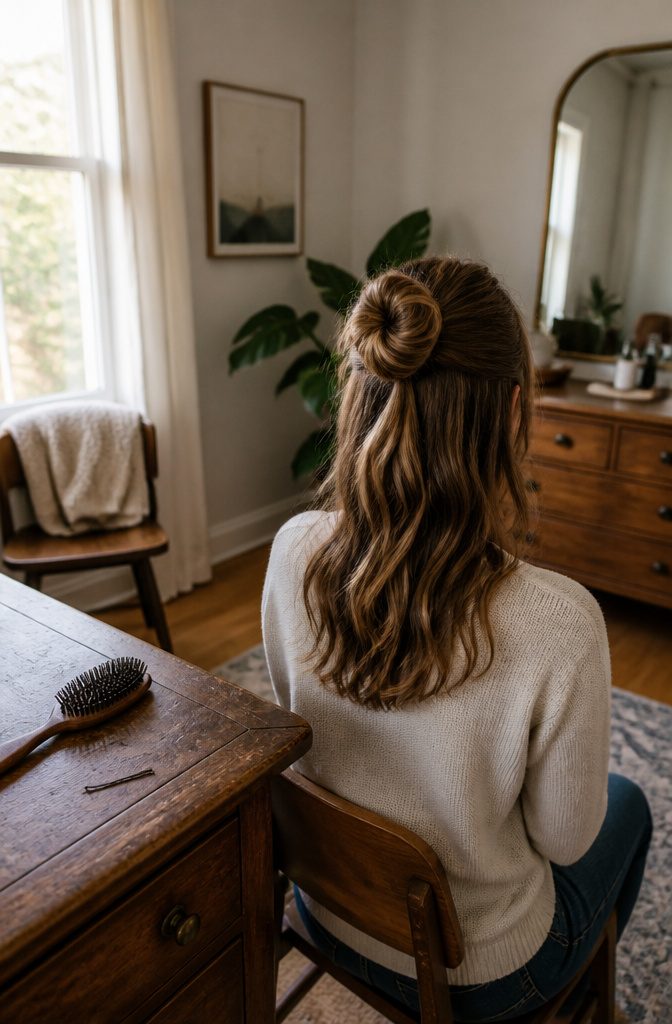
Gather the section at the crown, the same spot you’d use for a topknot, and leave everything below it hanging loose.
Smooth it with a brush before you tie it off with an elastic, because bumps in the ponytail show up in the finished bun.
Twist the tail and wind it around its base.
Wrap it loosely rather than pulling tight, since a loose coil sits full and a tight one flattens into a small knob. Tuck the end under the coil.
Slide bobby pins through the bun and into the hair beneath it, angling them in opposite directions so they grip the base.
I’d pick pins that match your hair color, since this style leaves them in plain view against the loose hair.
7. Braid and Topknot
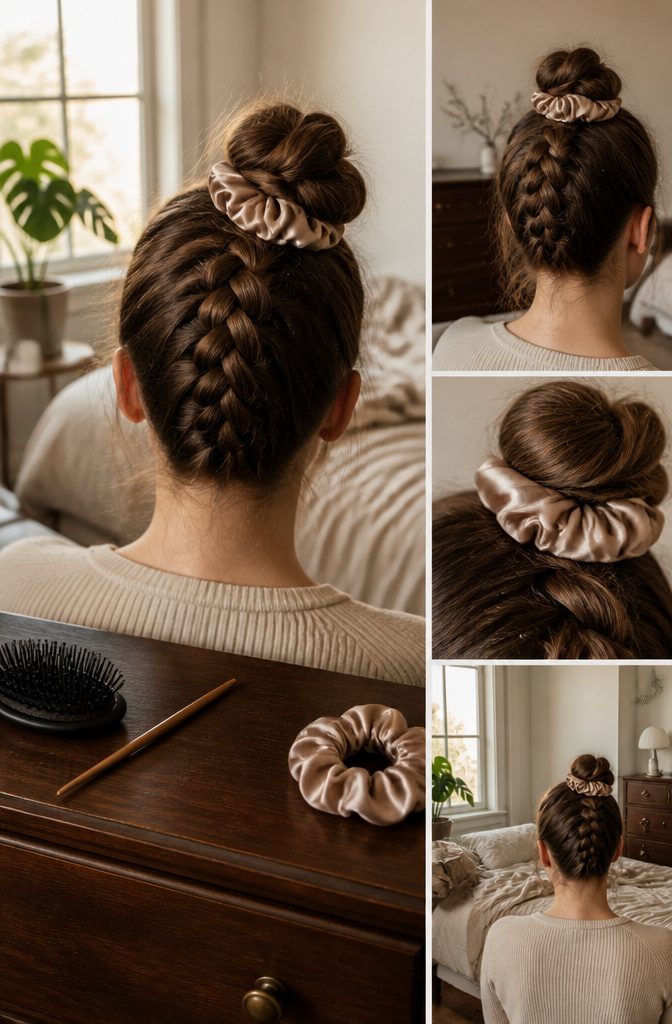
Begin at the nape and braid up toward the crown, then gather the remaining hair into a high ponytail where the topknot will sit.
Reddit commenters with very long hair say they find a braid easier to manage than twisting loose hair, which is the step many people get wrong.
Tie off the end of the braid with a small elastic, coil it around the base of the ponytail, and tuck the tip underneath. One commenter uses a second tie to hold the coil itself.
Finish with a satin scrunchie wrapped over the base.
Commenters recommend satin to help with breakage, and it hides the elastic. If the coil slips by midday, a hair stick or even a pencil through the middle holds it.
8. Braided Low Bun
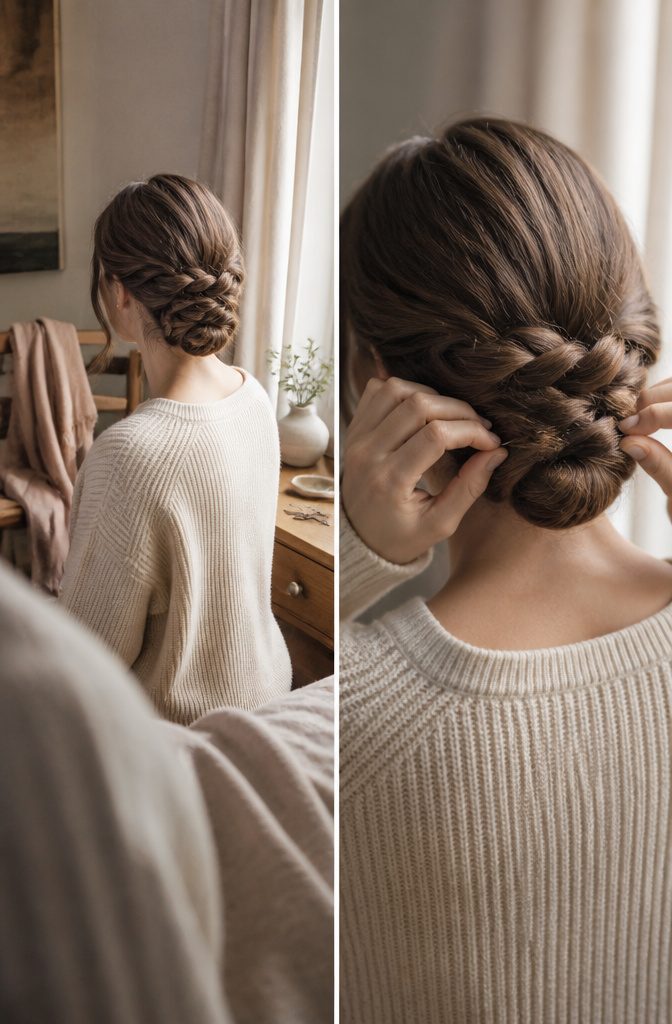
Braid a loose sideswept braid over one shoulder and stop with some length left unbraided at the bottom.
Hold one strand and slide the other two up the braid toward your head, so the braid bunches into a thick, rippled scrunch.
Pin that scrunched braid low at the nape to form the bun, then wrap the strand you held around its base and tuck the end under a pin.
This is one of the fussier buns in the list.
Slide the two strands up evenly, because a hard pull on one side flattens the scrunch and leaves the bun lopsided. I’d save it for mornings with time to spare, and pick something quicker on rushed days.
9. Waterfall-Braid Ponytail
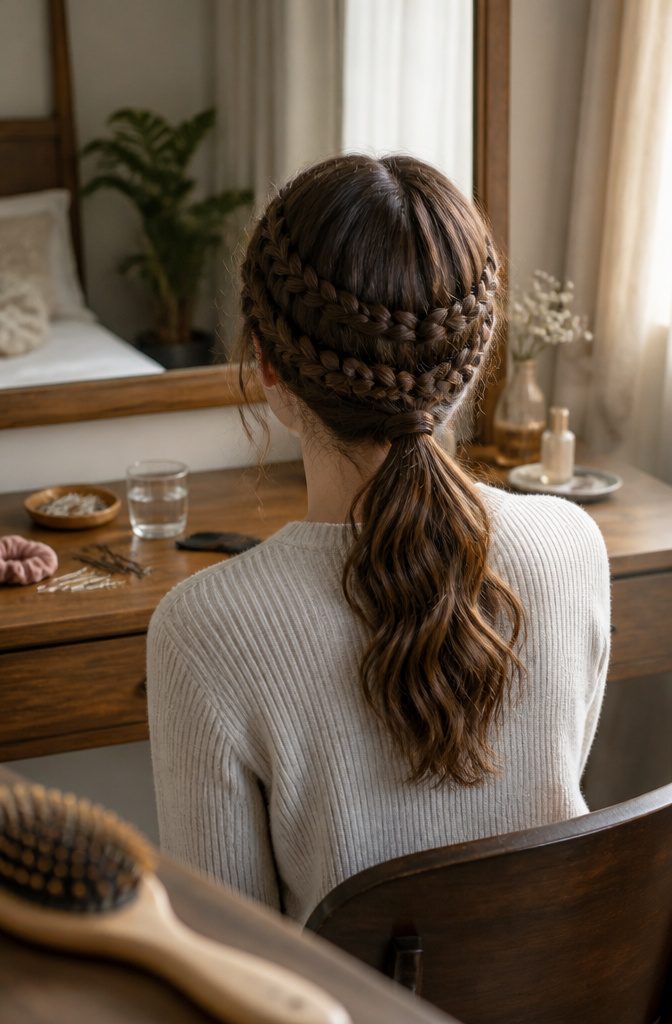
On each side, start with a waterfall braid near the crown, then add a second one lower, toward the middle of the head. A French braid follows and does the cleanup.
It gathers the loose ends the waterfall braids leave behind and finishes near the nape of your neck. Repeat on the other side, then pull both halves together into a low ponytail.
Quick it is not. Three braids per side is a project, and it belongs on a morning when you have time to spare, not a five-minute weekday.
If waterfall braids are new to you, practice them first. The finished ponytail looks far more intricate than a plain one, and that’s the reason to bother.
10. Side-Braid Ponytail
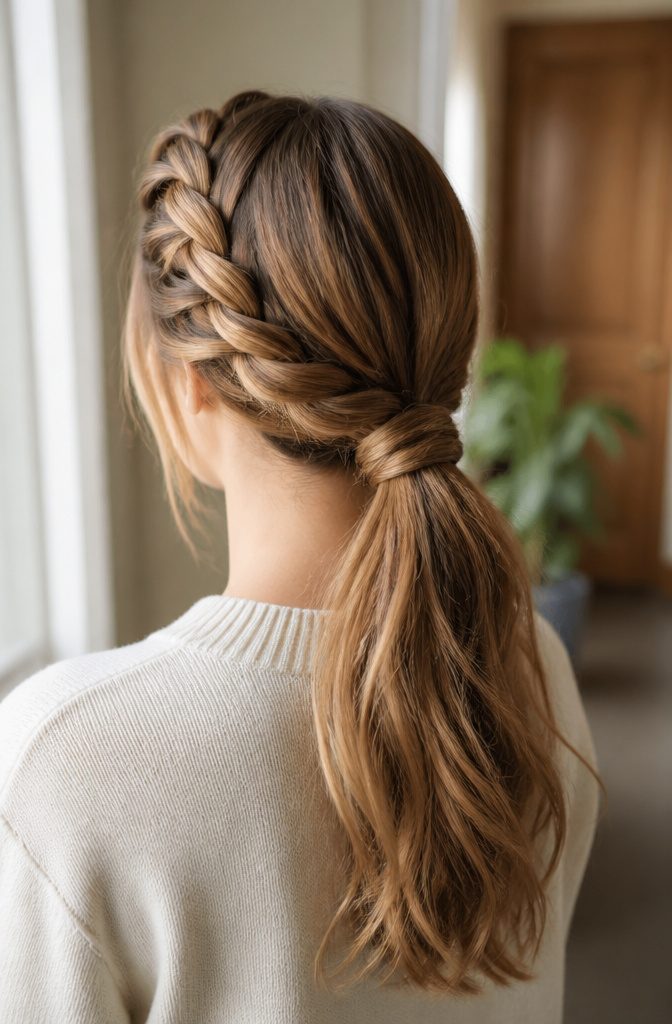
A deep side part sets up the whole look, so comb it in first and let one side carry most of the hair.
Start a Dutch braid at the part and work it back along the hairline, crossing strands under rather than over so the braid sits raised on top of the head.
At the nape, gather the braid and the rest of the hair into a ponytail, low or off to one side. Wrap the braided section around the ponytail base and pin the end underneath so the elastic disappears.
I prefer this to a plain ponytail on days when the hair feels flat. The raised braid adds shape at the front, and the wrap gives a bun-like finish without the work of building a full bun.
11. Ribbon Braids
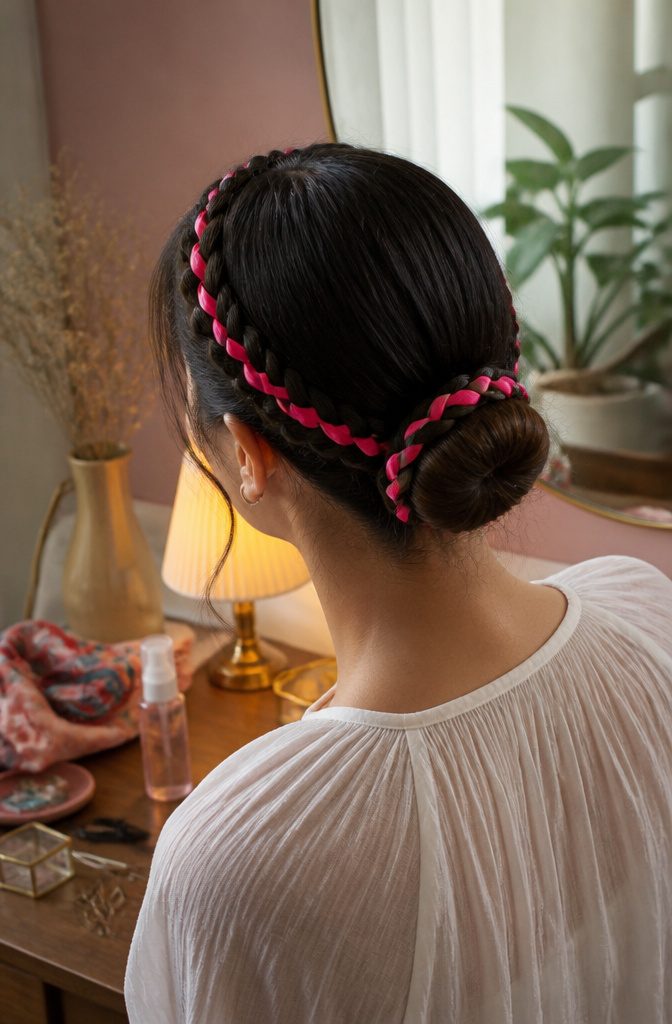
A ribbon takes the place of the third strand, so each braid is two sections of hair plus one bright length of color.
Tie the ribbon around the base of a small section, then cross it over and under exactly as you would a strand of hair.
Repeat on the other side so a braid frames each temple, then weave the ribbon through both braids before sweeping them back toward the bun and pinning them around its base.
A light coat of hairspray over the braids keeps flyaways down and stops the ribbon from slipping loose.
I’d treat this as an accent, not the whole look. Pair it with a plain, tidy bun and let the color do the playing.
12. Short-Hair Braid Style
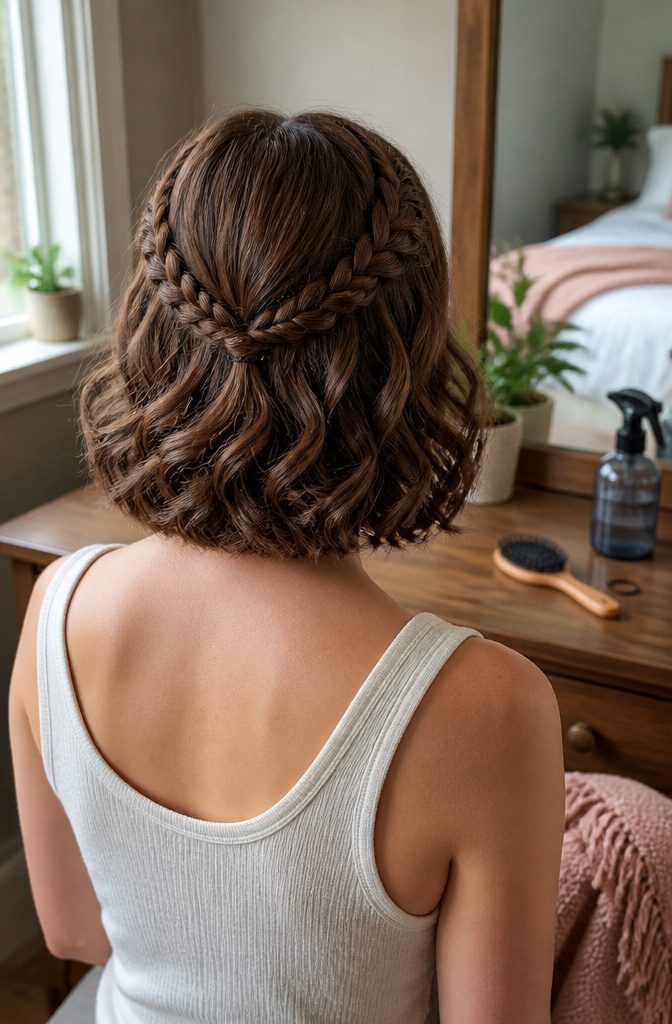
Short hair that won’t hold a bun can still wear braids, and this is the one style here built for it. Curl the hair all over first, so the loose lengths behind the braids look soft instead of flat.
Then make a French braid on each side, matching them in size and placement, and secure each at the back with a small elastic or pins.
I like it most on bobs and chin-length cuts, because the curls fill in everything the braids can’t reach.
Short braids tend to loosen by midday, so a light mist of hairspray before you braid gives them grip. Uneven sides give it away fastest, so check the part in a mirror before starting the second braid.
Pins, Elastics and Hairspray
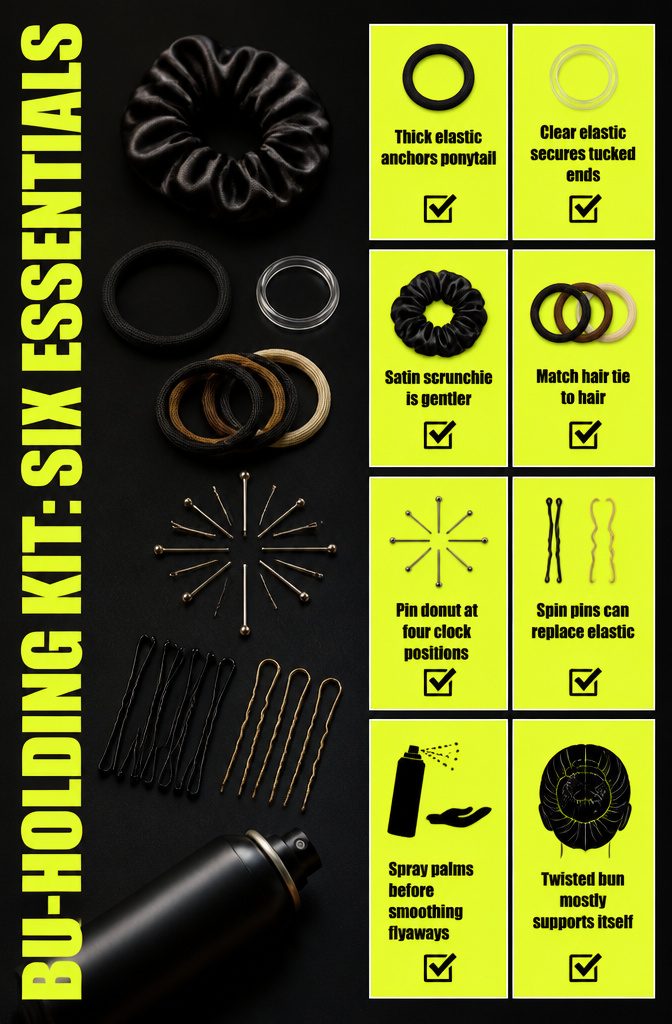
Each hold does a different job, so I pick based on what the bun has to survive.
- Elastic: A thick one anchors the ponytail base, and a clear one handles looped or tucked ends.
- Scrunchie: Satin is gentler on strands than a standard elastic and wraps easily around a twisted bun.
- Hair tie color: Match it to your hair so any visible band disappears.
- Straight pins: Wrap the ends around the donut and pin at 12:00, 3:00, 6:00 and 9:00, then fill in between.
- Bobby pins and clips: Pinning the end to your scalp stops a twist from unwinding, and a twisted bun mostly supports itself. Spin pins can replace the elastic.
- Hairspray: Spray your palms first to smooth flyaways, then mist the finished bun.
Serum, Gel and Balm
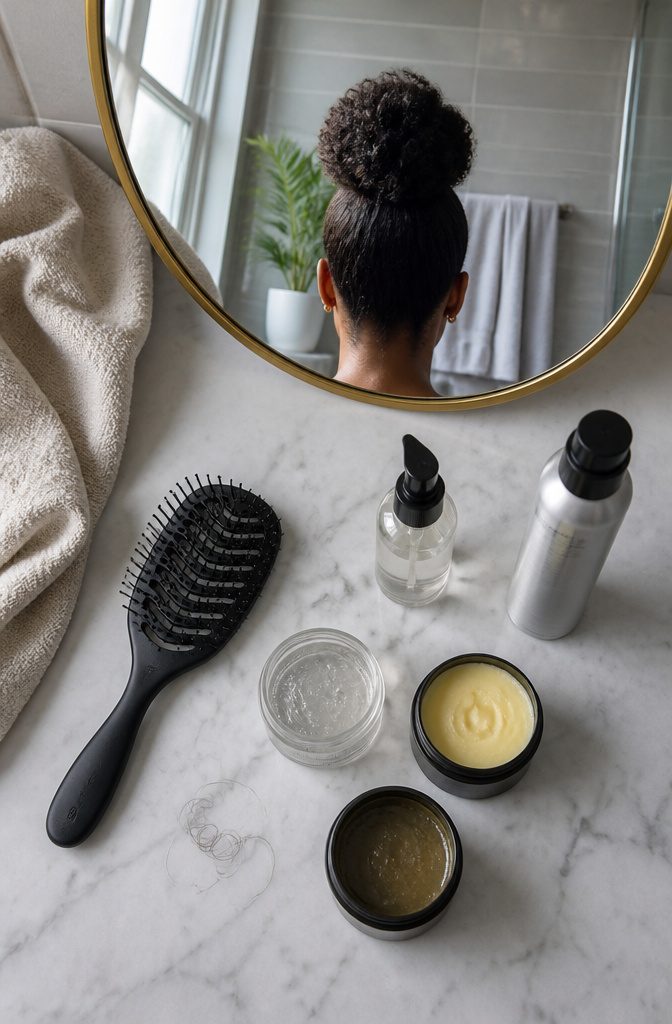
Prep takes four products, and each has one job.
- A touch of gel and balm builds the natural-hair topknot. The pair gives a sleek base under gravity-defying height, and more than a touch will flatten that volume.
- Proganix Weightless Oil is the serum for static flyaways. Smooth a small amount over the surface after the bun is shaped.
- Hairspray comes last. It smooths the outline and sets the finished bun.
- The Wet Brush goes first, on every style. Brush through before adding product so gel, balm or serum spreads evenly instead of clumping at the ends.
Adapting to Hair Type and Length
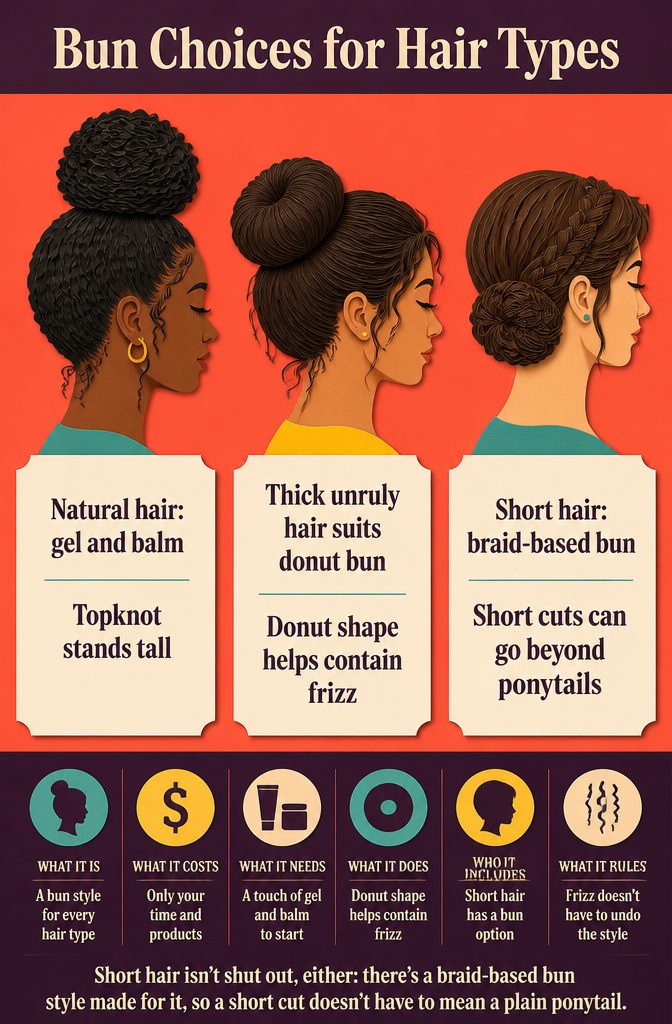
Natural hair suits a topknot built for height: a touch of gel and balm gives it a sleek base and a top that stands up on its own. Thick, unruly hair is where I’d point you toward the donut bun.
You thread the ponytail through the donut, spread the hair evenly over it, then wrap and pin the ends, so the shape does the work that frizz would otherwise undo.
A reader who tried it on her unruly hair for a week said she was loving it, which is the kind of report I trust more than a promise from a tutorial.
Short hair isn’t shut out, either: there’s a braid-based bun style made for it, so a short cut doesn’t have to mean a plain ponytail.
Frequently Asked Questions
How to look good in a bun?
Choose the style for your hair type: a donut bun suits thick, unruly hair, and a high topknot with a touch of gel and balm suits natural hair.
Brush through before adding product, and match your hair tie to your hair color so the band blends in.
Smooth flyaways with serum or hairspray on your palms, then mist the finished bun. On a messy bun, pull out only a few small strands so it looks deliberate instead of slumped.